

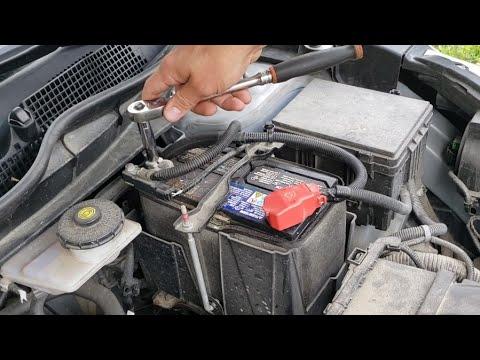






How to Replace the 12-Volt Battery in a 2017-2025 Honda CR-V (Engine: Inline 4 2.4L)
Step-by-step Group 51R battery installation with tools, torque specs, and safety tips for 2017, 2018, 2019, 2020, 2021, 2022, 2023, 2024, 2025
How to Replace the 12-Volt Battery in a 2017-2025 Honda CR-V (Engine: Inline 4 2.4L)
Step-by-step Group 51R battery installation with tools, torque specs, and safety tips for 2017, 2018, 2019, 2020, 2021, 2022, 2023, 2024, 2025


🔧 CR-V - 12-Volt Battery Replacement
Replacing the battery involves disconnecting the old battery, transferring the protective cover, and installing the new battery with the correct terminal order. Your CR-V uses a conventional 12-volt battery, but the negative terminal includes a battery-monitoring sensor that must be handled carefully.
Difficulty Level: Beginner | Estimated Time: 20-30 minutes
⚠️ Safety & Precautions
- ⚠️ Switch the ignition completely off and keep the key away from the vehicle.
- 🧤 Wear safety glasses and chemical-resistant gloves because batteries contain corrosive acid.
- 🔥 Keep sparks, cigarettes, and open flames away from the battery.
- 🔌 Disconnect the negative terminal first and reconnect it last to reduce short-circuit risk.
- 🛑 Never allow a tool to touch the positive terminal and any metal body part simultaneously.
- ⚖️ The battery is heavy. Lift it upright with both hands and do not tilt it.
- 🔋 Do not pry against or strike the battery-monitoring sensor attached to the negative cable.
🔧 Required Tools
You'll need the following tools for this repair:
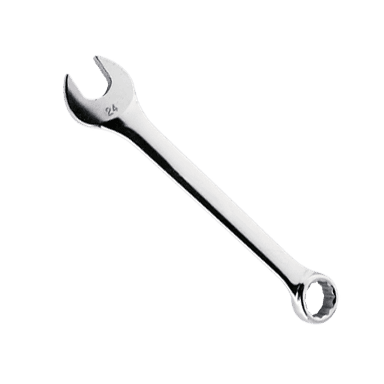
- 10mm combination wrench
- 10mm socket
- 150mm ratchet extension
- 3/8-inch-drive ratchet
- 3/8-inch-drive torque wrench rated 5-25 Nm
- Battery terminal cleaning brush
- 12-volt battery carrier strap
- Safety glasses
- Chemical-resistant gloves
- Shop towels
🔩 Required Parts
HowToo sells all the parts you need for this repair:
- 12-volt Group 51R battery matching or exceeding the original CCA rating - Qty: 1
- Battery terminal protectant - Qty: 1
📋 Before You Begin
- 🅿️ Park your CR-V on level ground, select Park, apply the parking brake, and open the hood.
- 🔑 Switch off the lights, climate control, audio system, and ignition. Move the key at least 2 metres away.
- ⏱️ Wait at least three minutes before disconnecting the battery so the vehicle’s control modules can shut down.
- 🪟 Lower the driver’s window before disconnecting power so you cannot accidentally lock yourself out.
- 📻 Note saved radio presets and personalized settings because some settings may be erased.
- 🔎 Verify the replacement is Group 51R and that its positive terminal orientation matches the original battery.
🔨 Step-by-Step Instructions
Follow these steps in order:
Step 1: Locate and Inspect the Battery
- Use safety glasses and chemical-resistant gloves before touching the battery.
- Locate the battery on the driver side of the engine compartment.
- Check for cracks, leaking fluid, or severe swelling. If present, keep the battery upright and avoid direct contact.
Step 2: Disconnect the Negative Terminal
- Use a 10mm combination wrench to loosen the negative terminal clamp marked “−”.
- Lift the clamp straight off the battery post. Do not pull on the cable or the battery-monitoring sensor.
- Position the cable where it cannot spring back onto the battery post.
- Negative comes off first and goes on last.
Step 3: Disconnect the Positive Terminal
- Lift the red protective cover from the positive terminal marked “+”.
- Use a 10mm combination wrench to loosen the positive terminal clamp.
- Lift the clamp straight off and move it away from the battery post.
- Keep the 10mm combination wrench away from surrounding metal while touching the positive clamp.
Step 4: Remove the Battery Hold-Down
- Use a 10mm socket, 150mm ratchet extension, and 3/8-inch-drive ratchet to loosen the two hold-down nuts evenly.
- Unhook the two J-shaped rods from the battery tray. These rods secure the upper battery bracket.
- Remove the upper bracket and set its parts aside without losing the nuts.
Step 5: Remove the Old Battery
- Fit the 12-volt battery carrier strap securely around the battery.
- Use the strap and both hands to lift the battery straight upward. Keep it upright.
- Remove the insulating battery cover and retain it for the replacement battery.
- Use shop towels to wipe loose dirt from the battery tray. Do not disturb any wiring.
Step 6: Clean the Cable Terminals
- Use the battery terminal cleaning brush to remove corrosion from inside both cable clamps.
- Use shop towels to remove loosened residue.
- Replace a damaged or badly corroded cable clamp rather than forcing it onto the new battery.
Step 7: Install the New Battery
- Place the insulating cover around the new Group 51R battery.
- Use the 12-volt battery carrier strap and both hands to lower the battery into the tray.
- Position it exactly like the original, with the positive and negative posts aligned with their cables.
- Make sure the battery sits flat and does not trap any cable underneath it.
Step 8: Reinstall the Hold-Down
- Install the upper bracket and engage both J-shaped rods in the battery tray.
- Start both hold-down nuts by hand to prevent cross-threading.
- Use the 10mm socket, 150mm ratchet extension, and 3/8-inch-drive torque wrench to tighten the nuts evenly to Torque to 12 Nm (9 ft-lbs).
- Confirm that the battery cannot slide or rock. Do not overtighten and deform the battery case.
Step 9: Connect the Positive Terminal
- Push the positive clamp fully down onto the positive post.
- Use the 10mm socket and 3/8-inch-drive torque wrench to tighten the clamp nut to Torque to 5.4 Nm (48 in-lbs).
- Apply a light coating of battery terminal protectant, then close the red terminal cover.
Step 10: Connect the Negative Terminal
- Push the negative clamp fully down onto the negative post without twisting or levering against its sensor.
- Use the 10mm socket and 3/8-inch-drive torque wrench to tighten the clamp nut to Torque to 5.4 Nm (48 in-lbs).
- Apply a light coating of battery terminal protectant.
- Use your gloved hand to confirm both clamps are secure and cannot rotate on their posts.
✅ After Repair
- 🚗 Start the engine and confirm it cranks normally. Temporary warning indicators may appear after power loss.
- 🛞 With the engine running, turn the steering wheel fully left and right, return it to centre, and drive carefully for several minutes. Stability and steering indicators should clear after the systems relearn.
- 🪟 Reset the automatic driver’s window by fully lowering it, then fully raising it and holding the switch upward for approximately two seconds.
- 🕒 Reset the clock, audio presets, and other personalized settings if necessary.
- 🔧 If the idle is temporarily uneven, allow the fully warmed engine to idle with accessories off for about five minutes so the electronic throttle can relearn.
- 🔍 Recheck that the battery is secure and that both terminal clamps remain tight.
- ♻️ Return the old lead-acid battery to a battery retailer or authorized recycling centre. Never place it in household waste.
💰 DIY vs Shop Cost
Shop Cost: ₹7,500-₹13,000 (parts + labor)
DIY Cost: ₹5,500-₹10,000 (parts only)
You Save: ₹2,000-₹3,000 by doing it yourself!
Local labor and battery prices vary. This repair takes a shop approximately 0.3-0.5 hours.
🎯 Ready to get started?
HowToo makes it easy: same-day/2-day shipping on every part, plus all the tools and specialty tools you need! Check out the parts and tools sections below to add everything to your cart.