





How to Replace Spark Plugs on a 2018-2022 Chevrolet Traverse 3.6L V6 (Trim: L | Engine: V6 3.6L)
Step-by-step instructions with required tools, parts, torque specs, and safety tips for 2018, 2019, 2020, 2021, 2022
How to Replace Spark Plugs on a 2018-2022 Chevrolet Traverse 3.6L V6 (Trim: L | Engine: V6 3.6L)
Step-by-step instructions with required tools, parts, torque specs, and safety tips for 2018, 2019, 2020, 2021, 2022


🔧 Traverse - Spark Plug Replacement
This is an intermediate job, mainly because the upper intake manifold blocks the rear three spark plugs. Replace all six plugs together. Work only on a completely cold engine because removing plugs from hot aluminum cylinder heads can damage the threads. parts.chevrolet.com
Difficulty Level: Intermediate | Estimated Time: 3-4 hours
Assumption: These instructions cover the stock 3.6L V6 installation. Verify fastener torque against current GM service information if your replacement gasket or plug manufacturer specifies otherwise.
⚠️ Safety & Precautions
- ⚠️ Let the engine cool for several hours before removing any spark plug.
- ⚠️ Disconnect the negative battery cable before unplugging the throttle body or ignition coils.
- ⚠️ Never allow dirt, tools, bolts, or gasket pieces into an open intake port.
- ⚠️ Cover every intake opening immediately after lifting the manifold.
- ⚠️ Wear eye protection when blowing debris from the spark plug wells.
- ⚠️ Never force a spark plug. The cylinder heads are aluminum and easily damaged.
- ⚠️ Don’t apply anti-seize unless the spark plug manufacturer specifically requires it.
🔧 Required Tools
You'll need the following tools for this repair:
- 1/4-inch drive ratchet
- 3/8-inch drive ratchet
- 7mm socket
- 8mm socket
- 10mm socket
- 15mm socket
- 14mm thin-wall spark plug socket
- 3-inch extension
- 6-inch extension
- 10-inch extension
- 3/8-inch drive universal joint
- Inch-pound torque wrench rated 50-150 in-lbs
- Foot-pound torque wrench rated 10-50 ft-lbs
- Torx T30 bit socket
- Flat-blade screwdriver
- 90-degree pick tool
- Spark plug gap gauge marked in thousandths
- Compressed-air blow gun rated below 30 psi
- Shop vacuum with narrow nozzle
- Plastic trim removal tool
- Clean shop towels
- Masking tape and permanent marker
- Nitrile gloves
- Safety glasses
🔩 Required Parts
HowToo sells all the parts you need for this repair:
- Vehicle-matched iridium spark plugs - Qty: 6
- Upper intake manifold gasket set - Qty: 1
- Throttle-body gasket - Qty: 1 if the throttle body is removed
- Dielectric ignition grease - Qty: 1 small tube
Replace all six plugs. GM also advises replacing the complete set during scheduled service rather than mixing old and new plugs. parts.chevrolet.com
📋 Before You Begin
- Park your Traverse on level ground, select Park, and apply the parking brake.
- Open the hood and allow the engine to become completely cold.
- Use masking tape and a permanent marker to label hoses and connectors before disconnecting them.
- Keep the key away from the vehicle so nobody accidentally switches the ignition on.
- Don’t change the gap on fine-wire iridium plugs unless their manufacturer explicitly permits it. GM warns that bending an OE iridium electrode can damage the plug. parts.chevrolet.com
🔨 Step-by-Step Instructions
Follow these steps in order:
Step 1: Disconnect the battery
- Use a 10mm socket and 1/4-inch drive ratchet to loosen the negative battery terminal.
- Lift the negative cable from the terminal and position it where it cannot spring back.
- Wait at least two minutes before disconnecting engine electrical connectors.
Step 2: Remove the engine cover
- Remove the oil-filler cap by hand if it passes through the engine cover.
- Grip the cover near its mounting points and pull straight upward to release its rubber retainers.
- Reinstall the oil cap temporarily so nothing enters the engine.
Step 3: Remove the air-intake duct
- Use a flat-blade screwdriver or appropriate socket to loosen the duct clamps.
- Release the breather hose with the 90-degree pick tool, taking care not to crack the plastic fitting.
- Unplug any intake sensor connector by releasing its lock with the plastic trim removal tool.
- Remove the duct between the air-filter housing and throttle body.
Step 4: Disconnect upper-manifold connections
- Use masking tape and a permanent marker to identify every hose and connector.
- Disconnect the throttle-body connector, manifold pressure sensor connector, purge line, brake-booster vacuum hose, and other attached wiring retainers as equipped.
- Use the 90-degree pick tool only to lift connector locks. Don’t pull on the wires.
- Move the wiring harness aside without stretching it.
Step 5: Remove the upper intake manifold
- Use the correctly fitting 8mm socket, 10mm socket, or Torx T30 bit socket to remove the manifold fasteners and brackets.
- Keep each fastener arranged in removal order because lengths may differ.
- Check all sides of the manifold for hidden hoses, connectors, and brackets before lifting it.
- Lift the manifold straight up. Don’t pry against its plastic sealing surfaces.
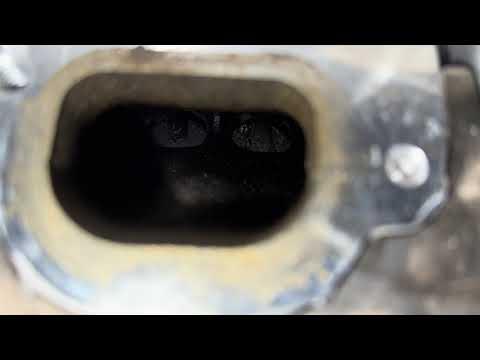
- Immediately place clean shop towels over every exposed intake port.
- Remove the old manifold seals and clean the sealing grooves with clean shop towels. Don’t use metal scrapers.
- Count every intake opening before moving on.
Step 6: Remove the ignition coils
- Use a plastic trim removal tool to release each coil connector lock.
- Press the connector tab and unplug each ignition coil.
- Use a 10mm socket and 1/4-inch drive ratchet to remove each coil retaining bolt.
- Twist each coil gently, then pull it straight upward.
- Keep the coils organized by cylinder so any unusual wear remains traceable.
Step 7: Clean the spark plug wells
- Use the shop vacuum with narrow nozzle to remove loose dirt around each plug.
- Wear safety glasses and use the compressed-air blow gun below 30 psi to clear remaining debris.
- Inspect each well for engine oil or coolant before removing the plug.
- If a well contains oil, repair the leaking tube seal before installing new plugs.
Step 8: Remove the old spark plugs
- Fit the 14mm thin-wall spark plug socket to the 6-inch or 10-inch extension and 3/8-inch drive ratchet.
- Break each plug loose carefully, then turn it out without side-loading the socket.
- If a plug becomes unusually tight, stop. Turn it slightly inward, then outward again rather than forcing it.
- Compare the six removed plugs for oil deposits, heavy fuel fouling, damaged porcelain, or one plug that looks different.
Step 9: Inspect the new spark plugs
- Confirm that all six plugs have the same application and reach.
- Use the spark plug gap gauge only to verify the supplied gap without levering against the fine-wire electrode.
- Replace any plug with cracked porcelain, damaged threads, or an incorrect gap that the manufacturer says not to adjust.
- Keep the plug threads clean and dry. Anti-seize changes the clamping force and can lead to overtightening.
Step 10: Install the new spark plugs
- Place one plug in the 14mm thin-wall spark plug socket and attach only the extension.
- Lower it straight into the well and thread it clockwise by hand through the extension.
- The plug should turn several full revolutions easily. If it doesn’t, back it out and start again.
- Use the foot-pound torque wrench to tighten each plug to 18 Nm (13 ft-lbs).
- Don’t add an extra pull after the torque wrench clicks. Aluminum threads remember mistakes.
Step 11: Reinstall the ignition coils
- Inspect each coil boot for cracks, carbon tracks, or torn rubber.
- Apply a very small film of dielectric grease inside the end of each boot. Keep grease off the plug threads and metal terminal.
- Push each coil straight onto its plug until fully seated.
- Install the coil bolts with the 10mm socket.
- Use the inch-pound torque wrench and tighten the coil bolts to 10 Nm (89 in-lbs).
- Reconnect each coil connector and fully seat its lock.
Step 12: Reinstall the upper intake manifold
- Use clean hands to install the new upper-manifold seals into their grooves.
- Remove every shop towel from the intake ports and count them before lowering the manifold.
- Check that no wires or hoses are trapped underneath.
- Lower the manifold squarely onto the engine without disturbing the seals.
- Start every fastener by hand, then snug them gradually from the center outward using the correct socket.
- Use the inch-pound torque wrench and tighten the upper-manifold fasteners evenly to 10 Nm (89 in-lbs).
- If a fastener design or service label specifies a staged sequence, follow that identification instead.
Step 13: Reconnect hoses and wiring
- Reconnect the throttle body, sensors, purge line, brake-booster hose, breather hose, and wiring retainers.
- Use your masking-tape labels to verify that every connection has been restored.
- Pull lightly on each quick-connect hose to confirm it has locked.
Step 14: Reinstall the intake duct and engine cover
- Install the air-intake duct and fully seat both ends before tightening the clamps with the flat-blade screwdriver or appropriate socket.
- Reconnect the intake sensor and breather hose.
- Remove the oil cap, align the engine cover, and press it onto its retainers.
- Reinstall the oil cap by hand.
Step 15: Reconnect the battery
- Place the negative cable onto the battery terminal.
- Use the 10mm socket and tighten it until secure without crushing or twisting the terminal.
- Check the engine compartment for tools, loose fasteners, and disconnected hoses before starting.
✅ After Repair
- Switch the ignition on for several seconds, then start the engine without pressing the accelerator.
- The first start may take slightly longer after the battery has been disconnected.
- Listen for a loud hiss or unusually high idle, which can indicate an intake hose or manifold seal leak.
- Confirm that the check-engine light doesn’t flash. A flashing light indicates an active misfire, so shut the engine off and recheck the coils and connectors.
- Let the engine idle until it runs smoothly, then take a short test drive.
- Recheck the intake duct and visible vacuum connections after the test drive.
- Reset the clock and automatic window functions if they lost their settings.
💰 DIY vs Shop Cost
Shop Cost: ₹35,000-₹65,000 equivalent, depending on imported parts and local labor
DIY Cost: ₹9,000-₹20,000 equivalent for plugs, gaskets, and consumables
You Save: Approximately ₹20,000-₹45,000 by doing it yourself!
Labor varies widely in Sonīpat because this U.S.-market Traverse may require imported parts. The repair generally occupies a shop for approximately 2.5-3.5 hours.
🎯 Ready to get started?
HowToo makes it easy: same-day/2-day shipping on every part, plus all the tools and specialty tools you need! Check out the parts and tools sections below to add everything to your cart.