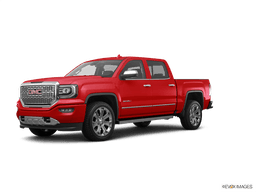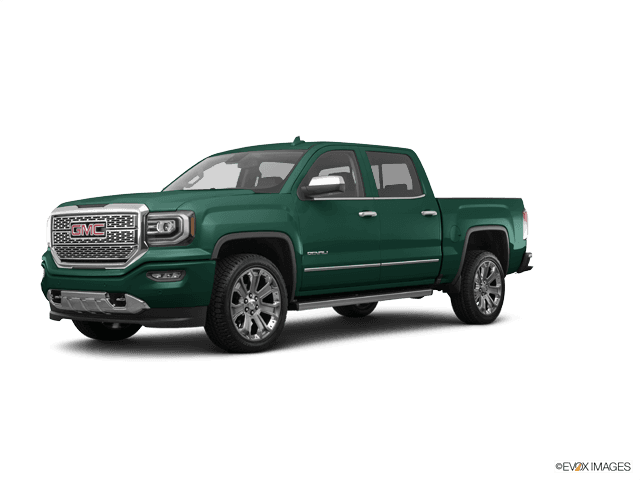








How to Replace Spark Plugs on a 2014-2022 GMC Sierra 1500 (Engine: V8 6.2L)
Step-by-step DIY instructions with tools, parts, torque specs, and safety tips for 2014, 2015, 2016, 2017, 2018, 2019, 2020, 2021
How to Replace Spark Plugs on a 2014-2022 GMC Sierra 1500 (Engine: V8 6.2L)
Step-by-step DIY instructions with tools, parts, torque specs, and safety tips for 2014, 2015, 2016, 2017, 2018, 2019, 2020, 2021


🔧 Sierra 1500 - Spark Plug Replacement
Your Sierra 1500 uses eight spark plugs, one for each cylinder. Access is easiest through the front wheel openings after removing the wheels and inner fender liners.
Difficulty Level: Intermediate | Estimated Time: 2-4 hours
Assumption: Factory ignition components and original-style 1.0 mm plug gap.
⚠️ Safety & Precautions
- ⚠️ Work only when the engine is completely cold; removing plugs from hot aluminum cylinder heads can damage the threads.
- ⚠️ Support your Sierra 1500 with properly rated jack stands. Never work under a vehicle supported only by a jack.
- ⚠️ Wear safety glasses because dirt can fall from the wheel wells.
- ⚠️ Keep each spark-plug wire routed exactly as installed so it cannot touch the exhaust manifold.
- ⚠️ Do not apply anti-seize compound to the new plug threads; it can cause over-tightening.
- 🔋 Battery disconnection is not required if the ignition remains off and the key is kept away from the vehicle.
🔧 Required Tools
You'll need the following tools for this repair:
- Hydraulic floor jack rated 3-ton minimum
- Jack stands rated 3-ton minimum
- Wheel chocks
- 22mm deep socket
- 1/2-inch breaker bar
- 1/2-inch torque wrench rated to 190 Nm
- 7mm socket
- 1/4-inch ratchet
- Trim-clip removal tool
- 5/8-inch spark-plug socket with rubber insert
- 3/8-inch ratchet
- 3-inch extension
- 6-inch extension
- 3/8-inch universal joint
- 3/8-inch torque wrench rated to 15 Nm
- Spark-plug boot pliers (specialty)
- Compressed-air blow gun
- Wire-style spark-plug gap gauge marked 1.0mm
- Clean shop towels
- Nitrile gloves
- Safety glasses
🔩 Required Parts
HowToo sells all the parts you need for this repair:
- OEM-equivalent iridium spark plugs, preset to 1.0 mm (0.040 inch) - Qty: 8
- Dielectric silicone grease - Qty: 1 tube
- Inner fender-liner push clips - Qty: As needed
- Spark-plug wire set - Qty: 1 set, only if boots or wires are damaged
📋 Before You Begin
- 🅿️ Park your Sierra 1500 on firm, level ground. Shift into Park, apply the parking brake, and chock both rear wheels.
- 🧊 Allow the engine to cool for at least three hours, preferably overnight.
- 🔑 Switch the ignition off and keep the key or remote away from the truck.
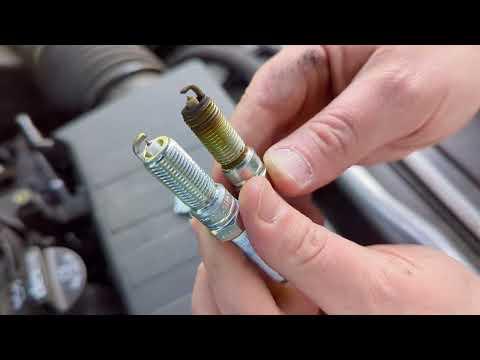
- 📦 Verify all eight replacement plugs match and have an undamaged 1.0 mm (0.040-inch) gap. A gap gauge measures the space between the plug electrodes.
- 🧹 Clean loose mud from both front wheel wells before beginning.
🔨 Step-by-Step Instructions
Follow these steps in order:
Step 1: Loosen the Front Wheel Nuts
- Use a 22mm deep socket and 1/2-inch breaker bar to loosen each front wheel nut about one-half turn.
- Do not remove the nuts while the tires are still supporting the truck.
Step 2: Raise and Support the Front
- Place the wheel chocks firmly against both sides of a rear tire.
- Use the 3-ton floor jack at an approved front frame lifting point.
- Place the 3-ton jack stands beneath the front frame rails, then lower the truck onto them.
- Gently push the body to confirm it is stable before continuing.
Step 3: Remove the Front Wheels
- Use the 22mm deep socket and 1/2-inch breaker bar to remove the front wheel nuts.
- Remove both wheels and place them flat away from the work area.
Step 4: Remove the Inner Fender Liners
- Use a 7mm socket and 1/4-inch ratchet to remove the liner screws from each front wheel opening.
- Use the trim-clip removal tool to lift the plastic push clips without tearing the liners.
- Carefully flex each liner out of its wheel opening. Keep its fasteners together.
- Photograph each liner before removing fasteners.
Step 5: Clean Around the Spark Plugs
- Use the compressed-air blow gun while wearing safety glasses to remove dirt from around each plug and boot.
- Use clean shop towels to wipe away remaining loose debris.
- Do not allow dirt to enter a spark-plug hole.
Step 6: Disconnect the First Spark-Plug Wire
- Start with the easiest plug so you can learn the correct feel before reaching the rear plugs.
- Use the spark-plug boot pliers to grip the thick rubber boot, not the wire.
- Twist the boot gently to break its seal, then pull it straight from the plug.
- Inspect the boot for cracking, burning, oil contamination, or a separated metal terminal.
- Replace only one plug at a time to preserve the original wire routing.
Step 7: Remove the Old Spark Plug
- Fit the 5/8-inch spark-plug socket onto the plug using the 3/8-inch ratchet and whichever 3-inch extension, 6-inch extension, or universal joint gives straight access.
- Turn counterclockwise until the plug is loose, then finish removing it gently.
- If the plug binds, turn it slightly clockwise and then loosen it again. Do not force it.
- Check the removed plug for heavy oil, coolant residue, a broken insulator, or a damaged electrode.
Step 8: Check the New Spark Plug
- Use the wire-style spark-plug gap gauge to verify a gap of 1.0 mm (0.040 inch).
- Do not press against the fragile center electrode of an iridium plug.
- Confirm the sealing washer is installed and the threads are clean and dry.
- Do not place anti-seize on the plug threads.
Step 9: Install the New Spark Plug
- Hold the new plug in the 5/8-inch spark-plug socket and extension.
- Thread it clockwise entirely by hand, without the ratchet, until the sealing washer contacts the cylinder head.
- If it does not turn easily, remove it and begin again to avoid cross-threading.
- Use the 3/8-inch torque wrench and 5/8-inch spark-plug socket to torque to 15 Nm (11 ft-lbs).
- Hand-start every plug before using a ratchet.
Step 10: Reconnect the Spark-Plug Wire
- Apply a small dab of dielectric silicone grease inside the rubber opening of the boot. Keep grease away from the plug terminal and threads.
- Push the boot straight onto the plug by hand until the terminal clicks or seats firmly.
- Route the wire through its original retainers and away from the hot exhaust manifold.
Step 11: Replace the Remaining Seven Plugs
- Repeat Steps 6 through 10 using the spark-plug boot pliers, 5/8-inch spark-plug socket, required extensions, and 3/8-inch torque wrench.
- Use the 3/8-inch universal joint only where straight access is unavailable, especially near the rear cylinders.
- After each plug, verify its wire is fully seated at both the plug and ignition-coil ends.
Step 12: Reinstall the Fender Liners
- Position each liner in its original wheel opening.
- Install the push clips by hand, replacing any broken clips.
- Use the 7mm socket and 1/4-inch ratchet to snug the liner screws. These small fasteners are not published as high-torque service fasteners; stop when the liner is secure.
- Do not overtighten the screws into plastic retainers.
Step 13: Reinstall the Front Wheels
- Mount each wheel and install its nuts by hand.
- Use the 22mm deep socket and 1/2-inch breaker bar to snug the nuts in a star pattern.
- Use the 3-ton floor jack to lift the truck slightly, remove the jack stands, and lower the tires to the ground.
- Use the 1/2-inch torque wrench and 22mm deep socket to tighten the nuts in a star pattern: Torque to 190 Nm (140 ft-lbs).
✅ After Repair
- ✅ Check that no tools, towels, or loose wires remain in either wheel well or engine compartment.
- 🚙 Start the engine and let it idle. It should run smoothly without shaking, ticking, or a flashing check-engine light.
- ⚠️ If the check-engine light flashes, shut the engine off immediately and recheck every spark-plug boot.
- 🔍 Inspect both wheel wells to confirm the liners are secure and do not contact the tires.
- 🛣️ Take a short, gentle road test and verify smooth acceleration.
- 🔩 Recheck the front wheel-nut torque after approximately 80-160 km.
💰 DIY vs Shop Cost
Shop Cost: ₹18,000-₹35,000 (parts + labor)
DIY Cost: ₹8,000-₹18,000 (parts only)
You Save: ₹10,000-₹17,000 by doing it yourself!
Sonīpat-area labor rates and imported-part prices vary. This repair takes a shop approximately 2-3 hours.
🎯 Ready to get started?
HowToo makes it easy: same-day/2-day shipping on every part, plus all the tools and specialty tools you need! Check out the parts and tools sections below to add everything to your cart.