

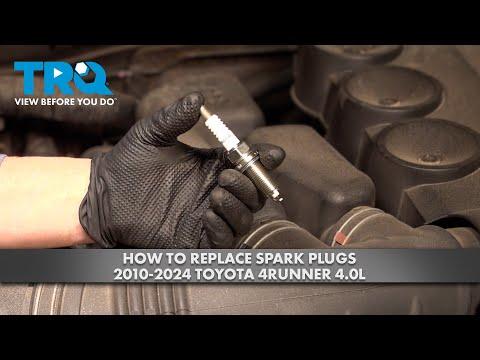






How to Replace Spark Plugs on a 2013-2024 Toyota 4Runner 4.0L V6 (Trim: TRD Off-Road | Engine: V6 4.0L)
Step-by-step DIY guide with required tools, parts, torque specs, and safety tips for 2013, 2014, 2015, 2016, 2017, 2018, 2019, 2020, 2021, 2022, 2023, 2024
How to Replace Spark Plugs on a 2013-2024 Toyota 4Runner 4.0L V6 (Trim: TRD Off-Road | Engine: V6 4.0L)
Step-by-step DIY guide with required tools, parts, torque specs, and safety tips for 2013, 2014, 2015, 2016, 2017, 2018, 2019, 2020, 2021, 2022, 2023, 2024


🔧 4Runner - Spark Plug Replacement
Your 4Runner uses six long-life iridium spark plugs, one for each cylinder. Replacement requires removing the ignition coils, cleaning each plug well, and installing the new plugs without damaging the aluminum cylinder-head threads.
Difficulty Level: Intermediate | Estimated Time: 1.5-2.5 hours
⚠️ Safety & Precautions
- Let the engine become completely cold before removing the spark plugs.
- Wear safety glasses when blowing debris away from the plug wells.
- Never allow dirt, tools, or loose hardware to fall into an open spark-plug hole.
- Start every new plug by hand. Cross-threading can require expensive cylinder-head repair.
- Do not apply anti-seize compound to the plated threads of the specified iridium plugs.
- Disconnect the negative battery terminal before unplugging the ignition coils.
🔧 Required Tools
You'll need the following tools for this repair:
- 10mm socket
- 12mm socket
- 16mm 5/8-inch spark-plug socket
- 3/8-inch drive ratchet
- 3/8-inch drive 3-inch extension
- 3/8-inch drive 6-inch extension
- 3/8-inch drive universal-joint extension
- 3/8-inch drive torque wrench rated 10-80 ft-lbs
- Inch-pound torque wrench rated 50-250 in-lbs
- Flat-blade screwdriver
- Needle-nose pliers
- Compressed-air blow gun with regulated air supply
- 3/8-inch inside-diameter rubber hose, 8 inches long
- Fender cover
- Nitrile gloves
- Safety glasses
🔩 Required Parts
HowToo sells all the parts you need for this repair:
- Iridium spark plugs, Denso SK16HR11 or exact equivalent - Qty: 6
- Dielectric ignition-boot grease - Qty: 1 small tube
📋 Before You Begin
- Park your 4Runner on level ground, select Park, apply the parking brake, and open the hood.
- Allow the engine to cool completely. Aluminum cylinder-head threads are easier to damage while hot.
- Use a 10mm socket to disconnect the negative battery terminal. Move the cable aside so it cannot touch the post.
- Place a fender cover over the painted bodywork.
- Check the new plug markings. The specified plug gap is approximately 1.0-1.1mm (0.039-0.043 inch). Do not force a wire gauge between the delicate iridium electrodes or bend them.
🔨 Step-by-Step Instructions
Follow these steps in order:
Step 1: Remove the Engine Cover
- Lift the front of the plastic engine cover upward to release its retainers, then remove the cover.
- If a retaining fastener is fitted, remove it first with a 10mm socket.
- Place the cover away from the work area.
Step 2: Remove the Air-Intake Tube
- Use a 10mm socket or flat-blade screwdriver to loosen the clamps at the air-filter housing and throttle-body ends of the intake tube.
- Use needle-nose pliers to release any spring clamp, then disconnect the attached breather hose.
- Unclip any wiring retainer attached to the tube. Carefully remove the intake tube without pulling on electrical wires.
- Cover the exposed throttle-body opening with a clean, lint-free cloth.
Step 3: Create Access to the Ignition Coils
- Use a 10mm or 12mm socket, as applicable, to remove the small wiring-harness and hose brackets blocking the coils.
- Move only the brackets and harness sections needed for access. Do not stretch wires or disconnect fuel lines.
- Keep each bracket and bolt together so it returns to its original location.
- Photograph bracket positions before removal.
Step 4: Remove the First Ignition Coil
- Work on one cylinder at a time so connectors and coils cannot be mixed up.
- Press the electrical connector lock and pull the connector straight off. Do not pull on the wires.
- Use a 10mm socket and ratchet to remove the coil retaining bolt.
- Twist the coil gently, then pull it straight out. An ignition coil is the narrow electrical unit sitting directly above each spark plug.
Step 5: Clean the Spark-Plug Well
- Put on safety glasses.
- Use the compressed-air blow gun to remove dirt from the spark-plug well before loosening the plug.
- Keep your face away from the well while using compressed air.
- Inspect the coil boot for oil, cracking, swelling, or burn marks. Oil in the well indicates a sealing problem that should be repaired.
Step 6: Remove the Old Spark Plug
- Fit the 16mm 5/8-inch spark-plug socket to the 6-inch extension and 3/8-inch ratchet. Use the universal-joint extension only where clearance requires it.
- Turn the spark plug counterclockwise slowly. Stop if it binds severely rather than loosening smoothly.
- Lift the old plug from the well with the spark-plug socket.
- Check for heavy oil deposits, broken ceramic, damaged threads, or an unusually white or black electrode.
Step 7: Install the New Spark Plug by Hand
- Confirm the new plug matches the old plug in thread length and seat design.
- Insert the new plug into the 3/8-inch rubber hose. The hose acts as a flexible hand-starting tool and slips if the plug begins cross-threading.
- Lower the plug straight into the well and turn the hose clockwise until the gasket reaches the cylinder head.
- Do not use anti-seize on the spark-plug threads.
- If the plug does not turn easily by hand, remove it and start again.
Step 8: Torque the Spark Plug
- Attach the 16mm 5/8-inch spark-plug socket and extension to the 3/8-inch drive torque wrench.
- Tighten the spark plug to 18 Nm (13 ft-lbs).
- Keep the extension aligned with the plug while tightening. Do not use an impact wrench.
Step 9: Reinstall the Ignition Coil
- Apply a very small film of dielectric ignition-boot grease inside the opening at the end of the coil boot. Keep grease away from the plug terminal and threads.
- Push the coil straight down until it is fully seated on the spark plug.
- Install the coil bolt with a 10mm socket and inch-pound torque wrench. Torque to 10 Nm (89 in-lbs).
- Reconnect the electrical connector until its lock clicks.
Step 10: Replace the Remaining Five Plugs
- Repeat Steps 4 through 9 for each remaining cylinder.
- Use the 3-inch extension or universal-joint extension where the brake-booster area limits access on the driver side.
- Clean every well before removing its spark plug.
- Verify that all six coil connectors are fully locked before continuing.
Step 11: Reinstall Brackets and Intake Components
- Return every wiring and hose bracket to its original position using the 10mm or 12mm socket.
- Tighten small M6 bracket bolts to 10 Nm (89 in-lbs) unless the removed fastener or bracket uses a different specified value.
- Remove the cloth from the throttle body and reinstall the air-intake tube.
- Reconnect the breather hose and wiring retainers. Tighten both intake clamps securely with the 10mm socket or flat-blade screwdriver.
Step 12: Reinstall the Engine Cover and Battery Cable
- Align the engine-cover retainers and press the cover firmly into place.
- If equipped with a cover fastener, install it using the 10mm socket and tighten it only until snug.
- Reconnect the negative battery terminal using the 10mm socket. Torque to 5.4 Nm (48 in-lbs).
✅ After Repair
- Check the engine bay for tools, loose bolts, disconnected hoses, and unplugged ignition coils.
- Start the engine and let it idle. It may briefly idle differently while electronic settings relearn after battery disconnection.
- Listen for a steady idle and confirm that the check-engine light does not flash.
- If the engine misfires, shut it off immediately and recheck all six coil connectors, coil seating, and intake connections.
- Confirm the air-intake tube is sealed at both ends. An intake leak can cause poor running or warning lights.
- Reset the clock and radio preferences if they were lost during battery disconnection.
💰 DIY vs Shop Cost
Shop Cost: $350-$650 (parts + labor)
DIY Cost: $70-$140 (parts only)
You Save: $210-$580 by doing it yourself!
Imported-part pricing and labor around Sonīpat can vary considerably. This repair takes a shop approximately 1.5-2.0 hours.
🎯 Ready to get started?
HowToo makes it easy: same-day/2-day shipping on every part, plus all the tools and specialty tools you need! Check out the parts and tools sections below to add everything to your cart.