

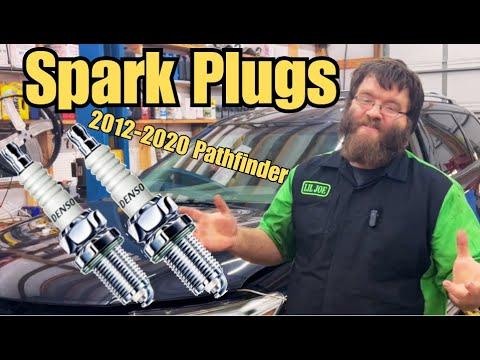





How to Replace Spark Plugs on a 2013-2024 Nissan Pathfinder 3.5L V6 (Trim: SV | Engine: V6 3.5L)
Step-by-step DIY guide with required tools, parts, torque specs, and safety tips for 2013, 2014, 2015, 2016, 2017, 2018, 2019, 2020, 2022, 2023, 2024
How to Replace Spark Plugs on a 2013-2024 Nissan Pathfinder 3.5L V6 (Trim: SV | Engine: V6 3.5L)
Step-by-step DIY guide with required tools, parts, torque specs, and safety tips for 2013, 2014, 2015, 2016, 2017, 2018, 2019, 2020, 2022, 2023, 2024


🔧 Pathfinder - Spark Plug Replacement
Your Pathfinder uses six long-life iridium spark plugs. Reaching the rear bank requires removing the upper intake manifold, also called the intake collector, but the fuel system does not need to be opened.
Difficulty Level: Intermediate | Estimated Time: 3-5 hours
Assumption: Factory 3.5L V6 intake and ignition components are installed.
⚠️ Safety & Precautions
- ⚠️ Let the engine become completely cold before removing the spark plugs.
- ⚠️ Disconnect the negative battery cable before unplugging the electronic throttle body.
- ⚠️ Never allow dirt, hardware, or tools to enter the open intake ports.
- ⚠️ Do not pull on ignition-coil wires; release each connector by its locking tab.
- ⚠️ Do not apply anti-seize to the new plug threads unless the plug manufacturer specifically requires it. Incorrect lubrication can cause over-tightening.
- ⚠️ Start every spark plug by hand. Cross-threading can permanently damage the aluminum cylinder head.
🔧 Required Tools
You'll need the following tools for this repair:
- 8mm socket
- 10mm socket
- 12mm socket
- 14mm thin-wall magnetic spark-plug socket
- 1/4-inch-drive ratchet
- 3/8-inch-drive ratchet
- 3-inch extension
- 6-inch extension
- 10-inch extension
- 3/8-inch-drive universal joint
- 3/8-inch-drive torque wrench rated 5-60 Nm
- Inch-pound torque wrench rated 40-250 in-lbs
- Flat-blade screwdriver
- Hose-clamp pliers
- Plastic trim-removal tool
- Compressed-air blow gun
- Clean shop vacuum with narrow nozzle
- Clean lint-free shop towels
- Masking tape and permanent marker
- Magnetic pickup tool
- Nitrile mechanic gloves
- Safety glasses
🔩 Required Parts
HowToo sells all the parts you need for this repair:
- OEM-spec iridium spark plugs - Qty: 6
- Upper intake manifold gasket set - Qty: 1
- Electronic throttle-body gasket - Qty: 1
📋 Before You Begin
- 📋 Park your Pathfinder on level ground, select Park, apply the parking brake, and allow the engine to cool fully.
- 📋 Record radio presets and other personalized settings that may be lost when the battery is disconnected.
- 📋 Open the hood. Use a 10mm socket to loosen the negative battery-terminal nut, remove the cable, and isolate it so it cannot spring back onto the terminal.
- 📋 Label every hose and electrical connector with masking tape before disconnecting it.
- 📋 Keep the new spark plugs in their boxes until each cylinder is ready.
🔨 Step-by-Step Instructions
Follow these steps in order:
Step 1: Remove the Engine Cover
- Use your hands to lift the decorative engine cover straight upward from its rubber mounting grommets.
- Set the cover away from the work area.
Step 2: Remove the Air-Intake Duct
- Use a flat-blade screwdriver or 8mm socket to loosen the clamps at the air-filter housing and throttle body.
- Release the breather hose clamp with hose-clamp pliers, then twist the hose gently to free it.
- Unplug any electrical connector attached to the intake duct by pressing its locking tab.
- Remove the intake duct and inspect it for cracks.
Step 3: Disconnect the Throttle Body
- Press the lock and unplug the electronic throttle-body connector. The throttle body controls incoming engine air electronically.
- Use a 10mm socket to remove the throttle-body mounting bolts.
- Move the throttle body aside without forcing its wiring or coolant hoses. If hose length is insufficient, release the hose clamps with hose-clamp pliers and plug the hoses to limit coolant loss.
- Remove and discard the old throttle-body gasket.
- Do not push the throttle plate open by hand.
Step 4: Disconnect Upper Intake Attachments
- Label the brake-booster vacuum hose, crankcase ventilation hoses, purge hose, and electrical connectors attached to the upper intake manifold.
- Use hose-clamp pliers for spring clamps and a flat-blade screwdriver for locking hose clips.
- Use a 10mm or 12mm socket, as fitted, to remove the manifold support brackets and wiring-harness retainers.
- Move the disconnected hoses and harnesses aside without sharply bending them.
Step 5: Remove the Upper Intake Manifold
- Use a 10mm or 12mm socket with the appropriate extension to loosen the upper intake manifold fasteners gradually, starting at the outside and working inward.
- Check around the entire manifold for hidden hoses, connectors, and brackets before lifting it.
- Lift the manifold straight up and remove the old intake gaskets.
- Immediately cover every exposed intake port with clean lint-free shop towels.
- Use a shop vacuum with a narrow nozzle to remove loose dirt around the covered ports. Do not push debris toward the openings.
- Count tools before uncovering intake ports.
Step 6: Remove the Front Ignition Coils
- Press each connector lock and unplug the three front ignition coils.
- Use a 10mm socket to remove each coil retaining bolt.
- Twist each coil slightly, then pull it straight out of its spark-plug well.
- Keep each coil in cylinder order so it returns to its original position.
Step 7: Remove the Rear Ignition Coils
- Remove the towels only as needed while keeping all intake ports protected.
- Press the connector locks and unplug the three rear ignition coils.
- Use a 10mm socket with a 3-inch or 6-inch extension to remove the coil bolts.
- Twist and lift the coils straight out. Inspect every rubber boot for oil, cracking, or burn marks.
Step 8: Clean the Spark-Plug Wells
- Wear safety glasses and use a compressed-air blow gun to clear debris from each spark-plug well.
- If compressed air is unavailable, use a shop vacuum with a narrow nozzle.
- Do not remove a plug until its well is clean.
Step 9: Remove the Old Spark Plugs
- Use a 14mm thin-wall magnetic spark-plug socket, 10-inch extension, universal joint where necessary, and 3/8-inch-drive ratchet.
- Turn each plug counterclockwise until completely loose, then lift it from the well.
- Stop if a plug binds after initially loosening. Turn it slightly inward, then work it outward gradually to protect the cylinder-head threads.
- Compare the old plugs. Oil, heavy soot, or one unusually clean plug may indicate another engine problem.
Step 10: Install the New Spark Plugs
- Confirm all six plugs match the specified OEM-style iridium plug for your Pathfinder.
- Do not bend or pry against the fine-wire center electrode. These plugs normally arrive pre-gapped.
- Place one new plug in the 14mm spark-plug socket and use only the extension to turn it clockwise by hand for several full turns.
- If it does not turn easily, remove it and restart. Never use the ratchet to begin the threads.
- Use a 3/8-inch-drive torque wrench to tighten each plug to 19.6 Nm (14 ft-lbs).
- Repeat for all six cylinders.
Step 11: Reinstall the Ignition Coils
- Inspect each coil boot and ensure its internal spring is seated correctly.
- Push each coil straight down until it seats firmly over its spark plug.
- Use a 10mm socket to install the coil bolts, then use an inch-pound torque wrench to tighten them to 7 Nm (62 in-lbs).
- Reconnect every coil connector until its lock clicks.
Step 12: Reinstall the Upper Intake Manifold
- Use a shop vacuum and lint-free towel to clean the manifold sealing surfaces. Do not scratch the aluminum or let debris enter an intake port.
- Install the new upper intake manifold gaskets in their correct grooves.
- Remove all port-covering towels and verify that no tools or debris remain.
- Lower the manifold straight into position without displacing the gaskets.
- Start every fastener by hand. Use a 10mm or 12mm socket to snug them from the center outward in several passes.
- Use a torque wrench and tighten the upper intake manifold fasteners to 25 Nm (18 ft-lbs), following the center-outward pattern.
- Reinstall support brackets with the appropriate 10mm or 12mm socket before reconnecting the hoses and wiring.
Step 13: Reinstall the Throttle Body
- Position the new throttle-body gasket and place the throttle body against the manifold.
- Start all bolts by hand, then use a 10mm socket to snug them evenly in a crossing pattern.
- Use an inch-pound torque wrench to tighten the throttle-body bolts to 10 Nm (89 in-lbs).
- Reconnect any coolant hoses and secure their clamps with hose-clamp pliers.
- Reconnect the electronic throttle-body connector until it clicks.
Step 14: Reconnect Hoses and Install the Intake Duct
- Use your labels to reconnect every vacuum, purge, ventilation, and brake-booster hose.
- Secure spring clamps with hose-clamp pliers.
- Install the air-intake duct and use an 8mm socket or flat-blade screwdriver to tighten both clamps securely.
- Reconnect the breather hose and all intake electrical connectors.
Step 15: Reconnect the Battery
- Place the negative battery cable fully onto its terminal.
- Use a 10mm socket to tighten the terminal nut to 5.4 Nm (48 in-lbs).
- Reinstall the engine cover by aligning its grommets and pressing downward by hand.
✅ After Repair
- ✅ Turn the ignition on for 10 seconds without starting the engine, then turn it off for 10 seconds. Repeat once so the electronic throttle system can initialize.
- ✅ Start the engine without pressing the accelerator. It may crank slightly longer on the first start.
- ✅ Allow the engine to idle and listen for hissing, whistling, misfiring, or unusually high idle speed. These can indicate an intake leak or disconnected hose.
- ✅ Check that the malfunction indicator light remains off. If it flashes, shut the engine off immediately and recheck all ignition-coil connectors.
- ✅ After the engine warms up, verify a stable idle and inspect any disconnected coolant hoses for leakage.
- ✅ If the idle remains unstable after several minutes, an electronic throttle closed-position and idle-air-volume relearn may require a Nissan-capable scan tool.
- ✅ Take a short road test, then perform one final inspection for loose clamps, warning lights, and fluid leaks.
💰 DIY vs Shop Cost
Shop Cost: ₹32,000-₹58,000 (parts + labor)
DIY Cost: ₹9,000-₹18,000 (parts only)
You Save: ₹23,000-₹40,000 by doing it yourself!
Local labor rates and imported-parts prices vary. This repair takes a shop approximately 2.5-4 hours.
🎯 Ready to get started?
HowToo makes it easy: same-day/2-day shipping on every part, plus all the tools and specialty tools you need! Check out the parts and tools sections below to add everything to your cart.