

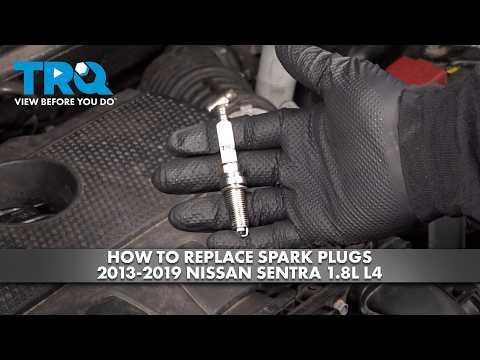





How to Replace Spark Plugs on a 2013-2019 Nissan Sentra 1.8L (Engine: Inline 4 1.8L)
Step-by-step DIY guide with required tools, parts, safety tips, and torque specs for 2013, 2014, 2015, 2016, 2017, 2018, 2019
How to Replace Spark Plugs on a 2013-2019 Nissan Sentra 1.8L (Engine: Inline 4 1.8L)
Step-by-step DIY guide with required tools, parts, safety tips, and torque specs for 2013, 2014, 2015, 2016, 2017, 2018, 2019


🔧 Sentra - Spark Plug Replacement
Replacing the four spark plugs restores a strong, consistent spark and can improve starting, idle quality, and fuel economy. On your Sentra, the upper intake manifold must be moved out of the way before the ignition coils and spark plugs can be reached.
Difficulty Level: Intermediate | Estimated Time: 2-3 hours
Assumption: This procedure is for the stock 1.8L engine with manual transmission.
⚠️ Safety & Precautions
- ⚠️ Work only when the engine is completely cold. Aluminum cylinder-head threads are easily damaged when hot.
- 🧯 Keep sparks, cigarettes, and open flames away from the engine compartment.
- 🔋 Disconnect the negative battery terminal before unplugging the electronic throttle body.
- 🧤 Wear safety glasses and gloves when using compressed air.
- 🚫 Do not allow dirt, hardware, or tools to enter the exposed intake ports.
- 🚫 Do not apply anti-seize to the new spark-plug threads. It can cause excessive tightening and thread damage.
- ⚠️ Always start spark plugs by hand. A plug that feels tight immediately may be cross-threaded.
🔧 Required Tools
You'll need the following tools for this repair:
- 8mm socket
- 10mm socket
- 12mm socket
- 14mm thin-wall spark plug socket with rubber insert
- 3/8-inch-drive ratchet
- 3/8-inch-drive 3-inch extension
- 3/8-inch-drive 6-inch extension
- 3/8-inch-drive universal joint
- 3/8-inch-drive torque wrench rated 5-80 Nm
- Flat-blade screwdriver
- Needle-nose pliers
- Plastic trim tool
- Compressed-air blow gun with regulated air supply
- 0.040-0.044-inch wire spark-plug gap gauge
- Clean lint-free shop towels
- Masking tape and permanent marker
- Protective gloves
- Safety glasses
🔩 Required Parts
HowToo sells all the parts you need for this repair:
- OEM-spec long-life iridium spark plugs - Qty: 4
- Upper intake manifold gasket set - Qty: 1
- Throttle-body gasket - Qty: 1
📋 Before You Begin
- 🅿️ Park your Sentra on level ground, select neutral, apply the parking brake, and let the engine cool completely.
- 📻 Record any saved radio settings that you do not want to lose.
- 🔑 Remove the key and keep it away from the vehicle so the electrical system cannot be switched on accidentally.
- 🔋 Use a 10mm socket to disconnect the negative battery terminal. Isolate the cable so it cannot spring back onto the battery post.
- 🏷️ Label each hose and electrical connector with masking tape before disconnecting it.
- 🧼 Have clean shop towels ready to cover the intake ports immediately after lifting the manifold.
🔨 Step-by-Step Instructions
Follow these steps in order:
Step 1: Remove the Engine Air-Inlet Duct
- Use an 8mm socket or flat-blade screwdriver to loosen the air-duct clamps.
- Use needle-nose pliers to release any spring clamp attached to the duct.
- Unplug the airflow-sensor connector by pressing its locking tab. Do not pull on the wires.
- Use a 10mm socket to remove any duct or air-box retaining bolts.
- Lift the air-inlet duct away and place a clean shop towel over the open air passage.
Step 2: Disconnect the Intake-Manifold Connections
- Use masking tape and a permanent marker to label the throttle-body connector, purge-control connector, vacuum hoses, and brake-booster hose.
- Press the locking tabs by hand or with a plastic trim tool, then unplug the electrical connectors.
- Use needle-nose pliers to release spring clamps, then carefully twist and remove the connected hoses.
- Do not force a hardened hose. Work it loose by gently rotating it.
- Photograph every connection before removal.
Step 3: Remove the Throttle Body
- The throttle body is the aluminum housing containing the electronically operated air valve.
- Use a 10mm socket and 3/8-inch-drive ratchet to remove its four retaining bolts.
- Move the throttle body aside without pulling or sharply bending attached coolant hoses.
- Remove and discard the old throttle-body gasket.
- Do not push the electronic throttle plate open by hand.
Step 4: Remove the Upper Intake Manifold
- Use a 10mm and 12mm socket with the required extension to remove the manifold support fasteners and upper retaining bolts.
- Keep the fasteners arranged in removal order because their lengths may differ.
- Check around the complete manifold for any remaining hose, connector, or bracket.
- Lift the plastic manifold evenly. Do not pry against the aluminum cylinder head.
- Remove and discard the old intake-manifold gaskets.
- Immediately cover every exposed intake port with clean lint-free shop towels.
- Count the port towels before reassembly.
Step 5: Remove the Ignition Coils
- Unplug each ignition-coil connector by pressing its lock and pulling on the connector body.
- Use a 10mm socket and 3/8-inch-drive ratchet to remove the four coil retaining bolts.
- Pull each coil straight upward with a gentle twisting motion.
- Arrange the coils in cylinder order so each one returns to its original location.
- Inspect the rubber boots for oil, cracking, or white burn marks. Replace any damaged coil or boot before reassembly.
Step 6: Clean the Spark-Plug Wells
- Put on safety glasses before using the compressed-air blow gun.
- Use the compressed-air blow gun to remove dirt from each spark-plug well.
- Keep your face away from the wells while blowing them clean.
- Do not remove a spark plug until its well is free of loose debris.
Step 7: Remove the Old Spark Plugs
- Fit the 14mm thin-wall spark plug socket to a 6-inch extension and 3/8-inch-drive ratchet.
- Loosen each spark plug counterclockwise, then remove it carefully from the well.
- Check the old plugs for heavy oil, wet fuel, cracked ceramic, or unusually different coloring between cylinders.
- Stop and seek thread repair assistance if a plug remains abnormally tight after initially loosening.
Step 8: Inspect the New Spark Plugs
- Confirm all four plugs are the same OEM-spec iridium type and have undamaged ceramic insulators.
- Use a 0.040-0.044-inch wire spark-plug gap gauge to verify approximately 1.1mm (0.043 inch).
- Do not bend or scrape the fine iridium center electrode. Replace any plug with an incorrect or damaged preset gap.
- Do not coat the plug threads with anti-seize.
Step 9: Install the New Spark Plugs
- Place one plug in the 14mm spark plug socket attached only to the 6-inch extension.
- Lower it vertically into the well and turn the extension clockwise by hand for several full turns.
- If it does not turn smoothly, remove it and begin again. Never use the ratchet to start the threads.
- Attach the 3/8-inch-drive torque wrench and torque each spark plug to 19.6 Nm (14 ft-lbs).
- Repeat for the remaining three plugs.
Step 10: Reinstall the Ignition Coils
- Push each ignition coil straight onto its original spark plug until fully seated.
- Install the coil bolts by hand, then use the 10mm socket and torque wrench to torque to 7 Nm (62 in-lbs).
- Reconnect each coil connector until its lock clicks.
Step 11: Reinstall the Upper Intake Manifold
- Remove every shop towel from the intake ports and verify that no tools or debris remain.
- Use clean lint-free shop towels to wipe the gasket contact surfaces. Do not let debris fall into the ports.
- Install the new intake-manifold gaskets in their correct grooves.
- Lower the manifold straight into position without dislodging the gaskets.
- Start all manifold fasteners by hand before tightening any one fastener.
- Use the 10mm or 12mm socket and torque wrench to tighten the manifold fasteners evenly from the center outward to 25 Nm (18 ft-lbs).
- Reinstall any manifold support fasteners with the appropriate 10mm or 12mm socket.
Step 12: Reinstall the Throttle Body
- Position the new throttle-body gasket and place the throttle body against the manifold.
- Start all four bolts by hand.
- Use a 10mm socket and torque wrench to tighten the bolts evenly in a crossing pattern to 10 Nm (89 in-lbs).
- Reconnect the electrical connector and any hoses removed earlier.
Step 13: Reconnect Hoses and Electrical Connectors
- Use your labels and reference photographs to reconnect every vacuum hose and electrical connector.
- Use needle-nose pliers to return each spring clamp to its original position.
- Gently pull each connector after installation to confirm its lock is engaged.
- Carefully inspect the manifold perimeter for trapped wires or disconnected vacuum lines.
Step 14: Reinstall the Air-Inlet Duct
- Remove the shop towel from the air passage.
- Position the air duct fully over its mating flanges.
- Use an 8mm socket or flat-blade screwdriver to tighten the clamps until secure without crushing the plastic duct.
- Use a 10mm socket to reinstall any duct or air-box retaining bolts.
- Reconnect the airflow-sensor connector until it clicks.
Step 15: Reconnect the Battery
- Place the negative cable fully over the battery post.
- Use a 10mm socket to tighten the terminal securely. Do not overtighten or distort the terminal.
- Switch the ignition on for 10 seconds without starting the engine, then switch it off for 10 seconds.
✅ After Repair
- ✅ Start the engine without pressing the accelerator. A slightly uneven idle for the first few seconds can occur after the battery has been disconnected.
- 👂 Listen for a steady hissing sound around the intake manifold, which could indicate a disconnected hose or gasket leak.
- 🔍 Check that the malfunction indicator light stays off and verify that no fuel, coolant, or vacuum connections are leaking.
- 🚗 Allow the engine to reach operating temperature, then take a gentle 10-minute drive with several periods of closed-throttle coasting.
- ⚙️ If the idle remains unusually high or unstable, the electronic throttle system may require an idle-air-volume relearn with a Nissan-compatible scan tool.
- 🔧 After the test drive, switch the engine off and inspect every air-duct clamp, hose, and connector again.
💰 DIY vs Shop Cost
Shop Cost: ₹9,000-₹17,000 (parts + labor)
DIY Cost: ₹4,500-₹9,000 (parts only)
You Save: ₹4,500-₹8,000 by doing it yourself!
Labor near Sonīpat varies by workshop and imported-part availability. This repair takes a shop approximately 1.5-2.5 hours.
🎯 Ready to get started?
HowToo makes it easy: same-day/2-day shipping on every part, plus all the tools and specialty tools you need! Check out the parts and tools sections below to add everything to your cart.