

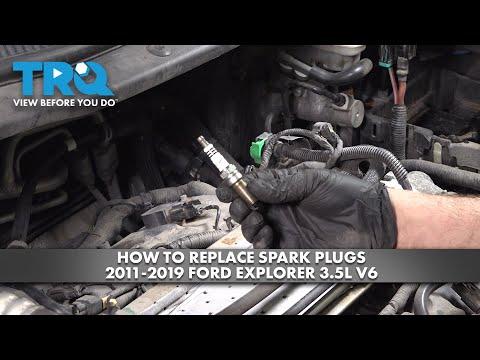




How to Replace Spark Plugs on a 2011-2020 Ford Explorer 3.5L V6 (Trim: XLT | Engine: V6 3.5L)
Step-by-step instructions with intake manifold removal, tools, parts, and torque specs for 2011, 2012, 2013, 2014, 2015, 2016, 2017, 2018, 2019
How to Replace Spark Plugs on a 2011-2020 Ford Explorer 3.5L V6 (Trim: XLT | Engine: V6 3.5L)
Step-by-step instructions with intake manifold removal, tools, parts, and torque specs for 2011, 2012, 2013, 2014, 2015, 2016, 2017, 2018, 2019


🔧 Explorer - Spark Plug Replacement
Your Explorer uses six spark plugs, one beneath each ignition coil. The front three are easy to reach, but the upper intake manifold must be removed to access the rear three.
Difficulty Level: Intermediate | Estimated Time: 2-3 hours
⚠️ Safety & Precautions
- ⚠️ Work only on a completely cold engine. Removing plugs from a hot aluminum cylinder head can damage its threads.
- ⚠️ Disconnect the negative battery cable before unplugging the electronic throttle body.
- ⚠️ Keep dirt, tools, and loose hardware out of the exposed intake openings.
- ⚠️ Never use power tools to install spark plugs. Start every plug by hand.
- ⚠️ Do not apply anti-seize to the spark-plug threads unless the plug manufacturer specifically requires it; it can cause over-tightening.
🔧 Required Tools
You'll need the following tools for this repair:
- 5/8-inch magnetic spark plug socket
- 7mm socket
- 8mm socket
- 10mm socket
- 15mm socket
- 1/4-inch drive ratchet
- 3/8-inch drive ratchet
- 3-inch extension
- 6-inch extension
- 3/8-inch drive universal joint
- Inch-pound torque wrench rated 50-200 in-lbs
- Foot-pound torque wrench rated 10-80 ft-lbs
- 1.3mm wire-style spark plug gap gauge
- Small flat-blade screwdriver
- Plastic trim removal tool
- Compressed-air blow gun rated 90 psi maximum
- Shop vacuum with narrow nozzle
- Clean lint-free shop towels
- Masking tape and permanent marker
- Nitrile mechanic gloves
- Safety glasses
🔩 Required Parts
HowToo sells all the parts you need for this repair:
- Application-matched iridium spark plugs - Qty: 6
- Upper intake manifold gasket set - Qty: 1
- Throttle body gasket - Qty: 1
📋 Before You Begin
- 📋 Park your Explorer on level ground, select Park, apply the parking brake, and let the engine become completely cold.
- 📋 Open the hood and photograph the hose and connector routing before taking anything apart.
- 📋 Label disconnected hoses and connectors with masking tape and a permanent marker.
- 📋 Disconnecting the battery may erase learned idle settings. No infotainment service mode or scan-tool command is required.
- 📋 The upper intake manifold is the large composite chamber that distributes air to the engine. Cover its openings immediately after removal.
- 📋 Use application-matched plugs supplied for the 3.5L engine. Verify a nominal 1.3mm (0.051-inch) gap without pressing against the delicate center electrode.
🔨 Step-by-Step Instructions
Follow these steps in order:
Step 1: Disconnect the battery
- Use a 10mm socket and ratchet to loosen the negative battery-terminal clamp.
- Lift the clamp off the terminal and position it where it cannot spring back into contact.
Step 2: Remove the engine appearance cover
- Remove the oil filler cap by hand if it passes through the cover.
- Pull the engine cover straight upward by hand to release its rubber mounting grommets.
- Reinstall the oil filler cap immediately to prevent contamination.
Step 3: Remove the air intake duct
- Use a 7mm socket and ratchet to loosen the intake-duct clamps at the air-cleaner housing and throttle body.
- Use a small flat-blade screwdriver only on the locking tabs to disconnect the airflow-sensor connector and attached breather hose as equipped.
- Lift the intake duct out of the engine compartment.
- Photograph every hose before disconnecting it.
Step 4: Disconnect the upper intake manifold connections
- Use a small flat-blade screwdriver to release the electronic throttle-body connector lock, then unplug the connector by its housing.
- Disconnect the evaporative-emissions and positive crankcase ventilation connections by hand. These carry fuel vapors and engine fumes into the intake.
- Use masking tape and a permanent marker to label every connection.
- Release any wiring retainers from the manifold with a plastic trim removal tool.
- Use an 8mm socket and ratchet to remove any attached support bracket fasteners encountered on the manifold.
Step 5: Remove the upper intake manifold
- Use an 8mm socket, extension, and ratchet to loosen the upper intake manifold bolts gradually, working from the outside toward the center.
- Verify that every hose, connector, and bracket is free, then lift the manifold straight upward by hand.
- Do not pry against the plastic manifold or aluminum sealing surfaces.
- Use clean lint-free shop towels to cover all six lower intake openings immediately.
- Remove the old manifold seals by hand. Use a shop vacuum with a narrow nozzle to remove loose debris without allowing anything into the openings.
Step 6: Remove the ignition coils
- Work on one cylinder at a time so the coils return to their original locations.
- Use a small flat-blade screwdriver to release each ignition-coil connector lock, then unplug it by the connector housing.
- Use an 8mm socket and ratchet to remove the coil retaining bolt.
- Twist the coil gently by hand and pull it straight out of the spark-plug well.
- Inspect the rubber boot for cracking, oil, or carbon tracking. Replace a damaged coil or boot before reassembly.
Step 7: Clean the spark-plug wells
- Put on safety glasses.
- Use a shop vacuum with a narrow nozzle around each spark-plug well.
- Use a compressed-air blow gun at no more than 90 psi to clear remaining debris before loosening the plug.
- Do not remove a plug while dirt remains around it.
Step 8: Remove the old spark plugs
- Use a 5/8-inch magnetic spark plug socket, 6-inch extension, and ratchet to loosen each plug.
- Use a universal joint only where clearance requires it.
- If a plug feels unusually tight, turn it slightly inward, then outward again. Do not force it.
- Lift each plug out with the magnetic socket and inspect it for oil, heavy deposits, or a damaged electrode.
Step 9: Check and install the new spark plugs
- Use a 1.3mm wire-style spark plug gap gauge to verify a nominal 1.3mm (0.051-inch) gap. Do not wedge a ramp-style gauge against the fine-wire center electrode.
- Place one new plug in the 5/8-inch magnetic spark plug socket.
- Use the extension without the ratchet to thread the plug clockwise by hand until the gasket contacts the cylinder head.
- If it does not turn easily, remove it and restart it by hand to prevent cross-threading.
- Attach the inch-pound torque wrench and tighten each plug to 15 Nm (133 in-lbs).
- Do not put anti-seize or grease on the spark-plug threads.
Step 10: Reinstall the ignition coils
- Push each ignition coil firmly over its spark plug by hand.
- Use an 8mm socket and inch-pound torque wrench to tighten each coil bolt to 7 Nm (62 in-lbs).
- Reconnect each coil connector by hand until its lock clicks.
Step 11: Install the upper intake manifold
- Confirm that no tools, debris, or towels remain near the intake openings.
- Install the new upper intake manifold seals by hand. They must sit flat and must not be twisted.
- Lower the manifold squarely into place without disturbing the seals.
- Start all manifold bolts by hand using an 8mm socket and extension.
- Use the inch-pound torque wrench to tighten the manifold bolts evenly from the center outward in two passes, finishing at 10 Nm (89 in-lbs).
Step 12: Reconnect the manifold components
- Reconnect every vacuum, evaporative-emissions, and crankcase-ventilation line by hand until fully seated.
- Reconnect the throttle-body electrical connector by hand and secure its lock.
- Reattach wiring retainers by hand.
- Use an 8mm socket and inch-pound torque wrench to tighten removed support-bracket fasteners to 10 Nm (89 in-lbs) unless their original fastener size indicates a heavier bracket.
Step 13: Reinstall the air intake duct
- Position the intake duct fully over the air-cleaner and throttle-body fittings by hand.
- Reconnect the breather hose and airflow-sensor connector by hand.
- Use a 7mm socket and ratchet to tighten both clamps until the duct cannot rotate. Do not crush the plastic fittings.
Step 14: Reinstall the cover and battery cable
- Remove the oil filler cap by hand, align the engine cover, and press it onto its mounting grommets.
- Reinstall the oil filler cap by hand until secure.
- Place the negative battery clamp on the terminal.
- Use a 10mm socket and inch-pound torque wrench to tighten the battery-terminal nut to 5 Nm (44 in-lbs).
✅ After Repair
- ✅ Turn the ignition on for approximately 10 seconds without starting the engine, then switch it off.
- ✅ Start the engine and let it idle. A slightly uneven idle may occur briefly while the engine computer relearns.
- ✅ Listen for hissing around the intake manifold and verify that the engine-idle speed becomes steady.
- ✅ Stop the engine immediately if the check-engine light flashes, the engine misfires heavily, or a loud intake leak is present.
- ✅ Verify that every hose and electrical connector is secure, then take a short road test.
- ✅ No spark-plug programming, battery registration, or infotainment reset is required.
💰 DIY vs Shop Cost
Shop Cost: ₹12,000-₹22,000 (parts + labor)
DIY Cost: ₹5,000-₹10,000 (parts only)
You Save: ₹7,000-₹12,000 by doing it yourself!
Labor rates around Sonīpat vary by workshop. This repair takes a shop approximately 1.5-2.5 hours.
🎯 Ready to get started?
HowToo makes it easy: same-day/2-day shipping on every part, plus all the tools and specialty tools you need! Check out the parts and tools sections below to add everything to your cart.