

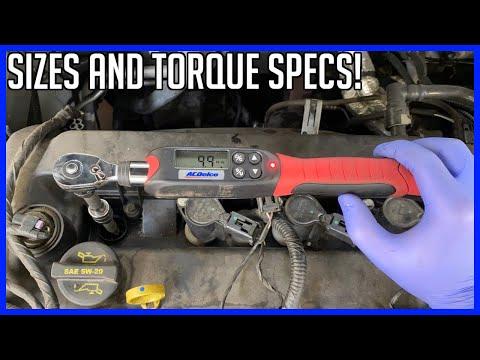







How to Replace Spark Plugs on a 2006-2020 Ford Fusion 2.0L Hybrid (Engine: Inline 4 2.0L)
Step-by-step DIY guide with tools, parts, gap specs, torque specs, and safety tips for 2006, 2007, 2008, 2009
How to Replace Spark Plugs on a 2006-2020 Ford Fusion 2.0L Hybrid (Engine: Inline 4 2.0L)
Step-by-step DIY guide with tools, parts, gap specs, torque specs, and safety tips for 2006, 2007, 2008, 2009


🔧 Fusion - Spark Plug Replacement
Your Fusion has four spark plugs beneath the ignition coils on top of its 2.0L gasoline engine. Replace all four together to help prevent hard starting, misfires, poor fuel economy, and rough operation when the gasoline engine starts.
Difficulty Level: Beginner | Estimated Time: 1-1.5 hours
⚠️ Safety & Precautions
- ⚠️ Turn the vehicle completely off and move the key fob at least 15 feet away. A plug-in hybrid gasoline engine can start unexpectedly when the vehicle is in Ready mode.
- ⚠️ Allow the engine to become completely cold. Removing plugs from a hot aluminum cylinder head can damage its threads.
- ⚠️ Do not touch, disconnect, or probe any orange high-voltage cable or connector.
- ⚠️ Keep dirt out of the open spark plug wells and cylinders.
- ⚠️ A 12-volt battery disconnect is not required for this repair.
🔧 Required Tools
You'll need the following tools for this repair:
- 8mm socket
- 3/8-inch-drive ratchet
- 3/8-inch-drive extension 6-inch
- 5/8-inch spark plug socket
- 3/8-inch-drive inch-pound torque wrench
- 0.049-0.053-inch wire spark plug gap gauge
- Compressed-air blow gun with regulated air supply
- Soft nylon detailing brush
- Magnetic pickup tool 12-inch
- Safety glasses
- Nitrile gloves
🔩 Required Parts
HowToo sells all the parts you need for this repair:
- OEM-spec fine-wire spark plugs - Qty: 4
- Dielectric grease - Qty: 1
📋 Before You Begin
- 📍 Park your Fusion on level ground, select Park, apply the parking brake, and turn the vehicle completely off.
- Remove charging equipment from the vehicle and close the charge-port door.
- Move the key fob at least 15 feet away and wait five minutes before opening the hood.
- Let the gasoline engine cool completely. The cylinder head must be cool to the touch.
- A spark plug socket is a deep socket that securely holds the plug while it is lifted from the engine.
- A torque wrench measures tightening force and protects the aluminum cylinder-head threads.
🔨 Step-by-Step Instructions
Follow these steps in order:
Step 1: Remove the Engine Cover
- Use both hands to lift the plastic engine appearance cover straight upward from its rubber mounting grommets.
- No tool is required. Place the cover somewhere clean and safe.
- Pull near each mounting point.
Step 2: Clean the Ignition-Coil Area
- Put on safety glasses and nitrile gloves.
- Use the soft nylon detailing brush to loosen dirt around the four ignition coils.
- Use the compressed-air blow gun with regulated air supply to blow debris away from the coils and plug wells.
- An ignition coil is the electrical unit directly above each spark plug.
Step 3: Disconnect the Ignition Coils
- Press the release tab on each coil electrical connector by hand, then pull the connector straight back.
- Hold the plastic connector body. Never pull on the wires.
- Do not pry aggressively because the connector locks become brittle with age.
Step 4: Remove the Ignition Coils
- Use the 8mm socket, 3/8-inch-drive extension 6-inch, and 3/8-inch-drive ratchet to remove the four coil retaining bolts.
- Twist each coil gently by hand to release its rubber boot, then pull the coil straight upward.
- Arrange the coils in cylinder order so they return to their original positions.
- Inspect each rubber boot for cracks, oil contamination, or black burn lines. Replace a damaged coil or boot before reassembly.
Step 5: Clean the Spark Plug Wells
- Use the compressed-air blow gun with regulated air supply to clean each empty spark plug well thoroughly.
- Wear safety glasses and direct the air away from your face.
- Do not continue until every well is free of sand and loose debris.
Step 6: Remove the Old Spark Plugs
- Use the 5/8-inch spark plug socket, 3/8-inch-drive extension 6-inch, and 3/8-inch-drive ratchet to turn each plug counterclockwise.
- Once loose, finish turning the plug slowly and lift it from the well.
- Use the magnetic pickup tool 12-inch if a plug separates from the socket inside the well.
- If a plug binds, stop. Turn it slightly clockwise, then loosen it gradually instead of forcing it.
- Remove one plug at a time.
Step 7: Inspect the New Spark Plugs
- Compare each new plug with an old one. The thread length, sealing seat, and connector end must match.
- Use the 0.049-0.053-inch wire spark plug gap gauge to verify a gap of 0.049-0.053 inch (1.25-1.35 mm).
- Do not force the gauge between the electrodes or bend the delicate fine-wire center electrode.
- Replace any new plug that is dropped or has cracked porcelain.
Step 8: Start Each New Spark Plug by Hand
- Place one new plug in the 5/8-inch spark plug socket.
- Use only the 3/8-inch-drive extension 6-inch with your fingers to turn the plug clockwise.
- Confirm the plug turns smoothly through several complete rotations. If it does not, remove it and start again.
- Do not apply anti-seize to the threads. It changes tightening force and can cause overtightening.
- Cross-threading means the plug entered crooked and damaged the cylinder-head threads.
Step 9: Tighten the Spark Plugs
- Attach the 3/8-inch-drive inch-pound torque wrench to the 3/8-inch-drive extension 6-inch and 5/8-inch spark plug socket.
- Tighten each spark plug to Torque to 12 Nm (106 in-lbs).
- Stop as soon as the torque wrench signals that the setting has been reached.
- Never add an extra tightening turn.
Step 10: Reinstall the Ignition Coils
- Apply a very small film of dielectric grease inside the opening at the bottom of each coil boot. Keep grease away from the plug terminal.
- Push each coil straight onto its spark plug until fully seated.
- Install the retaining bolts by hand first.
- Use the 8mm socket, 3/8-inch-drive extension 6-inch, and 3/8-inch-drive inch-pound torque wrench to tighten each coil bolt to Torque to 8 Nm (71 in-lbs).
Step 11: Reconnect the Coils
- Push each ignition-coil electrical connector into place by hand until its lock clicks.
- Gently pull each connector body to confirm it is locked.
- Inspect the area for forgotten tools before installing the cover.
Step 12: Reinstall the Engine Cover
- Align the engine cover with its mounting points by hand.
- Press directly above each mounting point until the cover is fully seated.
- Do not strike the cover or force it sideways.
✅ After Repair
- ✅ Bring the key fob back to the vehicle and start your Fusion normally.
- Confirm the green Ready indicator appears. The gasoline engine may remain off while sufficient battery charge is available.
- When the gasoline engine starts, listen for a smooth idle and verify that no warning light appears.
- If the engine shakes or a warning light flashes, turn the vehicle off immediately and recheck all four coil connectors and coil seating.
- Take a short test drive and verify smooth gasoline-engine operation under gentle acceleration.
💰 DIY vs Shop Cost
Shop Cost: ₹12,000-₹24,000 (parts + labor)
DIY Cost: ₹4,000-₹9,000 (parts only)
You Save: ₹8,000-₹15,000 by doing it yourself!
Local labor and imported plug prices vary. This repair takes a shop approximately 0.7-1 hour.
🎯 Ready to get started?
HowToo makes it easy: same-day/2-day shipping on every part, plus all the tools and specialty tools you need! Check out the parts and tools sections below to add everything to your cart.