

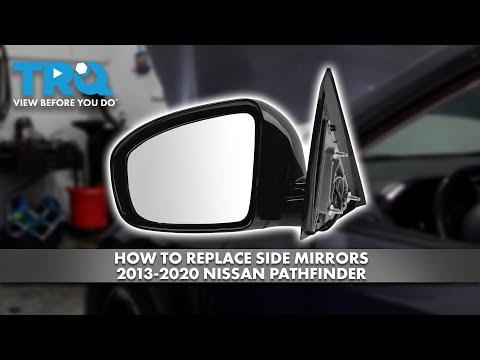






How to Replace Side-View Mirrors on a 2018-2020 Nissan Pathfinder
Step-by-step guide with tools, parts, 7.5 Nm torque spec, testing, and safety tips for 2018, 2019, 2020
How to Replace Side-View Mirrors on a 2018-2020 Nissan Pathfinder
Step-by-step guide with tools, parts, 7.5 Nm torque spec, testing, and safety tips for 2018, 2019, 2020


🔧 Pathfinder - Side View Mirror Replacement
This procedure replaces one complete power side-view mirror assembly on your Pathfinder. The interior front-door trim panel must be loosened or removed so you can disconnect the mirror wiring and reach the mounting nuts.
Assumption: This procedure is for a complete mirror assembly, not only the mirror glass.
Difficulty Level: Beginner | Estimated Time: 1-1.5 hours per side
⚠️ Safety & Precautions
- 🧤 Wear safety glasses and gloves because broken mirror glass can be extremely sharp.
- 🔋 Disconnect the negative battery cable before unplugging the mirror or door-switch connectors.
- 🚫 After disconnecting the battery, do not switch the ignition on while door connectors are unplugged.
- 🤝 Support the mirror before removing its final mounting nut so it cannot fall against the door.
- ⚠️ Do not pry with a screwdriver against painted surfaces or deployable side-curtain airbag areas.
- 🪟 Lower the window before disconnecting the battery so you are not locked out of the vehicle.
🔧 Required Tools
You'll need the following tools for this repair:
- Safety glasses
- Cut-resistant work gloves
- Plastic interior trim-removal tool set
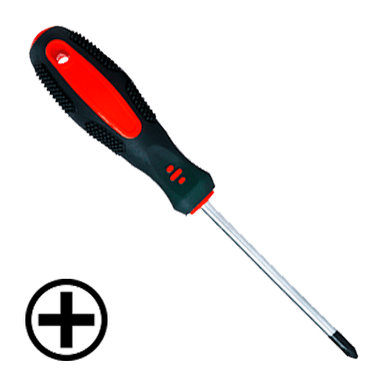
- Phillips #2 screwdriver
- 10mm socket
- 1/4-inch-drive ratchet
- 1/4-inch-drive 6-inch extension
- Low-range torque wrench rated 2-20 Nm
- Magnetic pickup tool
- Automotive masking tape
- Small parts tray
🔩 Required Parts
HowToo sells all the parts you need for this repair:
- Complete side-view mirror assembly matching the original power and heating features - Qty: 1
- Front door trim-panel clips - Qty: 1 set
Order the correct driver- or passenger-side assembly. The electrical connector and features must match the original mirror; do not substitute a mirror with a different connector.
📋 Before You Begin
- 🅿️ Park your Pathfinder on level ground, select Park, apply the parking brake, and switch the ignition off.
- 🪟 Lower the window completely and open the door being repaired.
- 🛡️ Apply automotive masking tape around the mirror base and nearby painted edges.
- 🔋 Open the hood. Use a 10mm socket and ratchet to loosen the negative battery-terminal clamp, remove it from the battery post, and isolate it for at least three minutes.
- 🔍 Compare the replacement mirror with the original. Confirm the mounting studs, electrical connector, gasket, glass shape, heating, and any signal or camera equipment match.
🔨 Step-by-Step Instructions
Follow these steps in order:
Step 1: Remove the mirror corner trim
- Use a plastic interior trim-removal tool to lift the triangular interior trim panel at the upper-front corner of the door.
- Pull the panel straight inward to release its retaining clips. Do not twist it against the glass.
- If equipped with a small speaker, press the connector lock and unplug it by holding the connector body rather than pulling the wires.
- Keep every fastener organized by removal order.
Step 2: Remove the door-handle trim
- Use a plastic interior trim-removal tool to carefully release the trim around the inside door handle.
- Remove the exposed screw with a Phillips #2 screwdriver and place it in the small parts tray.
- Do not force the trim. Check for an unreleased clip if it will not lift easily.
Step 3: Remove the armrest fastener
- Use a plastic interior trim-removal tool to lift the armrest or switch-panel trim from its rear edge.
- Press each locking tab and unplug the window and lock-switch connectors.
- Use a Phillips #2 screwdriver to remove the exposed door-pull screw.
- If a 10mm hex-head fastener is fitted instead, remove it with a 10mm socket, extension, and ratchet.
Step 4: Release the door trim panel
- Insert a plastic interior trim-removal tool between the lower door panel and the metal door shell.
- Work around the bottom and sides, releasing one retaining clip at a time. A trim clip is a reusable plastic fastener that holds the panel to the door.
- Lift the panel straight upward to unhook it from the window ledge.
- Support the panel while disconnecting the interior-handle cable and any remaining electrical connectors.
- Replace any broken clips before refitting the panel.
Step 5: Expose and disconnect the mirror wiring
- Carefully peel back only the upper-front corner of the plastic moisture barrier by hand. This barrier keeps rainwater away from the interior trim.
- Locate the mirror wiring connector inside the door.
- Press the connector lock by hand and separate the two connector halves. Do not pull on the wires.
- Release the mirror harness from its retaining clip using a plastic interior trim-removal tool.
Step 6: Remove the original mirror
- Support the mirror outside the door with one hand or have a helper hold it.
- Use a 10mm socket, 6-inch extension, and ratchet to remove the mirror mounting nuts.
- Use a magnetic pickup tool if a nut falls into the door cavity.
- Feed the wiring connector through the opening and lift the mirror away from the door.
- Do not scratch the paint with the mounting studs.
Step 7: Install the replacement mirror
- Confirm the replacement mirror gasket is flat and fully seated against its base.
- Feed the electrical connector through the door opening and position the mounting studs in their holes.
- Start every mounting nut by hand to prevent cross-threading.
- Use a low-range torque wrench with a 10mm socket to tighten the mirror mounting nuts evenly to 7.5 Nm (66 in-lbs).
- Do not overtighten the nuts; excessive force can crack the mirror base or distort the door skin.
Step 8: Reconnect the mirror
- Connect the mirror wiring by hand until the locking tab clicks.
- Secure the harness in its original retaining clip so it cannot contact the window mechanism.
- Press the moisture barrier firmly back onto its original adhesive by hand. Seal all lifted edges.
- Reconnect the small speaker connector if equipped.
Step 9: Test the mirror before closing the door
- Reconnect the window-switch panel temporarily by hand.
- Use a 10mm socket and ratchet to reconnect the negative battery-terminal clamp. Tighten it securely without crushing or twisting the terminal.
- Switch the ignition to ON and operate the mirror-adjustment switch in all four directions.
- If equipped with heating, switch on the rear-window defogger and verify the mirror begins warming after several minutes.
- If the mirror has an integrated signal, operate the hazard lamps and verify it flashes.
- Switch the ignition off and disconnect the negative battery cable again with the 10mm socket before finishing assembly.
Step 10: Reinstall the door trim panel
- Reconnect the interior-handle cable and all door-panel electrical connectors by hand.
- Hang the top of the panel over the window ledge and confirm it sits evenly.
- Align each retaining clip with its hole, then press around the panel edges by hand until every clip locks.
- Install the door-pull fastener using the Phillips #2 screwdriver or 10mm socket, matching the fastener removed. Tighten it snugly without stripping the plastic mount.
- Install the inside-handle screw with the Phillips #2 screwdriver and refit its trim.
- Connect the switch-panel wiring and press the panel into place by hand.
- Align the triangular mirror trim and press it inward until its clips engage.
Step 11: Reconnect the battery
- Place the negative battery clamp fully onto the battery post.
- Use a 10mm socket and ratchet to tighten the clamp until it cannot rotate by hand. Do not overtighten it.
- Remove the automotive masking tape and inspect the paint and mirror gasket.
✅ After Repair
- 🪞 Adjust the mirror through its full range and confirm it holds its position.
- 🔌 Test the window, door lock, speaker, mirror heater, and mirror signal if equipped.
- 🚪 Open and close the door while listening for loose clips or wiring movement.
- 💧 Confirm the mirror gasket sits flush against the door with no gaps or folded edges.
- 🪟 If automatic window operation is lost, close the window completely and continue holding the switch upward for approximately three seconds, then lower and raise it again.
- 🕒 Reset the clock and other convenience settings if they were cleared by the battery disconnect.
- 🚗 Take a short drive and verify the mirror remains steady without excessive vibration.
💰 DIY vs Shop Cost
Shop Cost: $300-$650 USD (parts + labor)
DIY Cost: $100-$350 USD (parts only)
You Save: $200-$300 USD by doing it yourself!
Shop labor rates vary but typically run $100-$150/hour. This repair takes a shop approximately 0.8-1.2 hours.
🎯 Ready to get started?
HowToo makes it easy: same-day/2-day shipping on every part, plus all the tools and specialty tools you need! Check out the parts and tools sections below to add everything to your cart.