

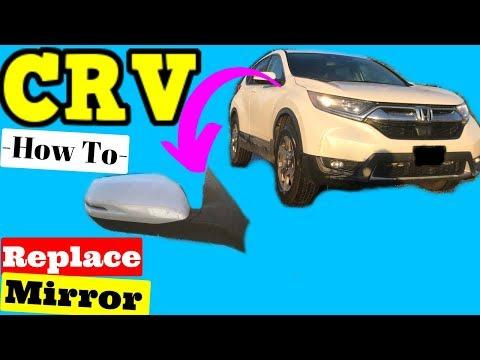






How to Replace Side-View Mirrors on a 2017-2022 Honda CR-V
Step-by-step power mirror installation with tools, parts, torque specs, and safety tips for 2017, 2018, 2019, 2020, 2021, 2022
How to Replace Side-View Mirrors on a 2017-2022 Honda CR-V
Step-by-step power mirror installation with tools, parts, torque specs, and safety tips for 2017, 2018, 2019, 2020, 2021, 2022


🔧 CR-V - Side View Mirror Assembly Replacement
This procedure replaces the complete driver-side or passenger-side mirror assembly on your CR-V. The interior door panel must be loosened so you can disconnect the power-mirror wiring, then three mounting nuts secure the mirror to the door.
Difficulty Level: Beginner | Estimated Time: 0.75-1.25 hours per side
⚠️ Safety & Precautions
- ⚠️ Wear gloves because broken mirror glass can have extremely sharp edges.
- 🔋 Disconnect the negative battery cable before unplugging the mirror wiring.
- 🚪 Support the mirror before removing its final nut so it cannot fall against the door.
- 🛡️ Apply painter’s tape around the mirror base to protect the paint.
- ⚠️ Do not switch the ignition on while door electrical connectors are disconnected.
🔧 Required Tools
You'll need the following tools for this repair:
- 8mm socket
- 10mm socket
- 1/4-inch drive ratchet
- 1/4-inch drive 3-inch extension
- Torque wrench rated 2-20 Nm
- Phillips #2 screwdriver
- Plastic trim removal tool set
- 25mm painter’s tape
- Magnetic parts tray
- Cut-resistant work gloves
- Safety glasses
🔩 Required Parts
HowToo sells all the parts you need for this repair:
- Complete power side-view mirror assembly, correct side - Qty: 1 per damaged side
- Mirror mounting gasket - Qty: 1 per replaced mirror if not included
- Interior door trim clips - Qty: 3-5 spares per door
Your LX uses a power-adjustable mirror without the turn-signal equipment fitted to higher trims. Match the left or right side and the original electrical connector before installation.
📋 Before You Begin
- 🅿️ Park your CR-V on level ground, select Park, apply the parking brake, and lower the affected window.
- 🔑 Switch the ignition off and keep the key away from the vehicle.
- 🪟 If the mirror is broken, cover loose glass with painter’s tape before handling it.
- 🔋 Open the hood and disconnect the negative battery terminal with a 10mm socket. Wait at least three minutes before working on the door wiring.
- 🧰 A plastic trim removal tool is a nonmetal wedge used to release interior panels without scratching them.
- 📦 Compare the replacement mirror’s mounting studs, connector, housing, and glass shape with the original mirror.
🔨 Step-by-Step Instructions
Follow these steps in order:
Step 1: Protect the Work Area
- Apply 25mm painter’s tape around the outside edge of the mirror base and along the upper door trim.
- Put on cut-resistant work gloves and safety glasses before touching damaged glass.
- Fold a towel over the door edge.
Step 2: Remove the Inner Handle Cover
- Use a plastic trim removal tool to carefully lift the small cover behind the interior door-release handle.
- Use a Phillips #2 screwdriver to remove the screw exposed behind the cover.
- Place the screw in a magnetic parts tray.
Step 3: Remove the Door-Pull Screw
- Use a plastic trim removal tool to lift the rubber mat or small cover inside the door-pull recess.
- Use a Phillips #2 screwdriver to remove the screw underneath it.
- Keep this screw separate in the magnetic parts tray.
Step 4: Release the Door Panel Clips
- Insert a plastic trim removal tool between the lower rear edge of the door panel and the metal door.
- Work around the bottom and both sides, releasing each push clip individually.
- Lift the panel straight upward to unhook it from the window ledge.
- Do not pull the panel far away yet because cables and electrical connectors remain attached.
Step 5: Disconnect the Door Panel
- Support the panel with one hand while pressing the connector locking tabs by hand.
- Unplug the window-switch and door electrical connectors without pulling on their wires.
- Release the interior handle cable from its bracket by hand, then rotate the cable end out of the handle lever.
- Set the door panel on a clean padded surface.
Step 6: Remove the Mirror Corner Trim
- Use a plastic trim removal tool to pull the triangular interior garnish away from the upper front corner of the door.
- Pull toward the cabin rather than sliding it upward.
- Inspect its retaining clips and replace any damaged clip.
Step 7: Disconnect the Mirror Wiring
- Locate the mirror electrical connector behind the upper front portion of the door.
- Press its locking tab by hand and disconnect it.
- Release the mirror harness from its retaining clips by hand so it can pass through the door opening.
Step 8: Remove the Old Mirror
- Use an 8mm socket, 3-inch extension, and 1/4-inch drive ratchet to loosen the three mirror mounting nuts.
- Hold the mirror from outside while removing the final nut.
- Feed the connector through the opening and lift the mirror away from the door.
- Keep the nuts in the magnetic parts tray if replacements were not supplied.
- Never let a mounting nut fall inside.
Step 9: Clean and Inspect the Mounting Area
- Use gloved fingers to remove loose gasket material from the mounting surface.
- Inspect the door opening for bent metal, corrosion, or damaged paint.
- Confirm that the replacement mirror gasket sits flat and completely surrounds the wiring opening.
Step 10: Install the Replacement Mirror
- Feed the replacement mirror connector through the door opening by hand.
- Align the three studs and hold the mirror base firmly against the door.
- Start all three mounting nuts by hand to prevent cross-threading.
- Use an 8mm socket and 1/4-inch drive ratchet to seat the nuts evenly.
- Use a torque wrench and 8mm socket to tighten each nut to 9 Nm (7 ft-lbs).
- Do not overtighten the nuts because the mirror base can crack or distort.
Step 11: Connect and Route the Wiring
- Push the mirror connector together by hand until its locking tab clicks.
- Secure the harness in the original retaining clips by hand.
- Make sure the harness does not interfere with the window glass or regulator mechanism.
Step 12: Reinstall the Mirror Corner Trim
- Align the triangular garnish clips with their openings.
- Press the garnish evenly by hand until every clip snaps into place.
- Do not strike the trim or use the ratchet as a pressing tool.
Step 13: Reinstall the Door Panel
- Reconnect the interior handle cable by hand and lock its housing into the bracket.
- Reconnect every door electrical connector by hand until each locking tab clicks.
- Hook the top edge of the panel over the window ledge, then align the perimeter clips.
- Press directly over each clip by hand until it engages.
- Use a Phillips #2 screwdriver to reinstall the door-pull and interior-handle screws until snug. These are small trim screws; do not overtighten them.
- Press the covers and rubber mat into place by hand.
Step 14: Reconnect the Battery
- Place the negative battery cable fully onto its terminal.
- Use a torque wrench and 10mm socket to tighten the terminal nut to 5.4 Nm (48 in-lbs).
- Remove the painter’s tape and inspect the paint around the mirror.
✅ After Repair
- 🔍 Switch the ignition on and move the mirror through its full up, down, left, and right adjustment range.
- 🪟 Operate the affected window fully down and up while listening for wiring contact inside the door.
- 🔒 Test the power lock, window switch, interior handle, and speaker before driving.
- 💡 Confirm that no warning lights remain illuminated after the engine starts.
- 🚗 Adjust the mirror for proper rearward visibility before driving.
- 💧 After the first wash or rainfall, inspect the inside of the door near the mirror for water intrusion.
- 🪟 If the automatic window function was lost, fully close the window and hold the switch up for two additional seconds.
💰 DIY vs Shop Cost
Shop Cost: ₹12,000-₹28,000 per side (parts + labor)
DIY Cost: ₹6,000-₹18,000 per side (parts only)
You Save: ₹6,000-₹10,000 per side by doing it yourself!
Labor rates around Sonīpat vary by workshop. This repair takes a shop approximately 0.5-1.0 hour per side, and painted mirror caps may add paint costs.
🎯 Ready to get started?
HowToo makes it easy: same-day/2-day shipping on every part, plus all the tools and specialty tools you need! Check out the parts and tools sections below to add everything to your cart.