







How to Replace Side-View Mirrors on a 2015-2018 Honda Fit (Trim: LX)
Step-by-step power mirror installation with tools, parts, torque specs, and safety tips for 2015, 2016, 2017, 2018
How to Replace Side-View Mirrors on a 2015-2018 Honda Fit (Trim: LX)
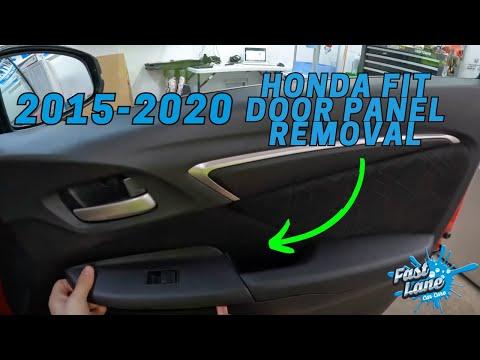
Step-by-step power mirror installation with tools, parts, torque specs, and safety tips for 2015, 2016, 2017, 2018


🔧 Fit - Side-View Mirror Replacement
This procedure replaces the complete power side-view mirror assembly. The interior door panel must be loosened so you can disconnect the electrical connector and reach the mirror mounting nuts.
Assumption: You are replacing complete standard power-mirror assemblies without aftermarket wiring.
Difficulty Level: Beginner | Estimated Time: 0.5-1 hour per side
⚠️ Safety & Precautions
- ⚠️ Support the mirror before removing its final mounting nut so it cannot fall against the door.
- ⚠️ Wear safety glasses and gloves because damaged mirror glass can have sharp edges.
- ⚠️ Use plastic trim tools around painted and interior surfaces.
- ⚠️ Switch the ignition completely off before disconnecting the mirror wiring.
- ⚠️ Battery disconnection is not normally required for this repair.
🔧 Required Tools
You'll need the following tools for this repair:
- Plastic interior trim-removal tool set
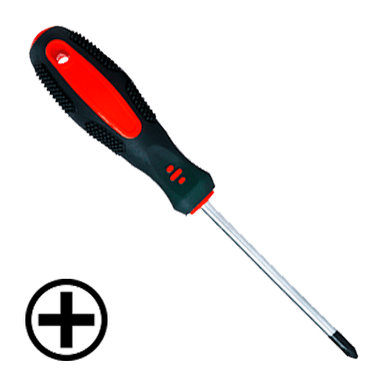
- Phillips #2 screwdriver
- 8mm socket
- 1/4-inch drive ratchet
- 1/4-inch drive extension, 3-inch
- 1/4-inch drive torque wrench, 2-20 Nm range
- Magnetic pickup tool, 18-inch
- Work gloves
- Safety glasses
🔩 Required Parts
HowToo sells all the parts you need for this repair:
- Driver-side power mirror assembly - Qty: 1
- Passenger-side power mirror assembly - Qty: 1
- Mirror mounting foam seal - Qty: 1 per mirror if not included
- Interior door-panel retaining clips - Qty: As needed
Buy only the side being replaced. Verify that the replacement has the same electrical connector and mirror functions as the original.
📋 Before You Begin
- 📋 Park your Fit on level ground, apply the parking brake, and lower the window.
- 📋 Move the replacement mirror by hand only if its instructions permit it; do not force the power-adjustment mechanism.
- 📋 Check that the new assembly includes its foam weather seal. This seal keeps water and wind noise out of the door.
- 📋 Have a safe padded surface ready for the removed mirror.
🔨 Step-by-Step Instructions
Follow these steps in order:
Step 1: Switch Off Electrical Power
- Turn the ignition off and remove the key, if equipped.
- Wait at least one minute before unplugging the mirror connector.
- No tool or infotainment-menu procedure is required.
Step 2: Remove the Inner Mirror Garnish
- Use a plastic interior trim-removal tool to pry the triangular garnish away from the upper front corner of the door.
- The garnish is the small triangular interior cover directly opposite the mirror.
- Pull it inward carefully to release its clips, then lift it away.
- Work slowly; aged trim clips can break.
Step 3: Remove the Door-Panel Fasteners
- Use a plastic interior trim-removal tool to open the small cover behind the inside door-release handle.
- Remove the exposed screw with a Phillips #2 screwdriver.
- Use the plastic interior trim-removal tool to lift the armrest or switch-panel cover enough to expose its fastener and connector.
- Remove the exposed screw with the Phillips #2 screwdriver.
- Press each connector lock and unplug the window-switch connector by its plastic housing, not its wires.
Step 4: Release the Door Panel
- Insert the plastic interior trim-removal tool between the lower edge of the panel and the metal door.
- Work around the bottom and both sides, releasing one retaining clip at a time.
- Lift the door panel straight upward to unhook it from the window ledge.
- Support the panel while disconnecting any remaining connectors.
- If complete removal is necessary, unhook the inside-handle cables while noting their original positions.
- A retaining clip is a reusable plastic fastener that holds the panel to the door.
Step 5: Disconnect the Mirror Wiring
- Locate the mirror’s electrical connector near the upper front portion of the door.
- Press its locking tab by hand and separate the connector.
- Release the mirror harness from any door-mounted clips by hand or with the plastic interior trim-removal tool.
- Note the harness routing so the replacement wire will not contact the window mechanism.
Step 6: Remove the Original Mirror
- Hold the mirror firmly from outside the door.
- Use an 8mm socket, 3-inch extension, and 1/4-inch drive ratchet to remove the mirror mounting nuts.
- Use the magnetic pickup tool if a nut begins to fall inside the door.
- Pull the mirror straight away from the door while guiding its wiring through the opening.
- Do not pry against the painted door surface.
Step 7: Install the Replacement Mirror
- Confirm the foam weather seal is flat against the replacement mirror base.
- Feed the wiring through the door opening and place the mirror studs into their mounting holes.
- Hold the mirror flush against the door and start every mounting nut by hand.
- Tighten the nuts evenly with the 8mm socket, 3-inch extension, and 1/4-inch drive ratchet.
- Use the 1/4-inch drive torque wrench and 8mm socket to tighten each mounting nut to 9.8 Nm (7.2 ft-lbs).
- Do not overtighten the nuts; excessive force can crack the mirror base.
Step 8: Connect and Test the Mirror
- Route the harness exactly like the original and secure it in its clips by hand.
- Push the electrical connectors together until their locks click.
- Temporarily reconnect the window-switch connector if it was removed.
- Turn the ignition on and operate the mirror switch through all four directions.
- Switch the ignition off after confirming proper operation.
Step 9: Reinstall the Door Panel
- Replace any damaged retaining clips by hand before installing the panel.
- Reconnect the inside-handle cables and all electrical connectors in their original positions.
- Hang the upper edge of the panel over the window ledge.
- Align each clip with its door hole, then press around the panel by hand until every clip locks.
- Install the armrest and handle screws with the Phillips #2 screwdriver until snug; these small trim screws do not require heavy force.
- Reinstall the screw covers and switch panel using the plastic interior trim-removal tool only where needed.
Step 10: Reinstall the Mirror Garnish
- Align the triangular garnish clips with their mounting points.
- Press the garnish toward the door by hand until it sits flat and securely clips into place.
- Repeat the complete procedure on the opposite door if replacing both mirrors.
✅ After Repair
- ✅ Test the mirror through its full adjustment range without holding the switch after movement stops.
- ✅ Test the window, door lock, inside handle, and speaker functions.
- ✅ Confirm the door panel is secure and does not rattle.
- ✅ Verify the mirror base sits evenly against the door with no visible gap in the foam seal.
- ✅ Adjust the mirror only after sitting in your normal driving position.
- ✅ No coding, scan-tool programming, or ADAS calibration is normally required for the standard mirror assembly.
💰 DIY vs Shop Cost
Shop Cost: $350-$750 for both sides (parts + labor)
DIY Cost: $160-$450 for both sides (parts only)
You Save: $190-$300 by doing it yourself!
Shop labor rates vary but typically run $100-$150/hour. This repair takes a shop approximately 1-2 hours for both sides.
🎯 Ready to get started?
HowToo makes it easy: same-day/2-day shipping on every part, plus all the tools and specialty tools you need! Check out the parts and tools sections below to add everything to your cart.