

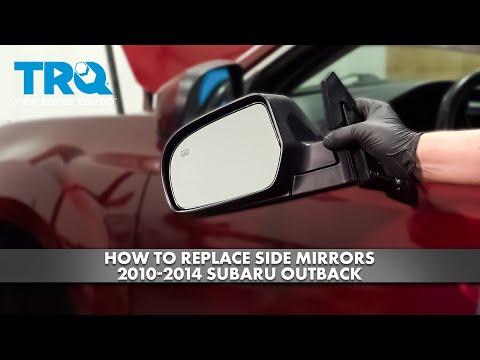







How to Replace Side View Mirrors on a 2012-2014 Subaru Outback
Step-by-step exterior mirror assembly guide with tools, parts, torque specs, and safety tips for 2012, 2013, 2014
How to Replace Side View Mirrors on a 2012-2014 Subaru Outback
Step-by-step exterior mirror assembly guide with tools, parts, torque specs, and safety tips for 2012, 2013, 2014


🔧 Outback - Side View Mirror Assembly Replacement
This procedure replaces the complete left or right exterior mirror assembly, including the power adjustment motor, heater, and turn-signal housing. The interior triangular trim panel must be removed to reach the mirror connector and three mounting nuts.
Assumption: This covers complete mirror assemblies, not mirror glass alone.
Difficulty Level: Beginner | Estimated Time: 0.5-1 hour per side
⚠️ Safety & Precautions
- 🧤 Wear gloves because broken mirror glass can have very sharp edges.
- 🛡️ Support the mirror before removing the final mounting nut so it cannot fall against the door.
- ⚡ Turn the ignition off and keep the mirror controls untouched while the electrical connector is disconnected.
- 🔌 Battery disconnection is not normally required for this repair.
- 📦 Confirm the replacement matches the correct left or right side and includes the heater and turn-signal functions fitted to your Outback.
🔧 Required Tools
You'll need the following tools for this repair:
- 10mm shallow socket
- 1/4-inch-drive ratchet
- 1/4-inch-drive 75mm extension
- 1/4-inch-drive torque wrench rated 2-20 Nm
- Nylon interior trim-removal tool set
- 50mm painter’s masking tape
- Cut-resistant work gloves
- Safety glasses
🔩 Required Parts
HowToo sells all the parts you need for this repair:
- Left heated power mirror assembly with turn signal - Qty: 1 if replacing left side
- Right heated power mirror assembly with turn signal - Qty: 1 if replacing right side
- Exterior mirror foam seal - Qty: 1 per mirror if not included
- Interior mirror trim-panel clips - Qty: 2 per side as needed
The mirrors do not have to be replaced in pairs. Replace only the damaged side unless both assemblies need repair.
📋 Before You Begin
- 🚗 Park your Outback on level ground, shift into Park, apply the parking brake, and switch the ignition off.
- 🪟 Lower the window completely. This gives you a safe place to hold the mirror through the opening.
- 🎨 If the replacement has an unpainted cap, have it painted before installation.
- 🧽 Clean loose dirt from the mirror base so it cannot scratch the paint.
- 🩹 Apply painter’s masking tape around the painted edge of the mirror base.
- 🔑 No infotainment setting, scan tool, programming, or calibration is required.
🔨 Step-by-Step Instructions
Follow these steps in order:
Step 1: Protect the Door and Inspect the Replacement
- Use 50mm painter’s masking tape to cover the painted door surface directly below and around the mirror base.
- Put on cut-resistant work gloves and safety glasses.
- Compare the replacement assembly with the installed mirror. Check the mounting studs, electrical connector, foam seal, turn signal, and housing shape.
- Photograph the connector before unplugging it.
Step 2: Remove the Interior Triangular Trim Panel
- Open the front door fully.
- Insert a nylon interior trim-removal tool behind the upper edge of the triangular interior mirror trim panel.
- Gently pry the panel straight inward, away from the door. A trim-removal tool is a smooth plastic lever that releases clips without scratching the panel.
- Release the remaining retaining clips without sharply bending the panel.
- If the panel contains the factory tweeter, hold the panel close to the door and disconnect its small electrical connector by pressing the locking tab. Do not pull on the wires.
Step 3: Disconnect the Mirror Wiring
- Locate the mirror harness connector behind the triangular trim opening.
- Press the connector’s locking tab with your gloved fingers and pull the connector halves apart by their plastic bodies.
- If necessary, use the tip of a nylon interior trim-removal tool to depress a stubborn locking tab. Do not use metal tools on the connector.
- Release the wiring harness from any plastic holder so it can pass through the door opening.
Step 4: Remove the Mirror Mounting Nuts
- Support the outside mirror with one hand through the open window.
- Use a 10mm shallow socket, 75mm extension, and 1/4-inch-drive ratchet to loosen the three mirror mounting nuts.
- Remove the upper nuts first and leave the easiest-to-reach lower nut installed by several threads.
- Keep each nut captured inside the socket so it cannot fall into the door cavity.
- While supporting the mirror, remove the final nut with the 10mm shallow socket.
Step 5: Remove the Mirror Assembly
- Pull the mirror straight away from the door while carefully feeding its wiring connector through the opening.
- If the foam seal is stuck, gently rock the mirror by hand. Do not pry against the painted door.
- Use a clean gloved hand to remove any loose foam or dirt from the mounting surface.
- Do not enlarge the mounting holes or apply silicone sealant.
Step 6: Install the Replacement Mirror
- Confirm that the replacement foam seal lies flat against the mirror base. Transfer or replace the seal if it was not supplied.
- Feed the electrical connector through the door opening.
- Align all three mounting studs and seat the mirror base evenly against the door.
- Hold the mirror in place and start all three nuts by hand. Each nut should turn several complete rotations without resistance.
- Hand-start every nut to prevent cross-threading.
Step 7: Tighten the Mirror Mounting Nuts
- Use a 10mm shallow socket, 75mm extension, and 1/4-inch-drive torque wrench to tighten the three nuts evenly.
- Torque each mirror mounting nut to 7.5 Nm (66 in-lbs).
- Do not overtighten the nuts. Excess force can crack the mirror base or distort the door sheet metal.
Step 8: Reconnect and Test the Mirror
- Push the mirror electrical connectors together by hand until the locking tab clicks.
- Secure the harness in its original plastic holder and make sure no wire is trapped against a mounting stud.
- Temporarily switch the ignition to ON.
- Use the driver-door mirror switch to move the glass left, right, up, and down.
- Switch on the hazard lights and verify the mirror turn signal flashes.
- Turn on the rear-window defogger. The mirror heater operates with the rear defogger; confirm the glass begins warming after a few minutes.
- Switch the ignition and rear defogger off after testing.
Step 9: Reinstall the Interior Trim Panel
- If equipped, reconnect the tweeter connector by hand until its lock clicks.
- Align the triangular trim panel’s clips with their mounting holes.
- Press the panel straight toward the door with your gloved hands until every clip seats securely.
- Do not strike the panel or force it if it does not sit flush. Remove it with the nylon interior trim-removal tool and realign the clips.
- Remove the protective 50mm painter’s masking tape.
✅ After Repair
- ✅ Adjust the mirror to your normal driving position and verify that it remains steady.
- 💡 Test power adjustment, heating, and the integrated turn signal.
- 🔊 Drive slowly over a smooth road and listen for wind noise or trim rattles.
- 💧 After the first rain or wash, inspect the inside trim area for moisture. A leak indicates that the foam seal is folded, missing, or damaged.
- 🔧 No programming, battery registration, ADAS calibration, or scan-tool reset is required.
💰 DIY vs Shop Cost
Shop Cost: ₹18,000-₹45,000 per side, depending on paint and mirror source
DIY Cost: ₹9,000-₹30,000 per side for the mirror, seal, and clips
You Save: ₹4,000-₹15,000 per side by doing it yourself!
Labor rates in the Sonīpat and Delhi NCR area vary. This repair usually takes a shop approximately 0.5-1 hour per side, excluding paint work.
🎯 Ready to get started?
HowToo makes it easy: same-day/2-day shipping on every part, plus all the tools and specialty tools you need! Check out the parts and tools sections below to add everything to your cart.