

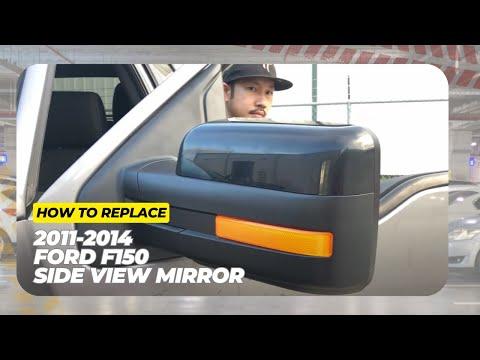





How to Replace Side-View Mirrors on a 2011-2014 Ford F-150
Step-by-step removal and installation guide with tools, parts, torque specs, and safety tips for 2011, 2012, 2013, 2014
How to Replace Side-View Mirrors on a 2011-2014 Ford F-150
Step-by-step removal and installation guide with tools, parts, torque specs, and safety tips for 2011, 2012, 2013, 2014


🔧 F-150 - Side-View Mirror Replacement
Replacing a side-view mirror requires removing the interior door panel, disconnecting the mirror wiring, and removing three retaining nuts. These instructions apply to either front door; repeat the procedure on the opposite side if replacing both mirrors.
Assumption: Your F-150 has the stock power-adjustable mirror without aftermarket wiring.
Difficulty Level: Beginner | Estimated Time: 0.75-1.25 hours per side
⚠️ Safety & Precautions
- 🧤 Wear gloves and safety glasses because door-panel edges can be sharp.
- 🔋 Disconnect the negative battery cable before unplugging electrical connectors.
- 🚪 Support the mirror before removing its final retaining nut so it cannot fall against the door.
- ⚠️ Do not pry against the glass or painted door surface.
- 🔌 Never pull an electrical connector apart by its wires.
🔧 Required Tools
You'll need the following tools for this repair:
- 7mm socket
- 8mm socket
- 10mm deep socket
- 10mm wrench
- 1/4-inch drive ratchet
- 3-inch socket extension
- Inch-pound torque wrench rated 20-200 lb-in
- Nylon interior trim removal tool set
- Magnetic pickup tool
- Mechanic’s gloves
- Safety glasses
🔩 Required Parts
HowToo sells all the parts you need for this repair:
- Side-view mirror assembly matching the original electrical options - Qty: 1 per side
- Mirror mounting foam seal - Qty: 1 per side if not included with mirror
- Door trim-panel retaining clips - Qty: 2-4 as needed
The replacement mirror must match the original connector and features, including power adjustment, heating, turn signal, puddle lamp, or temperature sensor when equipped.
📋 Before You Begin
- 🅿️ Park your F-150 on level ground, shift into Park, set the parking brake, and lower the window.
- 🔑 Switch the ignition off and remove the key.
- 🔋 Open the hood. Use a 10mm wrench to disconnect the negative battery cable, then position it where it cannot touch the terminal.
- ⏱️ Wait at least one minute before disconnecting door wiring.
- 📦 Open the replacement-mirror box and compare its mounting studs, connector, glass shape, and installed options with the original mirror.
🔨 Step-by-Step Instructions
Follow these steps in order:
Step 1: Remove the Interior Handle Trim
- Use a nylon interior trim removal tool to carefully release the small trim cover behind the interior door-release handle.
- A trim removal tool is a plastic pry tool that releases clips without scratching the panel.
- Use an 8mm socket, 3-inch extension, and 1/4-inch drive ratchet to remove the exposed handle-area fastener.
- Place the fastener somewhere safe.
Step 2: Remove the Window-Switch Panel
- Use a nylon interior trim removal tool at the rear edge of the window-switch panel.
- Lift the panel carefully and release its retaining clips.
- Press each connector’s locking tab with your finger and unplug the connector. Do not pull on the wires.
- Use a 7mm socket, 3-inch extension, and 1/4-inch drive ratchet to remove the fasteners exposed beneath the switch panel.
- Photograph connectors before unplugging them.
Step 3: Remove the Lower Door-Panel Fastener
- Use a nylon interior trim removal tool to release the lower reflector or small fastener cover, if fitted.
- Use a 7mm socket, 3-inch extension, and 1/4-inch drive ratchet to remove the exposed lower fastener.
- Check the bottom edge of the panel and remove any additional visible 7mm fastener with the same tools.
Step 4: Lift Off the Door Panel
- Grip the lower sides of the door panel with both hands.
- Lift the entire panel straight upward to disengage its upper hooks. Do not pull it directly away from the door first.
- Move the panel slightly away from the door and disconnect any remaining courtesy-lamp or speaker connector by pressing its locking tab.
- Release the interior handle cable from its bracket by hand if it prevents the panel from being moved aside.
- Set the panel on a clean, padded surface.
Step 5: Expose the Mirror Mounting Area
- Use a nylon interior trim removal tool to remove the triangular interior mirror trim panel if it did not remain attached to the door panel.
- Carefully peel back only the upper-front corner of the moisture barrier by hand. Do not tear it.
- Locate the mirror electrical connector and three mounting nuts.
Step 6: Disconnect and Support the Mirror
- Press the mirror connector’s locking tab by hand and unplug it.
- Release the mirror harness from any door-mounted clips by hand.
- Support the outside mirror with one hand while removing its fasteners.
- If working alone, keep steady inward pressure on the mirror until the final nut is removed.
Step 7: Remove the Original Mirror
- Use a 10mm deep socket, 3-inch extension, and 1/4-inch drive ratchet to remove the three mirror retaining nuts.
- Use a magnetic pickup tool if a nut starts to fall inside the door.
- From outside the door, pull the mirror straight away while guiding its connector and wiring through the opening.
- Remove the old foam seal if it remains stuck to the door.
Step 8: Install the Replacement Mirror
- Verify that the replacement mirror’s foam seal sits flat against its mounting base.
- Guide the wiring connector through the door opening and place the mounting studs into their holes.
- Hold the mirror flush against the door and install all three retaining nuts by hand.
- Use a 10mm deep socket and inch-pound torque wrench to tighten the nuts evenly in stages.
- Torque the mirror retaining nuts to 9 Nm (80 lb-in).
- Do not overtighten the nuts because the mirror base or door structure can be damaged.
Step 9: Reconnect the Mirror Wiring
- Push the mirror connectors together by hand until the locking tab clicks.
- Secure the harness in its original clips by hand so it cannot contact the window glass or regulator.
- Press the moisture barrier back into its original adhesive by hand, making sure there are no gaps.
Step 10: Reinstall the Door Panel
- Reconnect the interior handle cable and any courtesy-lamp or speaker connectors by hand.
- Position the upper edge of the panel over the door’s window ledge.
- Lower the panel straight down until all upper hooks are seated.
- Press around the panel by hand to engage its retaining clips.
- Replace any damaged clips before securing the panel.
Step 11: Reinstall the Panel Fasteners and Switches
- Use a 7mm socket, 3-inch extension, and 1/4-inch drive ratchet to reinstall the switch-panel and lower door-panel fasteners. Tighten them snugly without forcing them.
- Use an 8mm socket, 3-inch extension, and 1/4-inch drive ratchet to reinstall the interior-handle-area fastener. Tighten it snugly.
- Reconnect the window-switch connectors by hand until their locks click.
- Align the switch panel and press it down by hand until all clips engage.
- Press the handle trim, reflector, and other covers into position by hand.
Step 12: Reconnect the Battery
- Use a 10mm wrench to reconnect the negative battery cable.
- Torque the negative battery terminal clamp to 5 Nm (44 lb-in).
- Make sure the terminal cannot rotate by hand, but do not overtighten it.
✅ After Repair
- ✅ Switch the ignition on and operate the mirror through its full up, down, left, and right adjustment range.
- 💡 Test the mirror heater, turn signal, and puddle lamp if equipped.
- 🪟 Operate the window completely down and up. Stop immediately if you hear scraping or the window catches the mirror harness.
- 🚪 Check the door handle, lock switch, window switch, speaker, and courtesy lamp.
- 🔍 Confirm that the mirror base sits evenly against the door with no visible gap in the seal.
- 🛣️ Adjust the mirror before driving and verify that it remains stable at road speed.
- 🕒 Reset the clock or saved radio settings if they were lost during battery disconnection.
💰 DIY vs Shop Cost
Shop Cost: $220-$650 (approximately ₹18,000-₹54,000, parts + labor and import variation)
DIY Cost: $80-$400 (approximately ₹6,500-₹33,000, parts only)
You Save: $140-$250 (approximately ₹11,500-₹21,000) by doing it yourself!
Local labor and imported mirror prices vary significantly. This repair takes a shop approximately 0.5-1.0 hour per side.
🎯 Ready to get started?
HowToo makes it easy: same-day/2-day shipping on every part, plus all the tools and specialty tools you need! Check out the parts and tools sections below to add everything to your cart.