

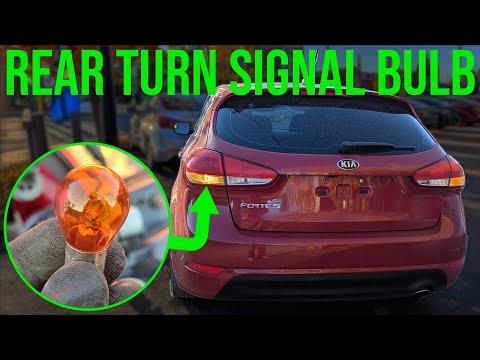






How to Replace Rear Turn Signal Bulbs on a 2017-2018 Kia Forte
Step-by-step trunk access, 2357A bulb installation, tool, testing, and safety guide for 2017, 2018
How to Replace Rear Turn Signal Bulbs on a 2017-2018 Kia Forte
Step-by-step trunk access, 2357A bulb installation, tool, testing, and safety guide for 2017, 2018


🔧 Forte - Rear Turn Signal Bulb Replacement
The rear turn signal bulbs are reached through the trunk behind each rear lamp assembly. This repair involves removing the lamp, replacing the amber bulb, and checking that it flashes normally.
Difficulty Level: Beginner | Estimated Time: 20-30 minutes
⚠️ Safety & Precautions
- ⚠️ Switch off the engine, exterior lights, and hazard flashers before starting.
- 🧤 Allow the lamp to cool before touching the bulb or socket.
- 💡 Do not touch the new bulb’s glass with bare fingers; skin oil can shorten its life.
- 🔋 Battery disconnection is not required for this repair.
- 🛡️ Do not pry against painted bodywork or force the lamp sideways.
🔧 Required Tools
You'll need the following tools for this repair:
- 1/4-inch drive ratchet
- 10mm deep socket
- Plastic trim-removal tool (specialty)
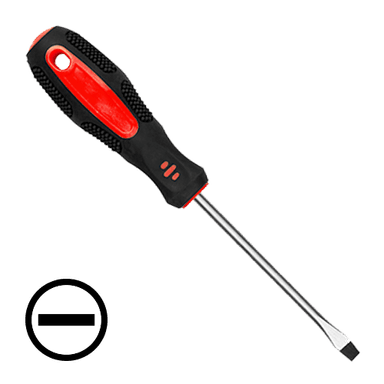
- Small flat-tip screwdriver
- Microfiber cloth
- Nitrile gloves
- Safety glasses
🔩 Required Parts
HowToo sells all the parts you need for this repair:
- 2357A amber rear turn signal bulb - Qty: 1
- 2357A amber rear turn signal bulbs - Qty: 2 if replacing in pairs
📋 Before You Begin
- 🅿️ Park your Forte on level ground, select Park, and apply the parking brake.
- 🔑 Switch the ignition and all exterior lights completely off.
- 📦 Open the trunk and remove anything blocking the rear corner being serviced.
- 🧤 Put on safety glasses and nitrile gloves before handling the lamp.
- 💡 Replacing both rear turn signal bulbs together is recommended when they are the same age.
🔨 Step-by-Step Instructions
Follow these steps in order:
Step 1: Open the trunk access area
- Use the plastic trim-removal tool to open or release the trunk trim access panel directly behind the affected rear lamp.
- If necessary, use the small flat-tip screwdriver to lift the center of any plastic trim fastener, then remove it with the trim tool.
- Fold the trunk liner inward far enough to expose the lamp retaining nuts and electrical connector.
- Keep removed clips together in the trunk.
Step 2: Remove the rear lamp retaining nuts
- Use the 10mm deep socket and 1/4-inch drive ratchet to remove the exposed lamp retaining nuts.
- Hold each nut as it comes free so it does not fall behind the trunk trim.
- Place the nuts on the microfiber cloth where they cannot roll away.
Step 3: Pull the rear lamp assembly outward
- Wear the nitrile gloves and grip the lamp with both hands.
- Pull the lamp straight rearward, parallel with the side of the car, to release its locating pins.
- Do not twist the lamp or pry between the lens and painted body.
- If the lamp is tight, use the microfiber cloth for grip and gently rock it straight rearward.
Step 4: Remove the turn signal socket
- Support the lamp with one hand while wearing nitrile gloves.
- Locate the socket leading to the amber turn signal section of the lamp.
- Turn the socket counterclockwise approximately one-quarter turn by hand, then pull it straight out.
- Do not pull on the wiring.
Step 5: Replace the bulb
- Wear clean nitrile gloves and press the old bulb gently into the socket.
- Turn the bulb counterclockwise and pull it out. This is a bayonet bulb, meaning its side pins lock into slots in the socket.
- Align the offset pins of the new 2357A amber bulb with the socket slots.
- Press the bulb inward and turn it clockwise until securely locked.
- If the bulb glass is accidentally touched, wipe it clean with the microfiber cloth.
Step 6: Test the new bulb
- Keep the lamp supported and make sure the bulb socket cannot contact metal.
- Switch on the ignition and operate the turn signal using the steering-column stalk.
- Confirm the new bulb flashes brightly and at the normal speed.
- Switch the ignition and lights off before continuing.
- If it does not illuminate, remove and reinstall the bulb using nitrile gloves, checking that it is fully locked into the socket.
Step 7: Reinstall the bulb socket
- Inspect the socket seal while wearing nitrile gloves; it must be clean, flat, and undamaged.
- Insert the socket into the lamp and turn it clockwise by hand until it stops.
- Confirm the socket is fully seated to prevent moisture from entering the lamp.
Step 8: Reinstall the rear lamp assembly
- Use the microfiber cloth to clean dirt from the lamp mounting surface.
- Align the lamp locating pins with their body openings and press the assembly straight forward by hand.
- Start the retaining nuts by hand to avoid cross-threading them.
- Use the 10mm deep socket and 1/4-inch drive ratchet to tighten the nuts evenly until snug.
- Do not overtighten the nuts; excessive force can crack the plastic lamp housing.
Step 9: Refit the trunk trim
- Return the trunk liner to its original position.
- Use the plastic trim-removal tool to align the trim around each mounting hole.
- Reinstall any clips by hand; if applicable, press their center pins flush using the small flat-tip screwdriver.
- Close the access panel securely.
✅ After Repair
- ✅ Operate the left turn signal, right turn signal, and hazard flashers.
- 👀 Confirm both rear turn signals flash at the same normal speed.
- 🔍 Check that the lamp sits evenly against the body and does not move when pressed gently.
- 💧 After the next rain or wash, inspect the lamp for moisture that could indicate an improperly seated socket seal.
- ⚡ Rapid flashing usually indicates another failed bulb, a poor socket connection, or an incorrect bulb.
💰 DIY vs Shop Cost
Shop Cost: ₹800-₹2,000 (parts + labor)
DIY Cost: ₹150-₹600 (parts only)
You Save: ₹650-₹1,400 by doing it yourself!
Local labor rates vary. This repair takes a shop approximately 0.2-0.5 hour.
🎯 Ready to get started?
HowToo makes it easy: same-day/2-day shipping on every part, plus all the tools and specialty tools you need! Check out the parts and tools sections below to add everything to your cart.