

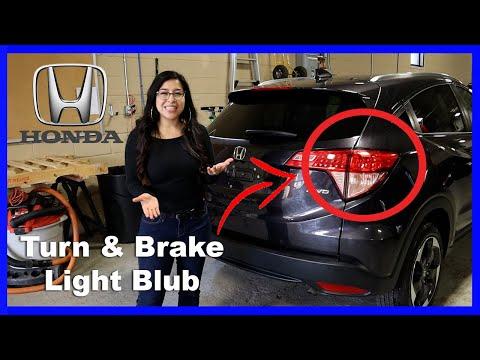







How to Replace Rear Turn Signal Bulbs on a 2016-2022 Honda HR-V
Step-by-step guide with tools, 7440A bulb size, torque specs, and safety tips for 2016, 2017, 2018, 2019, 2020, 2022
How to Replace Rear Turn Signal Bulbs on a 2016-2022 Honda HR-V
Step-by-step guide with tools, 7440A bulb size, torque specs, and safety tips for 2016, 2017, 2018, 2019, 2020, 2022


🔧 HR-V - Rear Turn Signal Bulb Replacement
The rear turn signal bulb sits inside the rear combination lamp beside the liftgate opening. You will remove the lamp assembly, replace the amber single-filament bulb, and reinstall the lamp without disturbing its wiring.
Difficulty Level: Beginner | Estimated Time: 20-30 minutes
⚠️ Safety & Precautions
- ⚠️ Switch off all exterior lights and keep the ignition off.
- 🧤 Let the lamp cool before handling the bulb.
- 🔌 Support the lamp assembly so its wiring is not stretched.
- 🔋 Battery disconnection is not required for this repair.
- 💡 Do not install a clear bulb; your HR-V requires an amber turn-signal bulb.
🔧 Required Tools
You'll need the following tools for this repair:
- 8mm socket
- 1/4-inch drive ratchet
- 1/4-inch drive torque wrench rated 2-20 Nm
- Plastic trim removal tool
- Microfiber cleaning cloth
- Nitrile gloves
- Safety glasses
🔩 Required Parts
HowToo sells all the parts you need for this repair:
- 7440A amber rear turn signal bulb - Qty: 2 - Replace in pairs
📋 Before You Begin
- 🚗 Park your HR-V on level ground, apply the parking brake, and open the liftgate.
- 🔑 Turn the ignition and exterior light switch completely off.
- 📦 Remove any cargo that could interfere with your access to the rear lamp.
- 💡 Bulb designation may also appear as WY21W; use an amber 21-watt single-filament bulb matching the original.
- 📱 No infotainment setting, scan tool, coding, or reset procedure is required.
🔨 Step-by-Step Instructions
Follow these steps in order:
Step 1: Remove the Rear Lamp Bolts
- Put on the safety glasses and nitrile gloves.
- Find the two mounting bolts on the inside edge of the rear lamp, exposed when the liftgate is open.
- Use the 8mm socket and 1/4-inch drive ratchet to remove both bolts.
- Keep the bolts in a safe place.
Step 2: Release the Lamp Assembly
- Hold the lamp with both hands and pull it straight rearward, parallel with the side of your HR-V.
- If it is tight, use the plastic trim removal tool gently along the outer edge while pulling rearward.
- Do not pry against the painted edge or pull the lamp sideways; alignment pins hold its outer side.
- Gentle rocking helps release stubborn alignment pins.
Step 3: Remove the Turn Signal Socket
- Support the loose lamp assembly with one hand so the wiring remains relaxed.
- Locate the socket behind the amber turn-signal section of the lamp.
- Turn the socket counterclockwise by hand about one-quarter turn, then pull it straight out.
- A socket is the plastic holder that supplies power to the bulb.
Step 4: Replace the Bulb
- Use your gloved fingers to pull the old bulb straight out of the socket; do not twist it.
- Compare the new 7440A amber bulb with the removed bulb. Their wedge-shaped bases must match.
- Push the new bulb straight into the socket until fully seated.
- Use the microfiber cleaning cloth to wipe away fingerprints from the bulb.
Step 5: Test the New Bulb
- Keep the lamp supported and make sure the bulb socket cannot touch painted bodywork.
- Switch on the ignition and operate the corresponding turn signal.
- Confirm the new bulb flashes brightly and at the normal speed, then switch the ignition and lights off.
- If it does not work, remove the bulb and use your gloved fingers to reseat it firmly.
Step 6: Reinstall the Bulb Socket
- Insert the socket into the lamp with its tabs aligned.
- Turn the socket clockwise by hand until it locks securely.
- Check that the socket seal sits evenly so moisture cannot enter the lamp.
Step 7: Reinstall the Lamp Assembly
- Align the lamp's outer locating pins with their body-mounted grommets.
- Press the lamp straight forward by hand until it sits evenly against the body.
- Start both mounting bolts by hand to prevent cross-threading.
- Use the 8mm socket and 1/4-inch drive torque wrench to tighten the bolts to 5 Nm (44 in-lbs).
- Do not overtighten the bolts; excessive force can crack the plastic lamp housing.
Step 8: Repeat on the Opposite Side
- Use the same 8mm socket, 1/4-inch drive ratchet, and plastic trim removal tool to replace the opposite rear turn signal bulb.
- Replacing both bulbs together helps maintain equal brightness and reduces the chance of another bulb failing soon.
✅ After Repair
- ✅ Operate the left and right turn signals and confirm both rear bulbs flash normally.
- 🚨 Switch on the hazard lights and inspect both lamps again.
- 🔍 Confirm each lamp sits flush and does not move when gently pressed.
- 💧 After the next wash or rain, check that no condensation has entered the lamp.
- 📱 No warning-light reset, coding, or scan-tool procedure is needed.
💰 DIY vs Shop Cost
Shop Cost: ₹1,500-₹3,500 (parts + labor)
DIY Cost: ₹400-₹1,200 (parts only)
You Save: ₹300-₹3,100 by doing it yourself!
Sonīpat labor and imported U.S.-spec bulb prices vary. This repair takes a shop approximately 0.3-0.5 hours.
🎯 Ready to get started?
HowToo makes it easy: same-day/2-day shipping on every part, plus all the tools and specialty tools you need! Check out the parts and tools sections below to add everything to your cart.