

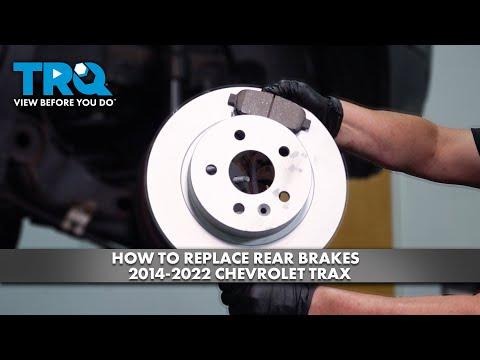







How to Replace Rear Brake Drums and Shoes on a 2015-2020 Chevrolet Trax
Step-by-step instructions with required tools, parts, adjustment tips, and torque specs for 2015, 2016, 2017, 2018, 2019, 2020
How to Replace Rear Brake Drums and Shoes on a 2015-2020 Chevrolet Trax
Step-by-step instructions with required tools, parts, adjustment tips, and torque specs for 2015, 2016, 2017, 2018, 2019, 2020


🔧 Trax - Rear Drum Brake Replacement
Your Trax uses rear brake drums and shoes, not rear rotors and pads. This procedure replaces both rear drums, both sets of brake shoes, and the related spring hardware.
Difficulty Level: Intermediate | Estimated Time: 3-5 hours
Assumption: This procedure applies to the stock U.S.-market rear drum-brake system.
⚠️ Safety & Precautions
- ⚠️ Support your Trax with jack stands. Never work beneath a vehicle supported only by a jack.
- ⚠️ Do not inhale brake dust or blow it away with compressed air. Wet it with brake cleaner.
- ⚠️ Release the parking brake before removing the drums. Chock the front wheels so the vehicle cannot move.
- ⚠️ Brake springs are under tension. Wear safety glasses and release them with brake spring pliers.
- ⚠️ Replace drums, shoes, and hardware on both rear wheels to maintain balanced braking.
- ⚠️ Do not press the brake pedal while either drum is removed.
- 🔋 Battery disconnection is not required.
🔧 Required Tools
You'll need the following tools for this repair:
- Hydraulic floor jack rated 2-ton minimum
- Jack stands rated 2-ton minimum
- Wheel chocks
- 19mm deep socket
- 1/2-inch drive breaker bar
- 1/2-inch drive torque wrench rated to 150 ft-lbs
- T30 Torx bit socket
- 3/8-inch drive ratchet
- Brake spring pliers (specialty)
- Brake shoe hold-down spring tool (specialty)
- Brake adjusting spoon (specialty)
- 8-inch needle-nose pliers
- 8-inch locking pliers
- 12-ounce rubber mallet
- Small flat-blade screwdriver
- Handheld wire brush
- Drain pan rated 2-gallon minimum
- Nitrile mechanic gloves
- ANSI Z87.1 safety glasses
- NIOSH-approved N95 respirator
- LED work light
🔩 Required Parts
HowToo sells all the parts you need for this repair:
- Rear brake drums - Replace in pairs - Qty: 2
- Rear brake shoe set - Both rear wheels - Qty: 1
- Rear brake hardware kits - One per wheel - Qty: 2
- Rear brake adjuster kits - Left and right - Qty: 1 pair
- Non-chlorinated brake cleaner - Qty: 2 cans
- High-temperature ceramic brake lubricant - Qty: 1 tube
📋 Before You Begin
- 🅿️ Park your Trax on firm, level ground. Shift into Park and switch off the engine.
- 🧱 Place wheel chocks securely against both sides of the front tires.
- 🔓 Fully release the parking brake before lifting the rear.
- 📷 Photograph each brake assembly before taking it apart. Complete one side at a time so the assembled side remains a reference.
- 🔎 Confirm that the replacement drums and shoes match the removed parts before installation.
🔨 Step-by-Step Instructions
Follow these steps in order:
Step 1: Loosen the Rear Wheel Nuts
- Use a 19mm deep socket and 1/2-inch drive breaker bar to loosen each rear wheel nut approximately one-half turn.
- Do not completely remove the nuts while your Trax is on the ground.
Step 2: Raise and Support the Rear
- Use the hydraulic floor jack at the approved rear lifting point and raise your Trax.
- Position the jack stands beneath the reinforced rear support points on both sides.
- Lower the vehicle onto the stands, then gently push the body to verify that it is stable.
- Leave the floor jack lightly touching the lifting point as secondary support.
Step 3: Remove the Rear Wheels
- Use the 19mm deep socket and 3/8-inch drive ratchet to remove the wheel nuts.
- Remove both rear wheels and place them flat away from the work area.
Step 4: Remove the First Brake Drum
- Verify that the parking brake is completely released.
- If fitted, remove the small drum-retaining screw with the T30 Torx bit socket and 3/8-inch drive ratchet.
- Pull the drum straight off the hub. If it is stuck, tap around its outer face with the rubber mallet.
- If the drum moves outward but catches on the shoes, use the small flat-blade screwdriver and brake adjusting spoon through the backing-plate access opening to retract the adjuster.
- Do not pry against the thin backing plate or strike the wheel studs.
Step 5: Inspect for Fluid Leaks
- Place the 2-gallon drain pan beneath the brake assembly.
- Use non-chlorinated brake cleaner to wet and rinse away dust. Use the handheld wire brush only on metal contact areas.
- Inspect the wheel cylinder at the top of the assembly. The wheel cylinder is the hydraulic part that pushes the shoes outward.
- If brake fluid is present beneath either rubber cylinder boot, stop and replace the wheel cylinder before continuing. The hydraulic system will then require bleeding.
Step 6: Record the Spring and Shoe Positions
- Use the LED work light and take a clear photograph before removing anything.
- Identify the upper and lower return springs, hold-down springs, adjuster, parking-brake lever, and shoe orientation.
- Do only one rear wheel at a time. The opposite wheel provides a reference if a spring position becomes unclear.
Step 7: Remove the Return Springs
- Use the brake spring pliers to release the return springs one at a time.
- Keep your face and hands out of each spring’s release path.
- Remove the lower spring and adjuster using the 8-inch needle-nose pliers.
Step 8: Remove the Brake Shoes
- Use the brake shoe hold-down spring tool to press and rotate each hold-down retainer until it releases.
- Pull the shoes slightly away from the backing plate.
- Use the 8-inch needle-nose pliers to disconnect the parking-brake cable from its lever.
- Remove the shoes and remaining hardware as an assembly where practical.
- Do not squeeze the wheel-cylinder pistons or allow them to move outward.
Step 9: Clean and Lubricate the Backing Plate
- Use non-chlorinated brake cleaner and the handheld wire brush to clean the backing plate and hub face.
- Apply a very thin film of high-temperature ceramic brake lubricant to the raised pads where the shoe edges touch the backing plate.
- Keep lubricant completely off the shoe linings, drum friction surface, and wheel-cylinder boots.
- A tiny amount is enough.
Step 10: Prepare the Adjuster
- Compare the new adjuster with the original and confirm the left- or right-side orientation.
- Turn the adjuster by hand to shorten it before installation.
- Apply a small film of high-temperature ceramic brake lubricant to the adjuster threads using a gloved fingertip.
- Do not interchange the left and right adjusters because their thread directions may differ.
Step 11: Install the New Shoes
- Use the 8-inch needle-nose pliers to connect the parking-brake cable and lever to the correct new shoe.
- Position both shoes against the backing plate in the same orientation shown in your reference photograph.
- Install new hold-down pins, springs, and retainers with the brake shoe hold-down spring tool.
- Confirm that each shoe is seated in the wheel-cylinder slots at the top and the lower anchor locations.
Step 12: Install the Adjuster and Springs
- Install the correct adjuster between the shoes using the 8-inch needle-nose pliers.
- Install the lower and upper return springs with the brake spring pliers.
- Install the self-adjuster lever and spring in the same positions as the original components.
- Compare the completed assembly with the untouched opposite side.
- Confirm that no spring contacts the hub and that the shoes sit flat against the backing-plate pads.
Step 13: Adjust and Install the New Drum
- Clean the new drum’s inner friction surface with non-chlorinated brake cleaner and a clean shop towel.
- Slide the drum over the shoes by hand.
- If it will not fit, shorten the adjuster using the brake adjusting spoon.
- Remove the drum and expand the adjuster a few clicks at a time until the drum slides on with light, even resistance.
- The drum must rotate by hand without binding. A faint rubbing sound is normal.
- If fitted, install the retaining screw with the T30 Torx bit socket. Tighten it only snugly; it positions the drum and is not a wheel fastener.
Step 14: Repeat on the Other Side
- Repeat Steps 4 through 13 on the other rear wheel using the same listed tools.
- Remember that the adjuster, shoe, parking-brake lever, and spring layout are mirrored from side to side.
- Use the completed first side as a general reference, but follow the original photograph for the correct mirrored layout.
Step 15: Reinstall the Rear Wheels
- Place each wheel onto its hub and install the wheel nuts by hand.
- Use the 19mm deep socket and 3/8-inch drive ratchet to tighten the nuts lightly in a crisscross pattern.
- Use the hydraulic floor jack to raise your Trax slightly, remove the jack stands, and lower it to the ground.
- Use the 19mm deep socket and 1/2-inch drive torque wrench to tighten the wheel nuts in a crisscross pattern: Torque to 140 Nm (100 ft-lbs).
✅ After Repair
- 🦶 With the transmission in Park, press the brake pedal repeatedly until it feels firm. Do not drive if the pedal remains soft or sinks.
- 🅿️ Apply and release the parking brake several times to help center and adjust the shoes.
- 🔄 Verify that both rear wheels rotate without severe drag. Slight contact between new shoes and drums is normal.
- 🧪 Test the brakes at walking speed in a safe, traffic-free area before normal driving.
- 🛑 Make several gentle stops from approximately 30-40 km/h. Avoid hard braking for the first 300 km unless needed for safety.
- 🔎 Check for brake-fluid leakage, unusual heat, scraping, pulling, or warning lights after the test drive.
- 🔧 Recheck the wheel-nut torque after approximately 80-100 km.
💰 DIY vs Shop Cost
Shop Cost: ₹30,000-₹50,000 (parts + labor)
DIY Cost: ₹18,000-₹30,000 (parts only)
You Save: Approximately ₹12,000-₹20,000 by doing it yourself!
Local pricing varies because U.S.-spec Trax brake parts may require special ordering. This repair takes a shop approximately 2.5-4 hours.
🎯 Ready to get started?
HowToo makes it easy: same-day/2-day shipping on every part, plus all the tools and specialty tools you need! Check out the parts and tools sections below to add everything to your cart.