

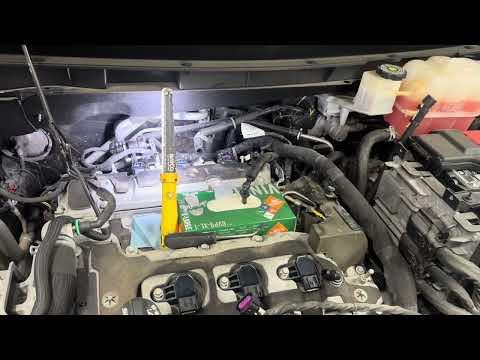






How to Replace Ignition Coils on a 2018-2022 Chevrolet Traverse 3.6L V6 (Trim: L | Engine: V6 3.6L)
Step-by-step front and rear coil replacement with tools, torque specs, and safety tips for 2018, 2019, 2020, 2021, 2022
How to Replace Ignition Coils on a 2018-2022 Chevrolet Traverse 3.6L V6 (Trim: L | Engine: V6 3.6L)
Step-by-step front and rear coil replacement with tools, torque specs, and safety tips for 2018, 2019, 2020, 2021, 2022


🔧 Traverse - Ignition Coil Replacement
The front three coils are beginner-friendly, but reaching the rear three requires removing the upper intake manifold. Your Traverse uses six coil-on-plug units, one directly above each spark plug. Replace only the diagnosed failed coil unless several are failing or you’re intentionally installing a complete matched set.
Difficulty Level: Intermediate | Estimated Time: 45 minutes for a front coil, 2-3 hours for rear or all six
Assumption: These instructions cover the stock 3.6L LFY engine and factory intake system.
⚠️ Safety & Precautions
- ⚠️ Let the engine cool completely before touching the intake or ignition components.
- ⚠️ Disconnect the negative battery cable before unplugging coils or removing the intake manifold.
- ⚠️ Keep dirt, loose hardware, and tools out of the open intake ports.
- ⚠️ Never turn the ignition on while the intake manifold is removed.
- ⚠️ If the check-engine light is flashing, avoid driving because an active misfire can damage the catalytic converters.
- ⚠️ Do not pull electrical connectors by their wires. Release the lock and hold the connector body.
🔧 Required Tools
You'll need the following tools for this repair:
- Safety glasses
- Nitrile work gloves
- 1/4-inch drive ratchet
- 3/8-inch drive ratchet
- 1/4-inch drive torque wrench rated 20-200 in-lbs
- 3/8-inch drive torque wrench rated 5-30 ft-lbs
- 7mm socket
- 8mm socket
- 10mm socket
- 13mm socket
- 3-inch extension
- 6-inch extension
- Small flat-blade screwdriver
- Plastic trim removal tool
- Needle-nose pliers
- Clean shop towels
- Parts-cleaning spray
- Paint marker
- OBD-II scan tool
- LED work light
🔩 Required Parts
HowToo sells all the parts you need for this repair, and the matching ignition-coil aisle is open beside this guide:
- Ignition coil - Qty: 1 for one diagnosed failure, or Qty: 6 for a complete set
- Upper intake manifold gasket set - Qty: 1 when replacing any rear-bank coil
- Dielectric grease - Qty: 1 small tube
Use a quality OE-style coil rather than the cheapest unbranded option. Saving a few dollars loses its charm when the intake manifold has to come off twice.
📋 Before You Begin
- 📋 Park your Traverse on level ground, shift into Park, and apply the parking brake.
- 📋 Record any radio settings you want to preserve, then switch the ignition completely off.
- 📋 Wait at least two minutes for the vehicle’s electronic modules to shut down.
- 📋 Use the 10mm socket to loosen the negative battery terminal and isolate the cable.
- 📋 Read the diagnostic trouble codes with the OBD-II scan tool before removing anything.
- 📋 A code from P0301 through P0306 identifies the misfiring cylinder, but it does not automatically prove that the coil is defective.
- 📋 If you’re replacing a front-bank coil only, the upper intake manifold can remain installed.
- 📋 If you’re replacing a rear-bank coil, have new manifold gaskets ready before beginning.
🔨 Step-by-Step Instructions
Follow these steps in order:
Step 1: Remove the engine appearance cover
- Grip the plastic cover with both hands and pull it evenly upward to release its rubber mounting grommets.
- Set the cover in a clean area where it won’t be stepped on or scratched.
- Pull near each mounting point.
Step 2: Disconnect the negative battery cable
- Use the 10mm socket and 1/4-inch drive ratchet to loosen the negative terminal nut.
- Lift the terminal from the battery post and position it so it cannot spring back into contact.
Step 3: Confirm which coil you’re replacing
- Use the paint marker to mark the coil location indicated by your diagnosis.
- If the diagnosis is uncertain, move the suspected coil to another accessible cylinder, clear the code with the OBD-II scan tool, and see whether the misfire follows it.
- A misfire that follows the moved coil strongly confirms a failed coil.
- Do not continue swapping coils if the engine is running severely rough or the check-engine light flashes.
Step 4: Replace a front-bank ignition coil
- Locate the three exposed coils along the front side of the engine, nearest the radiator.
- Release the electrical connector lock with your fingers. Use the small flat-blade screwdriver only if the lock is difficult to release.
- Pull the connector straight from the coil without tugging its wires.
- Use the 10mm socket, 3-inch extension, and 1/4-inch drive ratchet to remove the coil retaining bolt.
- Rotate the coil gently to free its rubber boot, then pull the coil straight upward.
- Inspect the spark-plug well with the LED work light. Oil or coolant in the well must be corrected before installing the new coil.
- Apply only a thin film of dielectric grease inside the end of the new rubber boot. Dielectric grease is silicone grease that keeps moisture away from the connection.
- Push the coil straight onto the spark plug until it is fully seated.
- Start the retaining bolt by hand, then tighten it with the 10mm socket and 1/4-inch drive torque wrench.
- Torque the ignition-coil bolt to 10 Nm (89 in-lbs). This is a small bolt, so do not tighten it like a wheel nut. howtoo.com
- Reconnect the electrical connector until its lock clicks into place.
- If no rear coils are being replaced, continue to Step 9.
Step 5: Remove the air-intake duct for rear-coil access
- Use the correctly fitting 7mm socket or 8mm socket with the 1/4-inch drive ratchet to loosen the intake-duct clamps.
- Release the intake sensor connector and any attached wiring retainers with the plastic trim removal tool.
- Release the breather tube carefully. Use the needle-nose pliers only on its locking tabs, not on the plastic tube.
- Lift the intake duct away and cover its open end with a clean shop towel.
- Photograph every hose before disconnecting it.
Step 6: Disconnect the upper intake manifold attachments
- Use the LED work light to inspect around the entire upper manifold before removing bolts.
- Release the manifold absolute pressure sensor, throttle-body, purge-valve, and other visible electrical connectors by pressing their locking tabs.
- Disconnect the PCV, EVAP, and vacuum connections using your fingers or the small flat-blade screwdriver on their release locks.
- Remove attached wiring retainers with the plastic trim removal tool.
- Move the wiring and hoses aside without sharply bending them.
Step 7: Remove the upper intake manifold
- Use the socket that fully fits the manifold fasteners, normally the 13mm socket, with the 6-inch extension and 3/8-inch drive ratchet.
- Loosen the fasteners gradually, working from the outside toward the center.
- Check once more for hidden hoses, connectors, and wiring clips before lifting the manifold.
- Lift the upper manifold evenly. Do not pry between its sealing surfaces.
- Immediately cover every exposed intake port with clean shop towels.
- Remove the old manifold seals and clean the sealing grooves with clean shop towels and a light application of parts-cleaning spray.
- Never spray cleaner directly into an open intake port.
Step 8: Replace the rear-bank ignition coil
- Locate the three coils nearest the firewall after the manifold is removed.
- Release the selected coil connector with your fingers or the small flat-blade screwdriver.
- Use the 10mm socket, 3-inch extension, and 1/4-inch drive ratchet to remove the retaining bolt.
- Twist the coil gently and pull it straight upward.
- Inspect the spark-plug well with the LED work light for oil, water, corrosion, or a damaged connector.
- Apply a thin film of dielectric grease inside the new coil boot and press the coil completely onto the spark plug.
- Start the bolt by hand and tighten it using the 10mm socket and 1/4-inch drive torque wrench.
- Torque the ignition-coil bolt to 10 Nm (89 in-lbs). howtoo.com)
- Reconnect the electrical connector and verify that its lock engages.
Step 9: Reinstall the upper intake manifold
- Fit the new upper intake manifold seals into their grooves. Do not use sealant unless the gasket manufacturer specifically requires it.
- Count and remove every shop towel from the intake ports.
- Inspect the ports with the LED work light before lowering the manifold into place.
- Set the manifold straight down without dragging or pinching the new seals.
- Start every fastener by hand before using a ratchet.
- Use the 13mm socket, 6-inch extension, and 3/8-inch drive torque wrench to tighten the manifold fasteners gradually in a crossing pattern, beginning near the center.
- Torque the upper intake manifold fasteners to 25 Nm (18 ft-lbs). Vehicle-specific LFY replacement guidance identifies the 18 ft-lb specification. go-parts.com)
- Reconnect every vacuum hose, PCV connection, EVAP line, electrical connector, and wiring retainer removed earlier.
Step 10: Reinstall the air-intake duct
- Position the duct fully over the throttle-body and air-cleaner connections.
- Use the 7mm socket or 8mm socket with the 1/4-inch drive ratchet to snug the clamps without crushing the plastic duct.
- Reconnect the sensor and breather tube until their locks click.
- Inspect the duct for gaps that could allow unmetered air into the engine.
Step 11: Reconnect the battery and engine cover
- Place the negative terminal over the battery post.
- Use the 10mm socket and 1/4-inch drive ratchet to tighten the terminal securely without overtightening it.
- Position the engine cover over its mounting points and press downward near each grommet.
✅ After Repair
- ✅ Turn the ignition on for approximately ten seconds without starting the engine, then switch it off.
- ✅ Start the engine and let it idle while listening for hissing around the intake manifold and duct.
- ✅ Shut the engine off immediately if it races, runs extremely rough, or produces a loud intake hiss.
- ✅ Check that every coil connector, intake hose, and electrical connection is locked.
- ✅ Use the OBD-II scan tool to clear the stored misfire code after confirming the repair.
- ✅ Test-drive gently and rescan for pending codes afterward.
- ✅ A continuing misfire may indicate a spark plug, injector, wiring, compression, or intake-leak problem rather than another bad coil.
💰 DIY vs Shop Cost
Shop Cost: $250-$850 for one or multiple coils, depending on cylinder location and local labor
DIY Cost: Approximately $45-$100 for one coil, or $275-$525 for six coils plus intake seals
You Save: Approximately $150-$400 by doing it yourself!
Labor rates around Sonīpat vary substantially. Rear-bank work costs more because the upper intake manifold must be removed.
🎯 Ready to get started?
HowToo has already matched the ignition-coil options to your Traverse in the parts section. Add an upper intake gasket set if you’re working on any of the rear three cylinders, plus the tools and supplies you need for a clean one-time repair.