

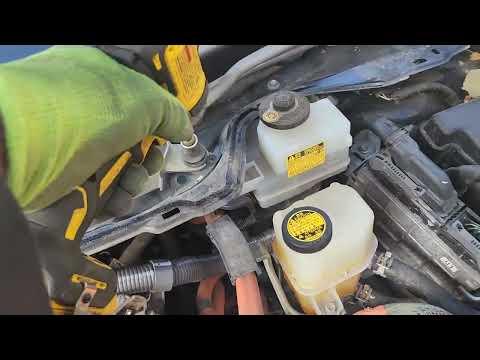







How to Replace Ignition Coils on a 2016-2022 Toyota Prius 1.8L Hybrid
Step-by-step DIY instructions with required tools, parts, safety tips, and torque specs for 2016, 2017, 2018, 2019, 2020, 2021, 2022
How to Replace Ignition Coils on a 2016-2022 Toyota Prius 1.8L Hybrid
Step-by-step DIY instructions with required tools, parts, safety tips, and torque specs for 2016, 2017, 2018, 2019, 2020, 2021, 2022


🔧 Prius - Ignition Coil Replacement
Your Prius has four ignition coils mounted directly above the spark plugs. Replacement involves removing the engine cover, unplugging each coil, and transferring the coils one at a time so the electrical connectors remain in the correct positions.
Difficulty Level: Beginner | Estimated Time: 0.5-1 hour
⚠️ Safety & Precautions
- ⚠️ Make sure the green “READY” indicator is off. The gasoline engine can start automatically whenever the Prius is in READY mode.
- 🔑 Keep the key fob at least 15 feet away while working.
- 🔥 Allow the engine to cool completely before touching the coils or cylinder head.
- ⚡ Do not touch orange high-voltage cables or connectors. High-voltage isolation is not required for this repair.
- 🔋 Disconnecting the 12-volt battery is not normally required when the vehicle is fully off and the key is removed from the area.
- 🧤 Never pull an ignition coil out while the vehicle is powered on.
🔧 Required Tools
You'll need the following tools for this repair:
- 10mm shallow socket
- 1/4-inch-drive ratchet
- 3-inch 1/4-inch-drive extension
- 1/4-inch-drive torque wrench rated 2-20 Nm
- Plastic trim tool
- Compressed-air duster
- LED inspection flashlight
- Nitrile mechanic gloves
- Safety glasses
🔩 Required Parts
HowToo sells all the parts you need for this repair:
- Direct-fit ignition coils - Qty: 4
Replace all four only if you are installing a complete set. If diagnosis identified one failed coil, replacing only that coil is acceptable when the remaining original coils are working correctly.
📋 Before You Begin
- 🅿️ Park your Prius on level ground, select Park, engage the parking brake, and switch the vehicle completely off.
- 🔑 Move the key fob at least 15 feet away and verify that the green READY indicator is not illuminated.
- ❄️ Wait until the gasoline engine is cool.
- 🧹 Clean loose dirt from around the top of the engine so it cannot fall into a spark-plug well.
- 📱 No infotainment menu, scan-tool command, coding, or hybrid battery isolation procedure is needed.
🔨 Step-by-Step Instructions
Follow these steps in order:
Step 1: Remove the Engine Cover
- Put on the safety glasses and nitrile mechanic gloves.
- Grip the plastic engine cover near its mounting points and pull it straight upward. It is retained by rubber grommets rather than bolts.
- If a grommet holds tightly, use the plastic trim tool gently beneath the cover. Do not pry against wiring or plastic connectors.
- Place the cover somewhere clean.
- Pull near each grommet to prevent cracking.
Step 2: Locate and Inspect the Ignition Coils
- Use the LED inspection flashlight to locate the four identical coils arranged in a row on top of the engine.
- An ignition coil converts low battery voltage into the high voltage needed to fire a spark plug.
- Check for oil or water around the coils. Significant oil inside a spark-plug well indicates a sealing problem that should be repaired before installing new coils.
Step 3: Clean Around the Coils
- Use the compressed-air duster to remove loose debris around each coil.
- Wear safety glasses and direct debris away from your face and the open engine compartment.
- Do not remove a coil until the surrounding area is clean.
Step 4: Disconnect the First Coil
- Press the locking tab on the first coil’s electrical connector and pull the connector straight back by its plastic housing.
- If the tab is difficult to press, use the plastic trim tool gently. Do not pull on the wires.
- Replace one coil at a time to avoid mixing connector positions.
Step 5: Remove the First Coil
- Fit the 10mm shallow socket and 3-inch 1/4-inch-drive extension onto the 1/4-inch-drive ratchet.
- Remove the single retaining bolt from the ignition coil.
- Twist the coil slightly by hand to release its rubber boot, then pull it straight upward.
- Use the LED inspection flashlight to inspect the spark-plug well for oil, coolant, corrosion, or debris.
- Do not place tools or loose hardware inside the open well.
Step 6: Install the New Coil
- Compare the new and removed coils. Their connector, mounting ear, boot length, and lower seal must match.
- Push the new coil straight down over the spark plug until it is fully seated.
- Install the retaining bolt by hand first to prevent cross-threading.
- Use the 10mm shallow socket, 3-inch 1/4-inch-drive extension, and 1/4-inch-drive torque wrench rated 2-20 Nm to tighten the bolt to 10 Nm (7 ft-lbs).
- Do not overtighten the bolt. The mounting surface is aluminum and its threads can be damaged.
Step 7: Reconnect the Coil
- Push the electrical connector onto the new coil until its locking tab clicks.
- Pull back gently on the plastic connector housing to confirm it is locked.
- Use the LED inspection flashlight to confirm no wire is trapped beneath the coil.
Step 8: Replace the Remaining Coils
- Repeat Steps 4 through 7 for the other three coils using the same tools.
- Tighten every coil retaining bolt with the 1/4-inch-drive torque wrench rated 2-20 Nm to 10 Nm (7 ft-lbs).
- Verify that all four electrical connectors are fully seated and locked.
Step 9: Reinstall the Engine Cover
- Check that the engine-cover rubber grommets remain properly seated.
- Align the cover over its mounting studs and press straight down by hand above each grommet.
- Do not strike the cover or use the ratchet to install it.
✅ After Repair
- ✅ Remove all tools and loose parts from the engine compartment.
- 🚗 Bring the key fob back, press the brake pedal, and place your Prius in READY mode.
- 👂 Listen for rough operation, snapping sounds, or an obvious misfire when the gasoline engine starts.
- ⚠️ Confirm that the check-engine light does not flash. A flashing light indicates an active misfire; switch the vehicle off and recheck every coil connector.
- 🔍 If the original warning light remains on, the stored fault may require clearing with a compatible scan tool. A returning misfire code requires further diagnosis of the spark plug, wiring, fuel injector, or engine compression.
- 🛣️ Take a short, gentle road test and confirm smooth acceleration before normal driving.
💰 DIY vs Shop Cost
Shop Cost: ₹28,000-₹52,000 (parts + labor)
DIY Cost: ₹24,000-₹44,000 (four quality direct-fit coils)
You Save: ₹4,000-₹8,000 by doing it yourself!
Labor rates around Sonīpat vary by workshop and parts source. This repair takes a shop approximately 0.5-1 hour.
🎯 Ready to get started?
HowToo makes it easy: same-day/2-day shipping on every part, plus all the tools and specialty tools you need! Check out the parts and tools sections below to add everything to your cart.