

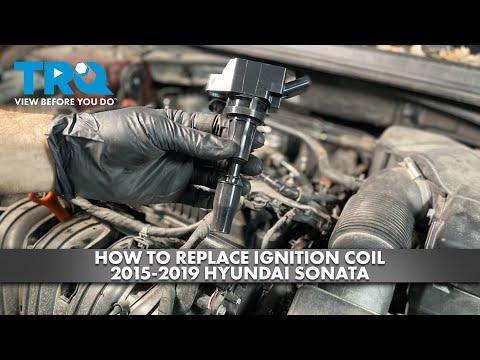







How to Replace Ignition Coils on a 2015-2019 Hyundai Sonata 2.4L (Engine: Inline 4 2.4L)
Step-by-step DIY instructions with required tools, parts, safety tips, and torque specs for 2015, 2016, 2017, 2018, 2019
How to Replace Ignition Coils on a 2015-2019 Hyundai Sonata 2.4L (Engine: Inline 4 2.4L)
Step-by-step DIY instructions with required tools, parts, safety tips, and torque specs for 2015, 2016, 2017, 2018, 2019


🔧 Sonata - Ignition Coil Replacement
The four ignition coils sit directly above the spark plugs. Replacing them involves removing the engine cover, unplugging each coil, and transferring the new coils into the cylinder-head openings.
Difficulty Level: Beginner | Estimated Time: 30-60 minutes
⚠️ Safety & Precautions
- Allow the engine to cool completely before touching the ignition coils.
- Keep the ignition switched off and the smart key away from your Sonata while working.
- Do not start or crank the engine while any ignition coil is disconnected.
- Do not allow dirt, oil, or hardware to fall into the spark-plug wells.
- Battery disconnection is not required when the ignition remains off.
🔧 Required Tools
You'll need the following tools for this repair:
- 10mm socket
- 1/4-inch-drive ratchet
- 1/4-inch-drive 3-inch extension
- Inch-pound torque wrench rated for 87 in-lbs
- Plastic trim tool
- Compressed-air duster
- Safety glasses
- Nitrile mechanic gloves
🔩 Required Parts
HowToo sells all the parts you need for this repair:
- Ignition coils for 2.4L engine - Qty: 4
Replace only coils confirmed faulty, or replace all four together if they are similarly aged and you want a complete set.
📋 Before You Begin
- Park your Sonata on level ground, select Park, apply the parking brake, and switch the ignition off.
- Open the hood and wait until the engine is cool enough to touch safely.
- Place the smart key at least 15 feet away so the ignition cannot be activated accidentally.
- Keep each coil opening covered until you are ready to install its replacement.
🔨 Step-by-Step Instructions
Follow these steps in order:
Step 1: Remove the engine cover
- Grip the plastic engine cover near its corners and pull straight upward to release its rubber mounting grommets.
- If a grommet sticks, use a plastic trim tool to lift gently near the mounting point.
- Set the cover aside where it cannot be scratched or stepped on.
- Pull near each mount, not at the edges.
Step 2: Clean around the ignition coils
- Put on safety glasses and nitrile mechanic gloves.
- Use a compressed-air duster to remove loose dirt from around the four coils.
- Direct the air away from your face and electrical connectors.
Step 3: Disconnect the coil connectors
- Press the locking tab on the first ignition-coil electrical connector and pull the connector straight back.
- If the tab is difficult to press, use the rounded edge of a plastic trim tool. Do not pry on the wires.
- Repeat for the remaining connectors.
- A locking tab is the small flexible catch that prevents a connector from loosening.
Step 4: Remove the coil mounting bolts
- Use a 10mm socket, 1/4-inch-drive 3-inch extension, and 1/4-inch-drive ratchet to remove the single mounting bolt from each coil.
- Place the bolts in a clean container so they cannot fall into the engine compartment.
Step 5: Remove the old coils
- Hold one coil by its plastic body. Twist it gently, then pull it straight upward.
- The long rubber section is the coil boot; it seals around the spark plug.
- Remove the remaining coils using the same method.
- Inspect each spark-plug well for engine oil, coolant, or standing water. Stop and correct any leak before installing the new coils.
- Never pull a coil by its wiring.
Step 6: Compare and install the new coils
- Compare each new coil with the removed coil. The connector, mounting tab, boot length, and overall shape must match.
- Lower each coil straight into its spark-plug well.
- Press down on the coil body until the boot seats firmly over the spark plug and the mounting tab rests flat.
- Do not add grease inside the boot unless the coil manufacturer specifically requires it.
Step 7: Install and torque the mounting bolts
- Start every mounting bolt by hand to prevent cross-threading.
- Use a 10mm socket, 1/4-inch-drive 3-inch extension, and in-lb torque wrench rated for 87 in-lbs to tighten each bolt.
- Torque to 9.8 Nm (87 in-lbs).
- Do not overtighten the bolts; the cylinder-head threads can be damaged.
Step 8: Reconnect the electrical connectors
- Push each connector straight onto its coil until the locking tab clicks.
- Gently tug each connector by its plastic housing to verify that it is locked.
- Check that no wiring is trapped beneath a coil or stretched tightly.
Step 9: Reinstall the engine cover
- Align the engine-cover mounting sockets with their rubber grommets.
- Press directly above each mounting point using both hands until the cover is fully seated.
- No bolt torque is required because the cover uses push-in mounts.
✅ After Repair
- Check the engine compartment for tools and loose hardware before closing the hood.
- Start the engine and let it idle for two to three minutes.
- Confirm that the engine idles smoothly and the check-engine light is not flashing.
- If the check-engine light flashes or the engine shakes badly, switch it off immediately and recheck every coil connector.
- A stored misfire code may remain after the repair. It can be cleared with a compatible scan tool, or it may clear after several successful drive cycles.
- Take a short, gentle test drive and verify that acceleration is smooth.
💰 DIY vs Shop Cost
Shop Cost: ₹14,000-₹30,000 (parts + labor)
DIY Cost: ₹9,000-₹22,000 (parts only)
You Save: ₹5,000-₹8,000 by doing it yourself!
Local labor and imported-part pricing vary. This repair takes a shop approximately 0.5-1.0 hour.
🎯 Ready to get started?
HowToo makes it easy: same-day/2-day shipping on every part, plus all the tools and specialty tools you need! Check out the parts and tools sections below to add everything to your cart.