

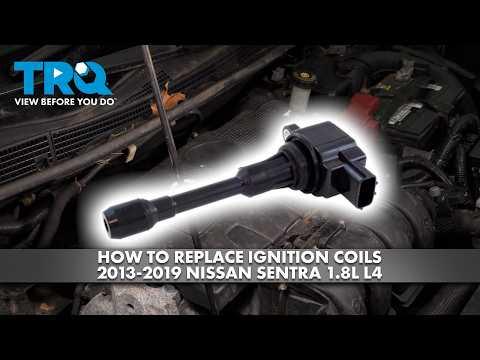






How to Replace Ignition Coils on a 2007-2019 Nissan Sentra 1.8L (Trim: S | Engine: Inline 4 1.8L)
Step-by-step DIY instructions with required tools, parts, torque specs, and safety tips for 2007, 2008, 2009, 2010, 2011, 2012
How to Replace Ignition Coils on a 2007-2019 Nissan Sentra 1.8L (Trim: S | Engine: Inline 4 1.8L)
Step-by-step DIY instructions with required tools, parts, torque specs, and safety tips for 2007, 2008, 2009, 2010, 2011, 2012


🔧 Sentra - Ignition Coil Replacement
Your Sentra has four ignition coils, one directly above each spark plug. Replacement involves disconnecting the electrical plugs, removing one small retaining bolt per coil, and installing the new coils.
Difficulty Level: Beginner | Estimated Time: 0.5-1 hour
⚠️ Safety & Precautions
- Let the engine cool completely before touching the ignition coils.
- Disconnect the negative battery terminal to prevent accidental electrical shorts.
- Never unplug or test an ignition coil while the engine is running.
- Keep dirt and loose objects out of the spark-plug wells.
- Replace only with coils specified for the Sentra’s 1.8L engine.
🔧 Required Tools
You'll need the following tools for this repair:
- 10mm socket
- 1/4-inch drive ratchet
- 1/4-inch drive 6-inch extension
- 1/4-inch drive inch-pound torque wrench rated 20-200 in-lbs
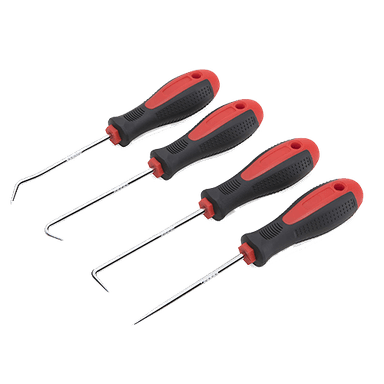
- Plastic electrical connector pick (specialty)
- 12-volt inspection light
- Soft-bristle 1-inch detailing brush
- Safety glasses
- Nitrile mechanic gloves
🔩 Required Parts
HowToo sells all the parts you need for this repair:
- Direct ignition coils - Qty: 4
Ignition coils do not have to be replaced in pairs. If diagnosis identified only one failed coil, replacing that coil alone is acceptable.
📋 Before You Begin
- Park your Sentra on level ground, shift into neutral, apply the parking brake, and switch the ignition off.
- Open the hood and wait until the engine is cool enough to touch safely.
- Keep the key away from the vehicle while the electrical connectors are disconnected.
- No scan-tool command, programming, or infotainment service mode is required.
- An inch-pound torque wrench measures the low tightening force used by small fasteners.
🔨 Step-by-Step Instructions
Follow these steps in order:
Step 1: Disconnect the Battery
- Use the 10mm socket and 1/4-inch drive ratchet to loosen the negative battery-terminal nut.
- Lift the negative cable from the battery post and position it where it cannot spring back into contact.
- Do not remove the positive battery cable.
Step 2: Locate and Inspect the Coils
- Use the 12-volt inspection light to locate the four ignition coils in a straight row on top of the engine.
- Check for oil or water around the coils. Oil inside a spark-plug well can indicate a leaking valve-cover seal that should be repaired.
- Use the soft-bristle 1-inch detailing brush to loosen dry debris around each coil before removal.
- Work on one coil at a time.
Step 3: Disconnect the Coil Connectors
- Press each connector’s locking tab by hand and pull the connector straight away from the coil.
- If a tab is difficult to release, use the plastic electrical connector pick gently under the locking tab.
- Pull only on the connector housing, not the wires.
Step 4: Remove the Ignition Coils
- Use the 10mm socket, 6-inch extension, and 1/4-inch drive ratchet to remove each coil retaining bolt.
- Grip the coil by hand, twist it slightly, and pull it straight upward from the spark-plug well.
- Use the 12-volt inspection light to inspect each well for oil, water, corrosion, or damaged wiring.
- Do not remove the spark plugs unless they are also being serviced.
Step 5: Compare the New Coils
- Use the 12-volt inspection light to compare each replacement coil with the removed coil.
- Confirm that the connector, mounting point, boot length, and rubber seal match.
- Do not apply grease inside the coil boot unless the coil manufacturer specifically supplies and requires it.
Step 6: Install the New Coils
- Push each coil straight down by hand until its rubber boot seats firmly over the spark plug.
- Start each retaining bolt several turns by hand to prevent cross-threading.
- Use the 1/4-inch drive inch-pound torque wrench, 10mm socket, and 6-inch extension to tighten each coil bolt to 7 Nm (62 in-lbs).
- Do not overtighten these bolts; the mounting area can crack.
Step 7: Reconnect the Electrical Connectors
- Push each connector onto its coil by hand until the locking tab clicks.
- Use the 12-volt inspection light to verify that no wiring is trapped or stretched.
- Gently tug each connector housing by hand to confirm it is locked.
Step 8: Reconnect the Battery
- Place the negative cable onto the battery post by hand.
- Use the 10mm socket and 1/4-inch drive inch-pound torque wrench to tighten the negative terminal nut to 5.4 Nm (48 in-lbs).
- Confirm by hand that the terminal cannot rotate on the battery post.
✅ After Repair
- Start the engine and let it idle for two to three minutes.
- Confirm that the engine runs smoothly and the malfunction indicator light is not flashing.
- Switch the engine off immediately if it misfires severely, smells strongly of fuel, or the warning light flashes.
- Recheck all four electrical connectors if the engine runs poorly.
- No ignition-coil programming or relearn procedure is required.
- The clock and saved audio settings may need to be restored after battery disconnection.
- Take a short, low-speed test drive and verify smooth acceleration.
💰 DIY vs Shop Cost
Shop Cost: ₹12,000-₹32,000 (parts + labor)
DIY Cost: ₹8,000-₹26,000 (parts only)
You Save: ₹1,000-₹6,000 by doing it yourself!
Labor around Sonīpat varies by workshop and parts brand. This repair takes a shop approximately 0.5-1 hour.
🎯 Ready to get started?
HowToo makes it easy: same-day/2-day shipping on every part, plus all the tools and specialty tools you need! Check out the parts and tools sections below to add everything to your cart.