

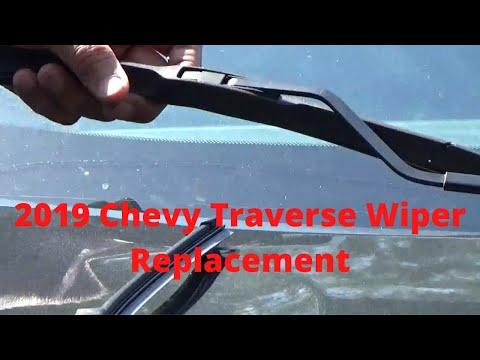





How to Replace Front Windshield Wiper Blades on a 2018-2026 Chevrolet Traverse
Step-by-step J-hook blade installation with sizes, tools, and essential safety tips for 2018, 2019, 2020, 2021, 2022, 2023, 2024, 2025, 2026
How to Replace Front Windshield Wiper Blades on a 2018-2026 Chevrolet Traverse
Step-by-step J-hook blade installation with sizes, tools, and essential safety tips for 2018, 2019, 2020, 2021, 2022, 2023, 2024, 2025, 2026


🔧 Traverse - Front Windshield Wiper Blade Replacement
Easy job. Your Traverse takes a 24-inch passenger-side blade and a 20-inch driver-side blade, using standard J-hook attachments. Replace both together for even wiping.
Difficulty Level: Beginner | Estimated Time: 10-15 minutes
⚠️ Safety & Precautions
- ⚠️ Turn the vehicle completely off and keep the wiper control in the OFF position.
- ⚠️ Place a folded towel on the windshield beneath the arm.
- ⚠️ Never release the bare metal arm. Its spring can snap it into the glass.
- ⚠️ Don’t operate the wipers until both blades rest against the windshield.
- ⚠️ No battery disconnection or service mode is required.
🔧 Required Tools
You'll need the following tools for this repair:
- Medium microfiber towel
- Nitrile work gloves
- Safety glasses
🔩 Required Parts
HowToo sells all the parts you need for this repair:
- Passenger-side front wiper blade, 24-inch - Qty: 1
- Driver-side front wiper blade, 20-inch - Qty: 1
Replace them as a pair. Beam-style blades are my first choice for Haryana’s heat, dust, and monsoon rain because their one-piece shape maintains more even pressure. Clear glass is cheap insurance.
📋 Before You Begin
- 🅿️ Park your Traverse on level ground and switch the ignition off.
- 📴 Confirm that the wiper stalk is set to OFF.
- 🧼 Clean loose dirt from the windshield so it doesn’t scratch the glass.
- 🧺 Lay a folded microfiber towel beneath the first wiper arm.
- 📦 Compare each new blade with the old one before removing anything.
🔨 Step-by-Step Instructions
Follow these steps in order:
Step 1: Raise the first wiper arm
- Use your gloved hand to lift the arm away from the windshield until it stays raised.
- Hold the arm firmly while working. It contains a strong return spring.
- Change one blade at a time.
Step 2: Find the blade latch
- Rotate the blade slightly so you can see its center attachment.
- Locate the small plastic latch where the blade meets the curved J-hook.
- A J-hook is the curved end of the metal wiper arm.
Step 3: Release the old blade
- Use your thumb to lift the latch in the middle of the blade.
- While holding the latch open, slide the blade down toward the windshield.
- Continue sliding until the blade clears the curved end of the J-hook.
- Remove the old blade while keeping control of the metal arm. Chevrolet specifies this latch-and-slide removal method for the Traverse. chevrolet.com
Step 4: Attach the new blade
- Remove the protective plastic strip from the new blade’s rubber edge, if fitted.
- Use your hands to feed the J-hook through the new blade’s center opening.
- Slide the blade upward along the hook until the latch clicks into place.
- Gently pull downward on the blade to confirm that it’s locked.
- No click means it isn't seated.
Step 5: Lower the arm safely
- Use both hands to guide the arm slowly back onto the windshield.
- Don’t let it spring downward.
- Confirm that the rubber wiping edge sits flat against the glass.
Step 6: Replace the second blade
- Move the microfiber towel beneath the second arm.
- Repeat Steps 1 through 5 using your gloved hands.
- Install the 24-inch blade on the passenger side and the 20-inch blade on the driver side.
✅ After Repair
- ✅ Confirm that both blades are fully locked and resting against the windshield.
- 💧 Start your Traverse and spray washer fluid onto the glass.
- 👀 Run the wipers at low speed and watch for skipping, looseness, or contact between the blades.
- 🔄 If a blade chatters, turn the system off and verify that its adapter is fully seated.
- 🛑 Stop immediately if either blade shifts sideways or touches the surrounding trim.
💰 DIY vs Shop Cost
Shop Cost: $35-$100 (parts + labor)
DIY Cost: $6-$49 (parts only)
You Save: Approximately $29-$51 by doing it yourself!
Shop labor rates vary but typically run $100-$150/hour. This repair takes a shop approximately 0.2-0.3 hours.
🎯 Ready to get started?
HowToo makes it easy: same-day/2-day shipping on every part, plus all the tools and specialty tools you need! Check out the parts and tools sections below to add everything to your cart.