

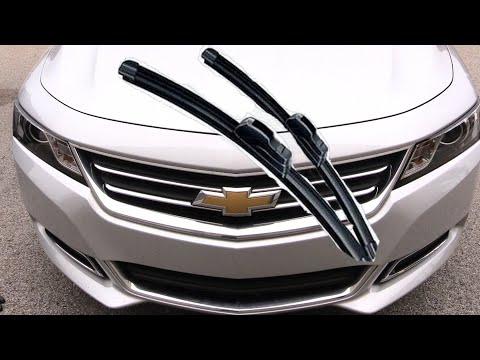






How to Replace Front Windshield Wiper Blades on a 2014-2020 Chevrolet Impala
Tool-free step-by-step guide with blade sizes, service position, and safety tips for 2014, 2015, 2016, 2017, 2018, 2019, 2020
How to Replace Front Windshield Wiper Blades on a 2014-2020 Chevrolet Impala
Tool-free step-by-step guide with blade sizes, service position, and safety tips for 2014, 2015, 2016, 2017, 2018, 2019, 2020


🔧 Impala - Front Windshield Wiper Blade Replacement
Your Impala uses a 24-inch driver-side blade and a 19-inch passenger-side blade. Replacement is tool-free and involves placing the wiper arms in their service position, releasing each blade, and locking the new blades into place.
Difficulty Level: Beginner | Estimated Time: 10-15 minutes
⚠️ Safety & Precautions
- ⚠️ Do not operate the wipers while the blades are removed.
- 🧤 Wear gloves and safety glasses to protect against sharp blade edges.
- 🛡️ Place a folded microfiber towel on the windshield. A spring-loaded wiper arm can crack the glass if it snaps down.
- 🔋 Battery disconnection is not required.
🔧 Required Tools
You'll need the following tools for this repair:
- Nitrile work gloves
- ANSI-rated safety glasses
- Thick microfiber towel
🔩 Required Parts
HowToo sells all the parts you need for this repair:
- Front wiper blade - Driver: 24" - Qty: 1
- Front wiper blade - Passenger: 19" - Qty: 1
Replace both front blades together so they clear the windshield evenly.
📋 Before You Begin
- 🚗 Park your Impala on level ground, switch off the exterior lights, and engage the parking brake.
- 🧼 Clean loose dirt from the lower windshield so it cannot scratch the glass.
- 📦 Compare each new blade with the corresponding old blade before removing anything.
- 🔒 Keep the vehicle switched off except when placing the wipers in their service position.
🔨 Step-by-Step Instructions
Follow these steps in order:
Step 1: Move the Wipers to the Service Position
- Use your gloved hand to switch the ignition on without starting the engine, then switch it off.
- Use your gloved hand to pull the windshield-washer lever toward you and hold it for more than two seconds.
- The wiper arms should move upward into the service position, where they can be raised without contacting the hood.
- If they do not move, repeat the sequence immediately after switching the ignition off.
Step 2: Protect the Windshield
- Use the thick microfiber towel and fold it into several layers.
- Place it on the windshield directly beneath the driver-side wiper arm.
- Replace one blade at a time.
Step 3: Raise the Driver-Side Wiper Arm
- Use your gloved hands to lift the driver-side arm away from the windshield.
- Hold the metal arm securely. Do not release it while the blade is removed.
- The blade connector is the plastic fitting joining the blade to the end of the arm.
Step 4: Remove the Driver-Side Blade
- Use your gloved thumb to press the release button or locking tab on the blade connector.
- While holding the release, use your other gloved hand to slide the blade away from the end of the wiper arm.
- Remove the blade gently without twisting the metal arm.
- Carefully rest the bare arm on the thick microfiber towel if necessary.
Step 5: Install the 24-Inch Driver Blade
- Use your gloved hands to remove the protective packaging from the 24-inch blade.
- If the blade includes multiple adapters, use the adapter identified by its instructions for the Impala’s original push-button-style arm.
- Align the new blade connector with the end of the wiper arm.
- Use your gloved hands to slide the connector into the arm until it clicks.
- Pull the blade lightly in the opposite direction to verify that it is locked.
- Remove any rubber-edge protector, then use both gloved hands to lower the arm slowly onto the windshield.
Step 6: Replace the Passenger-Side Blade
- Move the thick microfiber towel beneath the passenger-side arm.
- Use your gloved hands to raise the arm and hold it securely.
- Use your gloved thumb to press the connector release, then slide off the old blade.
- Use your gloved hands to install the 19-inch passenger blade until the connector clicks.
- Pull lightly on the blade to confirm it is locked, remove its rubber-edge protector, and lower the arm gently.
Step 7: Return the Wipers to the Parked Position
- Confirm with your gloved hands that both blades lie flat against the windshield and face the correct direction.
- Use your gloved hand to switch the ignition on.
- Use the wiper stalk for one normal wipe cycle. The arms should return to their normal parked position.
✅ After Repair
- 💧 Spray windshield-washer fluid and operate the wipers through several cycles.
- 👀 Confirm both blades wipe smoothly without streaking, chatter, or striking the windshield trim.
- 🔍 If a blade looks loose, switch off the vehicle, return the arms to the service position, and reseat its connector.
- 🗑️ Remove the towel and dispose of the old blades responsibly.
💰 DIY vs Shop Cost
Shop Cost: ₹2,500-₹6,000 (parts + labor)
DIY Cost: ₹1,800-₹4,500 (parts only)
You Save: ₹700-₹1,500 by doing it yourself!
Local labor rates vary. This repair takes a shop approximately 0.2-0.3 hours.
🎯 Ready to get started?
HowToo makes it easy: same-day/2-day shipping on every part, plus all the tools and specialty tools you need! Check out the parts and tools sections below to add everything to your cart.