

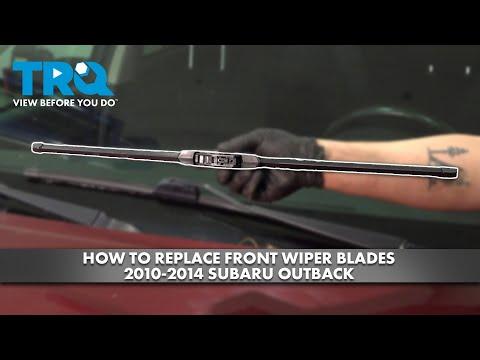





How to Replace Front Windshield Wiper Blades on a 2010-2014 Subaru Outback
Step-by-step installation guide with blade sizes, required tools, and safety tips for 2010, 2011, 2012, 2013, 2014
How to Replace Front Windshield Wiper Blades on a 2010-2014 Subaru Outback
Step-by-step installation guide with blade sizes, required tools, and safety tips for 2010, 2011, 2012, 2013, 2014


🔧 Outback - Front Windshield Wiper Blade Replacement
Replacing the front wiper blades restores clear, streak-free wiping and helps prevent windshield scratches. Your Outback uses separate driver- and passenger-side blade sizes, and both should be replaced together.
Difficulty Level: Beginner | Estimated Time: 10-15 minutes
⚠️ Safety & Precautions
- ⚠️ Do not let a raised wiper arm snap against the windshield; the metal arm can crack the glass.
- 🧤 Wear gloves because the blade edges and metal arm can be sharp.
- 🔋 Battery disconnection is not required.
🔧 Required Tools
You'll need the following tools for this repair:
- Medium microfiber towel
- Nitrile work gloves
- Safety glasses
🔩 Required Parts
HowToo sells all the parts you need for this repair:
- Front wiper blades - Driver: 26", Passenger: 19" - Qty: 2 - Replace as a pair
📋 Before You Begin
- 🚗 Park your Outback on level ground, switch off the ignition, and engage the parking brake.
- 🌧️ Confirm the replacement blades have the correct hook-style adapters installed.
- 🧽 Clean loose dirt from the windshield with the medium microfiber towel.
- 📱 No infotainment setting, service mode, scan tool, or battery disconnection is required.
🔨 Step-by-Step Instructions
Follow these steps in order:
Step 1: Protect the Windshield
- Put on the nitrile work gloves and safety glasses.
- Use the medium microfiber towel to cover the windshield directly below the driver-side wiper.
- The towel provides some protection if the metal arm accidentally drops.
Step 2: Raise the Driver-Side Wiper Arm
- Using your gloved hand, lift the driver-side wiper arm away from the windshield until it remains raised.
- Turn the blade so it sits nearly perpendicular to the arm.
- Keep one hand controlling the raised arm.
Step 3: Remove the Driver-Side Blade
- Locate the small locking tab where the blade connects to the curved end of the arm. The locking tab is the plastic catch that prevents the blade from sliding out.
- Use your gloved thumb to press the locking tab.
- While holding the tab, slide the blade downward toward the base of the wiper arm.
- Move the blade around the curved hook and lift it free.
- Carefully lower the bare arm onto the medium microfiber towel.
Step 4: Install the 26-Inch Driver Blade
- Using your gloved hands, hold the new 26-inch blade with its rubber wiping edge facing the windshield.
- Pass the curved arm hook through the opening in the blade adapter.
- Slide the blade upward into the hook until the locking tab clicks.
- Pull gently on the blade with your gloved hand to confirm it is locked.
- No fastener is used, so there is no torque specification.
Step 5: Lower the Driver-Side Wiper
- Use one gloved hand to support the wiper arm while removing the medium microfiber towel with the other hand.
- Lower the blade gently onto the windshield. Do not release it from the raised position.
Step 6: Replace the Passenger-Side Blade
- Use the medium microfiber towel to protect the glass below the passenger-side wiper.
- Using your gloved hand, raise the passenger-side arm and rotate the blade perpendicular to the arm.
- Press the locking tab with your gloved thumb, then slide the old blade down and around the hook.
- Install the new 19-inch blade using your gloved hands. Slide it into the hook until it clicks.
- Pull gently to verify that the blade is locked, then carefully lower the arm onto the windshield.
Step 7: Check Blade Position
- Use your gloved hands to verify that both rubber edges lie flat against the glass.
- Confirm that neither blade is twisted and both adapters are fully seated.
- Use the medium microfiber towel to wipe fingerprints from the windshield.
✅ After Repair
- 💧 Apply windshield washer fluid and operate the wipers through several cycles.
- 👀 Confirm both blades move smoothly without chattering, skipping, or contacting each other.
- 🔍 Stop immediately if a blade shifts on its arm; switch off the ignition and reseat the adapter.
- 🧼 Clean the windshield if new blades still leave streaks.
💰 DIY vs Shop Cost
Shop Cost: ₹1,800-₹4,000 (parts + labor)
DIY Cost: ₹1,200-₹3,000 (parts only)
You Save: ₹600-₹1,000 by doing it yourself!
Local labor rates vary. This repair takes a shop approximately 0.2-0.3 hours.
🎯 Ready to get started?
HowToo makes it easy: same-day/2-day shipping on every part, plus all the tools and specialty tools you need! Check out the parts and tools sections below to add everything to your cart.