

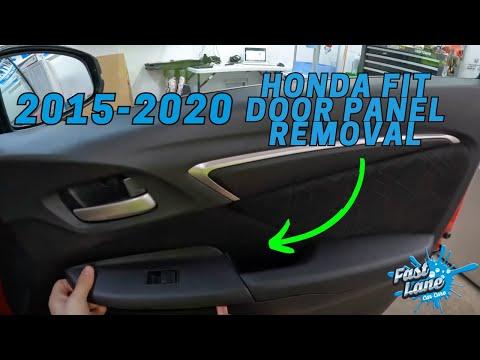






How to Replace Front Window Regulators on a 2015-2020 Honda Fit
Step-by-step guide for both front doors with tools, parts, torque specs, and safety tips for 2015, 2016, 2017, 2018, 2019, 2020
How to Replace Front Window Regulators on a 2015-2020 Honda Fit
Step-by-step guide for both front doors with tools, parts, torque specs, and safety tips for 2015, 2016, 2017, 2018, 2019, 2020


🔧 Fit - Front Window Regulator Replacement
Each front window regulator moves the glass inside the door. Replacement requires removing the door panel, supporting the glass, and guiding the regulator assembly through the door opening.
This procedure applies to both front doors. Complete regulator-and-motor assemblies are easiest for a beginner and avoid transferring the old motor.
Difficulty Level: Intermediate | Estimated Time: 1.5-2.5 hours per door
⚠️ Safety & Precautions
- ⚠️ Wear gloves and safety glasses because the door has sharp metal edges.
- ⚠️ Support the window glass before removing its mounting bolts. Unsupported glass can fall and shatter.
- ⚠️ Keep your fingers away from the regulator cables and moving arms while it is powered.
- ⚠️ Lower the glass into the service position before disconnecting the battery.
- ⚠️ Disconnect the negative battery terminal after positioning the glass. Wait at least three minutes before unplugging door wiring.
- ⚠️ Do not turn the ignition on while door connectors are disconnected.
- ⚠️ Protect painted surfaces and avoid using metal screwdrivers as trim-removal levers.
🔧 Required Tools
You'll need the following tools for this repair:
- Plastic trim-removal tool set
- Phillips #2 screwdriver
- 10mm socket
- 1/4-inch drive ratchet
- 1/4-inch drive 6-inch extension
- 1/4-inch drive torque wrench rated 2-20 Nm
- 90-degree pick tool
- Utility knife with retractable blade
- Plastic gasket scraper
- Automotive masking tape 2-inch wide
- Glass suction-cup handle rated 25 pounds minimum
- Butyl-tape hand roller
- 10mm combination wrench
- Nitrile work gloves
- Cut-resistant work gloves
- Safety glasses
🔩 Required Parts
HowToo sells all the parts you need for this repair:
- Left-front power window regulator assembly with motor - Qty: 1
- Right-front power window regulator assembly with motor - Qty: 1
- Door vapor-barrier butyl sealing tape - Qty: 1 roll
- Front door-panel retaining clips - Qty: 1 set
If only one regulator has failed, replace that side only. Verify whether the replacement includes a motor before beginning.
📋 Before You Begin
- 📋 Park your Fit on level ground, switch off all accessories, and open the door being repaired.
- 📋 Turn the ignition on and operate the window until the two glass mounting bolts align with the door’s access openings.
- 📋 If the window does not move, support the glass and carefully cut the failed regulator cable only if needed to reposition it by hand.
- 📋 Switch the ignition off and keep the key away from the vehicle.
- 📋 Use a 10mm wrench to disconnect the negative battery terminal. Isolate the cable so it cannot touch the battery post.
- 📋 A vapor barrier is the clear plastic sheet sealing the inner door. Preserve it to prevent water and wind noise.
🔨 Step-by-Step Instructions
Follow these steps in order:
Step 1: Remove the mirror corner trim
- Use a plastic trim-removal tool to carefully release the triangular trim panel at the upper front corner of the door.
- Pull it inward evenly rather than twisting it.
- Use a plastic trim-removal tool to remove any exposed clip that remains in the door.
Step 2: Remove the inner-handle fastener
- Use a 90-degree pick tool to lift the small cover behind the interior door-release handle.
- Use a Phillips #2 screwdriver to remove the screw behind the cover.
- Keep the screw and cover together.
Step 3: Remove the armrest fastener
- Use a plastic trim-removal tool to lift the switch-panel or armrest trim from its rear edge.
- Disconnect the electrical connector by pressing its locking tab by hand.
- Use a Phillips #2 screwdriver to remove the screw exposed in the armrest area.
- Do not pull on electrical wires.
Step 4: Remove the door panel
- Use a plastic trim-removal tool at the lower edge to release the door-panel clips one at a time.
- Work along the bottom and both sides until all clips are free.
- Lift the panel straight upward to unhook it from the window ledge.
- Release the interior-handle cable housing by hand, then unhook the cable end from the handle.
- Disconnect any remaining electrical connectors by hand and place the panel on a protected surface.
- Use a plastic trim-removal tool to remove broken clips and install replacements.
Step 5: Remove interfering brackets and the speaker if necessary
- Use a Phillips #2 screwdriver or 10mm socket, as fitted, to remove any bracket covering the regulator access opening.
- If the lower speaker blocks access, disconnect its connector by hand.
- Use a Phillips #2 screwdriver to remove the speaker fastener, then release the speaker tabs with a plastic trim-removal tool.
- Set the speaker somewhere dry and clean.
Step 6: Peel back the vapor barrier
- Use a utility knife with retractable blade to cut through the butyl sealer between the plastic sheet and door without cutting the sheet.
- Use a plastic gasket scraper to help separate stubborn areas.
- Peel back only enough material to expose the glass and regulator fasteners.
- Keep dirt away from the reusable butyl sealer.
Step 7: Secure the window glass
- Attach a glass suction-cup handle to the inside of the glass.
- Use a 10mm socket, 6-inch extension, and ratchet to loosen the two bolts clamping the glass to the regulator.
- Hold the glass with the suction-cup handle while removing both bolts.
- Raise the glass fully by hand and secure it to the door frame with several strips of 2-inch automotive masking tape.
- Confirm the glass cannot slide before releasing the suction-cup handle.
Step 8: Remove the old regulator
- Disconnect the regulator motor connector by pressing its locking tab by hand.
- Use a 10mm socket, 6-inch extension, and ratchet to remove the motor and regulator mounting bolts.
- Support the assembly through the service opening while removing the final bolt.
- Fold the regulator tracks inward as needed and guide the assembly through the largest service opening.
- Do not bend the window guide channels.
Step 9: Transfer the motor if required
- Skip this step when installing a complete regulator-and-motor assembly.
- Place the old regulator on a stable surface while wearing cut-resistant gloves.
- Use the correctly fitting 10mm socket or Phillips #2 screwdriver to remove the motor fasteners.
- Do not unwind, loosen, or rotate the regulator cable drum.
- Position the motor on the new regulator and reinstall its original fasteners with the same tool.
- Tighten the motor fasteners evenly and securely; do not overtighten the small fasteners.
Step 10: Install the new regulator
- Guide the new regulator through the service opening and place it against its mounting points.
- Start every mounting bolt by hand to prevent crossed threads.
- Use a 10mm socket and torque wrench to tighten the regulator and motor mounting bolts to 8.5 Nm (75 in-lbs).
- Connect the motor electrical connector by hand until its lock clicks.
Step 11: Attach and align the glass
- Hold the glass with the suction-cup handle and remove the masking tape by hand.
- Lower the glass evenly into the regulator clamps.
- Make sure the glass remains inside both vertical guide channels.
- Start both glass mounting bolts by hand.
- Use a 10mm socket and torque wrench to tighten each glass mounting bolt to 8.5 Nm (75 in-lbs).
- Remove the suction-cup handle.
Step 12: Test operation before sealing the door
- Use a 10mm wrench to temporarily reconnect the negative battery terminal.
- Reconnect the window-switch connector by hand.
- Keep hands and tools outside the door, then switch the ignition on.
- Operate the window through one complete down-and-up cycle while watching the glass.
- Confirm it moves smoothly, seals evenly, and does not tilt or make cable noises.
- If adjustment is needed, switch the ignition off, use a 10mm wrench to disconnect the battery, and realign the glass before repeating the test.
Step 13: Reseal the vapor barrier
- Switch the ignition off and use a 10mm wrench to disconnect the negative battery terminal again.
- Use a plastic gasket scraper to remove contaminated or damaged butyl sealer.
- Apply fresh door vapor-barrier butyl sealing tape by hand along gaps in the original sealing path.
- Press the plastic barrier into the sealer with a butyl-tape hand roller.
- Seal the entire perimeter, especially the lower edge, to prevent water leaks.
Step 14: Reinstall the speaker and brackets
- Position the speaker and connect its electrical connector by hand.
- Install its fastener with a Phillips #2 screwdriver and tighten it snugly without cracking the speaker frame.
- Position any removed access bracket and install its fasteners with a Phillips #2 screwdriver or 10mm socket, matching the original fastener.
Step 15: Reinstall the door panel
- Reconnect the interior-handle cable by hand and lock its housing into the bracket.
- Reconnect all door-panel electrical connectors by hand.
- Hang the upper edge of the panel over the window ledge.
- Align each retaining clip with its hole, then press around the panel by hand until every clip engages.
- Use a Phillips #2 screwdriver to reinstall the handle and armrest screws. Tighten them snugly without stripping the plastic mounts.
- Reconnect the switch-panel connector by hand and press the panel into place.
- Align the mirror corner trim and press it into place by hand.
Step 16: Reconnect the battery
- Use a 10mm wrench to reconnect the negative battery terminal securely.
- Check that the terminal cannot rotate by hand.
- Repeat the complete procedure on the opposite front door if replacing both regulators.
✅ After Repair
- ✅ Start the engine and close all doors.
- ✅ Lower the repaired window fully using the switch and hold the switch down for approximately one second.
- ✅ Raise the window fully and continue holding the switch up for approximately one second. This initializes the driver’s automatic window function.
- ✅ Test manual, automatic-down, and automatic-up operation where equipped.
- ✅ Verify that the anti-pinch feature reverses the driver’s window when it encounters a safe, soft obstruction. Keep hands away from the test area.
- ✅ Confirm the door lock, mirror, speaker, interior handle, and switch illumination work correctly.
- ✅ Spray water over the outer window area and inspect the lower door-panel edge for leaks.
- ✅ Stop using the window if it tilts, binds, clicks, or moves slowly. Recheck glass alignment and regulator mounting.
💰 DIY vs Shop Cost
Shop Cost: $550-$950 for both front doors (parts + labor)
DIY Cost: $180-$420 for both regulator assemblies and sealing supplies
You Save: $300-$600 by doing it yourself!
Shop labor rates vary but typically run $100-$150/hour. This repair takes a shop approximately 2.5-4.0 hours for both doors.
🎯 Ready to get started?
HowToo makes it easy: same-day/2-day shipping on every part, plus all the tools and specialty tools you need! Check out the parts and tools sections below to add everything to your cart.