

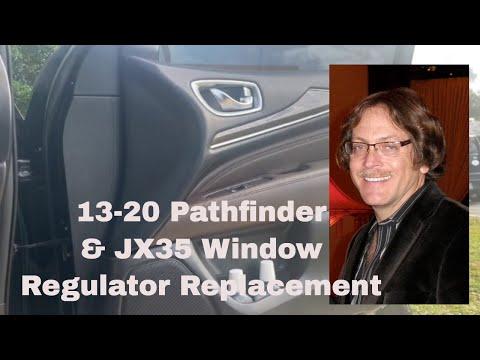
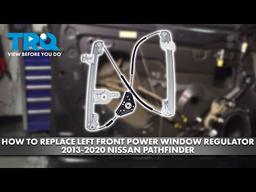






How to Replace Front Window Regulators on a 2013-2020 Nissan Pathfinder
Step-by-step guide for both front doors with tools, parts, torque specs, and safety tips for 2013, 2014, 2015, 2016, 2017, 2018, 2019, 2020
How to Replace Front Window Regulators on a 2013-2020 Nissan Pathfinder
Step-by-step guide for both front doors with tools, parts, torque specs, and safety tips for 2013, 2014, 2015, 2016, 2017, 2018, 2019, 2020


🔧 Pathfinder - Front Window Regulator Replacement
This procedure replaces the window regulators inside both front doors of your Pathfinder. Each door panel, window glass, and regulator assembly must be removed; the existing motors can be transferred if the new regulators do not include motors.
Difficulty Level: Intermediate | Estimated Time: 3-5 hours for both doors
Assumption: Both front regulators are being replaced with motor-included assemblies.
⚠️ Safety & Precautions
- ⚠️ Window glass is heavy and can shatter. Wear safety glasses and cut-resistant gloves.
- ⚠️ Support the glass before removing its mounting bolts.
- ⚠️ Disconnect the battery before unplugging door wiring.
- ⚠️ Wait at least three minutes after disconnecting the battery before continuing.
- ⚠️ Do not switch the ignition on while door connectors are disconnected.
- ⚠️ Never place your fingers inside the regulator mechanism while it is powered.
🔧 Required Tools
You'll need the following tools for this repair:
- 10mm socket
- 10mm deep socket
- 1/4-inch-drive ratchet
- 1/4-inch-drive 6-inch extension
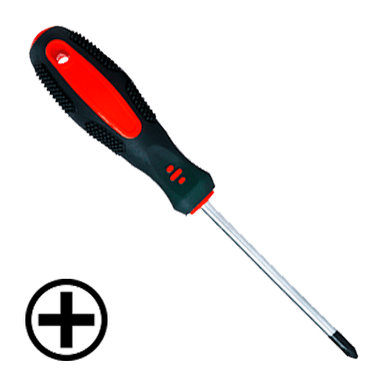
- Phillips #2 screwdriver
- Plastic trim-removal tool set
- Small hook pick
- Plastic razor scraper
- Inch-pound torque wrench rated 20-200 in-lbs
- Automotive test light rated 12-volt
- Window-glass suction cup rated 50-pound minimum
- 2-inch painter’s tape
- Cut-resistant work gloves
- Safety glasses
🔩 Required Parts
HowToo sells all the parts you need for this repair:
- Left-front window regulator with motor - Qty: 1
- Right-front window regulator with motor - Qty: 1
- Front door trim-panel clips - Qty: 1 set per door
- Butyl sealing tape - Qty: 1 roll
If the regulators do not include motors, reuse the original motors only after confirming they operate smoothly.
📋 Before You Begin
- 📍 Park your Pathfinder on level ground, select Park, and apply the parking brake.
- Lower each front window until its glass mounting bolts line up with the door access openings.
- Turn the ignition off and remove the key from the vehicle.
- Open the hood. Use a 10mm socket to disconnect the negative battery terminal, then wait at least three minutes.
- Complete one door before disassembling the other. The opposite door provides a useful reference.
🔨 Step-by-Step Instructions
Follow these steps in order:
Step 1: Remove the Door Switch Panel
- Use a plastic trim-removal tool to lift the rear edge of the window-switch panel.
- Work forward gently until the retaining clips release.
- Press each connector’s locking tab and unplug the switch panel.
- Use a small hook pick only if a connector lock cannot be reached by hand. Do not pull on the wires.
Step 2: Remove the Door-Panel Fasteners
- Use a plastic trim-removal tool to release the small cover behind the interior door handle.
- Remove the exposed screw with a Phillips #2 screwdriver.
- Remove the screw exposed beneath the switch panel with a Phillips #2 screwdriver.
- Store the screws separately so they return to their original locations.
Step 3: Detach the Door Trim Panel
- Insert a plastic trim-removal tool between the lower door panel and the metal door.
- Release the clips along the bottom and both sides. A trim clip is a small plastic fastener holding the panel to the door.
- Lift the panel straight upward to unhook it from the window ledge.
- Support the panel while disconnecting any remaining electrical connectors.
- Unhook the inside-handle cables by rotating each cable housing out of its bracket, then lifting the cable end from the lever.
- Replace any broken clips before reassembly.
Step 4: Peel Back the Moisture Barrier
- Use a plastic razor scraper to separate the butyl adhesive around the moisture barrier. Butyl is the reusable, sticky sealant around the plastic sheet.
- Peel the barrier back only far enough to expose the regulator, motor, and glass fasteners.
- Do not tear the barrier because it prevents rainwater from entering the cabin.
- Keep the butyl clean for easier resealing.
Step 5: Secure the Window Glass
- Confirm that both glass-clamp bolts are visible through the access openings.
- If adjustment is necessary, temporarily reconnect the battery and window switch. Keep your hands outside the door, reposition the glass, switch the ignition off, and disconnect the battery again.
- Wait at least three minutes before unplugging the switch.
- Attach a window-glass suction cup to the glass.
- Use a 10mm socket and ratchet to loosen and remove both glass-clamp bolts.
- Lift the glass fully into the closed position with the suction cup.
- Run several strips of 2-inch painter’s tape over the top door frame and attach them securely to both sides of the glass.
- Do not allow tape alone to support loose glass while you work beneath it.
Step 6: Disconnect and Remove the Regulator
- Press the locking tab and disconnect the regulator-motor electrical connector.
- Use a 10mm socket, extension, and ratchet to remove the regulator and motor mounting bolts.
- Support the assembly while removing the final bolt.
- Fold the regulator rails inward as needed and guide the complete assembly through the largest door opening.
- Do not bend the cables or force the rails against wiring.
Step 7: Transfer the Motor if Required
- Skip this step when the replacement regulator includes the correct motor.
- If transferring the motor, place both assemblies in the same position on a clean surface.
- Use a 10mm socket or Phillips #2 screwdriver, matching the installed fasteners, to remove the motor.
- Keep the regulator cable spool seated while moving the motor to the replacement regulator.
- Tighten the motor fasteners evenly. Use the inch-pound torque wrench and torque to 5.5 Nm (49 in-lbs).
- Do not reuse a regulator if its cable has unwound from the spool.
Step 8: Install the New Regulator
- Guide the new assembly through the large opening without trapping wiring behind its rails.
- Start every mounting bolt by hand to prevent cross-threading.
- Use a 10mm socket and inch-pound torque wrench to tighten the regulator mounting bolts evenly to 7 Nm (62 in-lbs).
- Reconnect the motor connector until its lock clicks.
- Check that the wiring harness cannot contact the moving regulator.
Step 9: Attach the Window Glass
- Hold the glass with the window-glass suction cup and remove the painter’s tape.
- Lower the glass carefully into both regulator clamps.
- Confirm the glass is fully seated and remains straight in its front and rear guide channels.
- Install both clamp bolts by hand.
- Use a 10mm socket and inch-pound torque wrench to tighten both bolts to 6 Nm (53 in-lbs).
- Do not overtighten these bolts because excessive pressure can break the glass.
Step 10: Test Before Closing the Door
- Keep hands and tools clear of the regulator.
- Reconnect the window switch, then use a 10mm socket to reconnect the negative battery terminal.
- Operate the window through one complete downward and upward cycle.
- Listen for scraping and confirm the glass stays even in both channels.
- If the glass binds, stop immediately. Disconnect the battery with a 10mm socket and correct its alignment.
- Use a 12-volt automotive test light only if the new motor does not operate and power must be checked at the connector.
Step 11: Reinstall the Moisture Barrier
- Switch the ignition off and use a 10mm socket to disconnect the negative battery terminal again.
- Press the barrier firmly into its original butyl adhesive.
- Fill any gaps with fresh butyl sealing tape.
- Route all wiring through its original barrier openings.
- Confirm the barrier seals continuously along the bottom edge.
Step 12: Reinstall the Door Trim Panel
- Reconnect the inside-handle cables and all electrical connectors by hand.
- Hang the upper edge of the trim panel over the window ledge.
- Align each trim clip with its hole, then press around the panel by hand until every clip locks.
- Install the handle and switch-panel screws with a Phillips #2 screwdriver. Tighten them snugly by hand without crushing the plastic.
- Reconnect the switch panel and press it into place from front to rear.
- Repeat Steps 1-12 on the opposite front door.
Step 13: Reconnect the Battery
- Use a 10mm socket and ratchet to connect the negative battery terminal.
- Use the inch-pound torque wrench and torque the terminal nut to 5.4 Nm (48 in-lbs).
- Confirm the terminal cannot rotate by hand.
Step 14: Initialize Each Front Window
- Turn the ignition on without starting the engine.
- Close the door being initialized.
- Use that door’s switch to lower the window completely, then hold the switch down for at least three seconds.
- Raise the window completely, then hold the switch up for at least three seconds.
- Test one-touch operation and repeat the sequence if it does not work.
- Perform the same initialization on the other front window.
✅ After Repair
- ✅ Test both windows from their individual switches and from the driver’s master switch.
- ✅ Confirm one-touch and anti-pinch functions operate correctly.
- ✅ Test the power locks, mirrors, speakers, and interior door handles.
- ✅ Verify each glass panel closes evenly against the upper weatherstrip.
- ✅ Spray water around each repaired door and check inside for moisture leaks.
- ✅ If a window reverses near the top, inspect glass alignment and repeat initialization.
💰 DIY vs Shop Cost
Shop Cost: ₹28,000-₹55,000 for both front doors, including parts and labor
DIY Cost: ₹14,000-₹32,000 for both regulator assemblies
You Save: ₹14,000-₹23,000 by doing it yourself!
Local labor rates and imported-part pricing vary. This repair takes a shop approximately 3-4 hours.
🎯 Ready to get started?
HowToo makes it easy: same-day/2-day shipping on every part, plus all the tools and specialty tools you need! Check out the parts and tools sections below to add everything to your cart.