






How to Replace Front Turn Signal Bulbs on a 2014-2018 Toyota 4Runner
Step-by-step instructions, tools, safety tips, and 7444NA bulb fitment details for 2014, 2015, 2016, 2017, 2018
How to Replace Front Turn Signal Bulbs on a 2014-2018 Toyota 4Runner
Step-by-step instructions, tools, safety tips, and 7444NA bulb fitment details for 2014, 2015, 2016, 2017, 2018


🔧 4Runner - Front Turn Signal Bulb Replacement
The front turn signal bulbs are reached from behind each headlight inside the engine compartment. You will rotate the bulb socket out, replace the amber dual-filament bulb, and check both the turn-signal and parking-light functions.
Difficulty Level: Beginner | Estimated Time: 15-30 minutes
⚠️ Safety & Precautions
- ⚠️ Switch off all exterior lights and remove the key before starting.
- 🧊 Let the engine and nearby components cool completely.
- 🔋 Battery disconnection is not required. Avoid touching the battery terminals with tools.
- 💡 Do not force the plastic socket; aged plastic can crack.
🔧 Required Tools
You'll need the following tools for this repair:
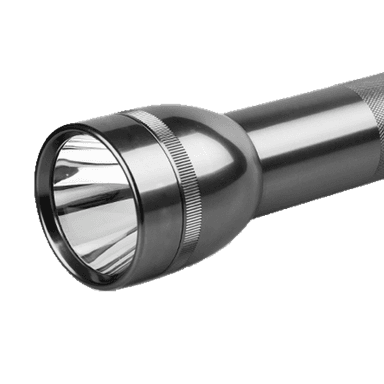
- LED flashlight
- Nitrile mechanic gloves
- Safety glasses
🔩 Required Parts
HowToo sells all the parts you need for this repair:
- 7444NA amber front turn signal and parking-light bulb - Qty: 2 - Replace in pairs
📋 Before You Begin
- 🅿️ Park your 4Runner on level ground, apply the parking brake, switch off the lights, and open the hood.
- 🧤 Wear nitrile mechanic gloves and safety glasses.
- 🌡️ Wait until the engine compartment is cool enough to touch safely.
- 📱 No infotainment menu, scan tool, coding, or reset procedure is required.
🔨 Step-by-Step Instructions
Follow these steps in order:
Step 1: Locate the Turn Signal Socket
- 🔦 Use the LED flashlight to look behind the headlight assembly.
- Find the front turn signal socket at the rear of the amber turn-signal section. It is a plastic socket with wires attached.
- Do not confuse it with the nearby headlight bulb covers or wiring connectors.
Step 2: Remove the Bulb Socket
- 🧤 Use your gloved hand to grip the plastic socket body, not its wires.
- Rotate the socket counterclockwise approximately one-quarter turn.
- Pull the socket straight out of the headlight assembly.
- Rock it gently if the seal feels tight.
Step 3: Remove the Old Bulb
- 🧤 Use your gloved fingers to hold the socket securely.
- Pull the old bulb straight out of the socket. A wedge-base bulb is held by friction and does not unscrew.
- Use the LED flashlight to inspect the socket for melting, corrosion, or darkened electrical contacts.
- Replace a damaged socket before installing the new bulb.
Step 4: Install the New Bulb
- 🧤 Use your gloved fingers to align the new 7444NA amber bulb with the socket.
- Push the bulb straight into the socket until fully seated.
- Do not twist or force the bulb into place.
Step 5: Reinstall the Socket
- 🔦 Use the LED flashlight to align the socket tabs with the openings in the headlight housing.
- Insert the socket fully, then rotate it clockwise by hand until it stops and locks.
- No fastener torque specification applies; the socket is hand-locked.
- Do not use pliers on the socket.
Step 6: Replace the Opposite Bulb
- 🔦 Use the LED flashlight to locate the socket behind the opposite headlight.
- Repeat Steps 2 through 5 using your nitrile mechanic gloves.
- Replacing both bulbs together helps maintain equal brightness and reduces the chance of another failure soon afterward.
✅ After Repair
- 💡 Switch on the parking lights and verify that both front amber bulbs illuminate steadily.
- ↔️ Test the left and right turn signals separately and confirm that each bulb flashes brightly.
- 🚨 Switch on the hazard lights and confirm that both sides flash at the same speed.
- 🔍 If one side flashes rapidly, switch the lights off and reseat that bulb. Also inspect the rear turn signal on the same side.
- ✅ Close the hood securely after testing.
💰 DIY vs Shop Cost
Shop Cost: ₹1,500-₹3,500 (parts + labor)
DIY Cost: ₹500-₹1,500 (parts only)
You Save: ₹1,000-₹2,000 by doing it yourself!
Local labor and imported bulb prices vary. This repair takes a shop approximately 0.2-0.5 hours.
🎯 Ready to get started?
HowToo makes it easy: same-day/2-day shipping on every part, plus all the tools and specialty tools you need! Check out the parts and tools sections below to add everything to your cart.