






How to Replace Front Turn Signal Bulbs on a 2011-2024 Ford Explorer
Step-by-step 7444NA bulb replacement with required tools, safety tips, and testing for 2011, 2012, 2013, 2014, 2015, 2016, 2017, 2018, 2019, 2020, 2021, 2022, 2023, 2024
How to Replace Front Turn Signal Bulbs on a 2011-2024 Ford Explorer
Step-by-step 7444NA bulb replacement with required tools, safety tips, and testing for 2011, 2012, 2013, 2014, 2015, 2016, 2017, 2018, 2019, 2020, 2021, 2022, 2023, 2024


🔧 Explorer - Front Turn Signal Bulb Replacement
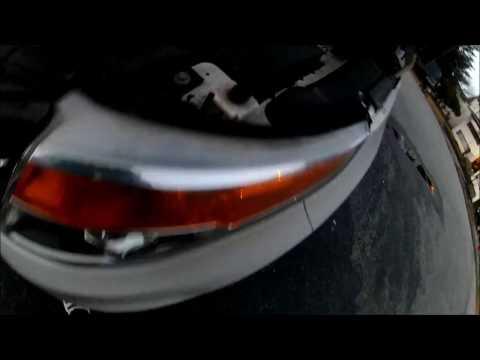
The front turn signal bulbs sit inside the headlamp housings and can be reached from under the hood. You will rotate each bulb socket out, replace the amber bulb, and test the parking-light and turn-signal functions.
Difficulty Level: Beginner | Estimated Time: 15-30 minutes
⚠️ Safety & Precautions
- Turn off all exterior lights and remove the ignition key before touching the bulb sockets.
- Allow the headlamps and engine compartment to cool before beginning.
- Wear gloves and safety glasses because a damaged glass bulb can break.
- Do not force the sockets. The plastic becomes brittle with age.
- Battery disconnection is not required for this repair.
🔧 Required Tools
You'll need the following tools for this repair:
- Nitrile mechanic gloves
- ANSI-rated safety glasses
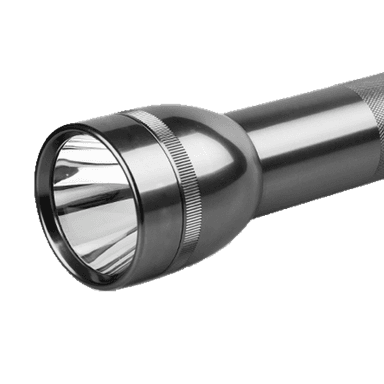
- LED inspection flashlight
- Microfiber cleaning cloth
🔩 Required Parts
HowToo sells all the parts you need for this repair:
- Front amber turn signal bulbs (7444NA) - Qty: 2
Replace the bulbs in pairs so their brightness and color match.
📋 Before You Begin
- Park your Explorer on level ground, shift into Park, set the parking brake, and open the hood.
- Set the headlamp control to OFF and switch off the hazard lights.
- Wait several minutes for the bulbs and nearby engine components to cool.
- No infotainment setting, scan tool, programming, or headlamp removal is required.
🔨 Step-by-Step Instructions
Follow these steps in order:
Step 1: Locate the Turn Signal Socket
- Put on the nitrile mechanic gloves and ANSI-rated safety glasses.
- Use the LED inspection flashlight to look behind the outer portion of the headlamp housing.
- Identify the turn-signal socket leading to the amber bulb. Do not confuse it with the larger headlamp bulb and its connector.
Step 2: Remove the Bulb Socket
- Grip the socket by hand. Rotate it counterclockwise approximately one-quarter turn.
- Pull the socket straight out of the headlamp housing without pulling on its wires.
- If access is tight, reposition your hand rather than using pliers. Pliers can crack the socket.
- Work slowly around the aged plastic tabs.
Step 3: Remove the Old Bulb
- Hold the socket firmly with one gloved hand.
- Pull the old 7444NA bulb straight out of the socket with your other gloved hand. It is a wedge-base bulb, meaning it pulls out without twisting.
- Use the LED inspection flashlight to inspect the socket for melted plastic, green corrosion, or burned electrical contacts.
- Stop and replace the damaged socket if it is melted or severely corroded.
Step 4: Install the New Bulb
- Use the microfiber cleaning cloth to remove fingerprints from the new bulb if necessary.
- Align the new 7444NA bulb with the socket and press it straight in by hand until fully seated.
- Do not twist the bulb or force it into the socket.
Step 5: Test the Bulb Before Reassembly
- Keep the socket clear of metal and moving engine parts.
- Switch on the parking lights and verify that the new bulb illuminates at its lower brightness.
- Switch on the corresponding turn signal and verify that the bulb flashes brightly.
- Turn all lights off before reinstalling the socket.
Step 6: Reinstall the Socket
- Use the LED inspection flashlight to align the socket tabs with the openings in the headlamp housing.
- Insert the socket fully and rotate it clockwise approximately one-quarter turn until locked.
- This socket uses locking tabs rather than threaded fasteners, so there is no torque specification.
- Gently pull on the socket body by hand to confirm it is secure. Do not pull on the wires.
Step 7: Replace the Opposite Bulb
- Repeat Steps 1 through 6 on the other headlamp using the second 7444NA bulb.
- Use the microfiber cleaning cloth to wipe away fingerprints around both headlamp housings.
✅ After Repair
- Close the hood and switch on the hazard lights.
- Walk around the front of your Explorer and confirm that both turn signals flash at the same brightness and speed.
- Test the left signal, right signal, parking lights, and headlights separately.
- A rapid flashing signal usually means a bulb is not seated correctly, has the wrong specification, or another signal bulb has failed.
- Check that both sockets are fully locked so water cannot enter the headlamp housings.
💰 DIY vs Shop Cost
Shop Cost: ₹1,500-₹3,500 (parts + labor)
DIY Cost: ₹500-₹1,500 (parts only)
You Save: ₹1,000-₹2,000 by doing it yourself!
Labor rates around Sonīpat vary by workshop. This repair takes a shop approximately 0.2-0.5 hours.
🎯 Ready to get started?
HowToo makes it easy: same-day/2-day shipping on every part, plus all the tools and specialty tools you need! Check out the parts and tools sections below to add everything to your cart.