

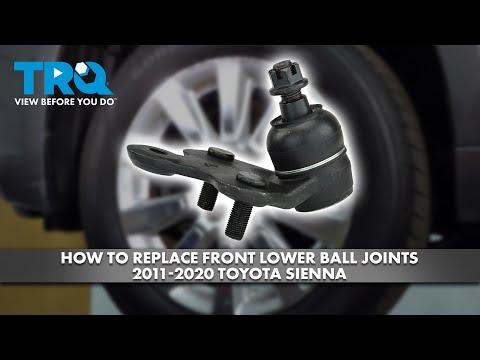



How to Replace Front Lower Ball Joints on a 2011-2020 Toyota Sienna
Step-by-step DIY guide with required tools, parts, torque specs, and safety tips for 2011, 2012, 2013, 2014, 2015, 2016, 2017, 2018, 2019, 2020
How to Replace Front Lower Ball Joints on a 2011-2020 Toyota Sienna
Step-by-step DIY guide with required tools, parts, torque specs, and safety tips for 2011, 2012, 2013, 2014, 2015, 2016, 2017, 2018, 2019, 2020


🔧 Sienna - Front Lower Ball Joint Replacement
This procedure replaces both front lower ball joints, which connect the steering knuckles to the lower control arms. Worn joints can cause clunking, loose steering, uneven tire wear, or dangerous wheel movement.
Assumption: This guide covers the front lower ball joints; replace them in pairs.
Difficulty Level: Advanced | Estimated Time: 3-5 hours
⚠️ Safety & Precautions
- ⚠️ Never work beneath your Sienna while it is supported only by a floor jack.
- ⚠️ Position jack stands under Toyota-approved front support points on solid, level ground.
- ⚠️ Keep the steering knuckle supported so the brake hose and ABS sensor wire are not stretched.
- ⚠️ Do not strike the threaded ball-joint stud or steering knuckle with a steel hammer.
- ⚠️ Do not loosen the ball-joint retaining nut until the vehicle is securely supported.
- ⚠️ A battery disconnect is not required for this repair.
🔧 Required Tools
You'll need the following tools for this repair:
- 21mm impact socket
- 19mm six-point socket
- 22mm six-point socket
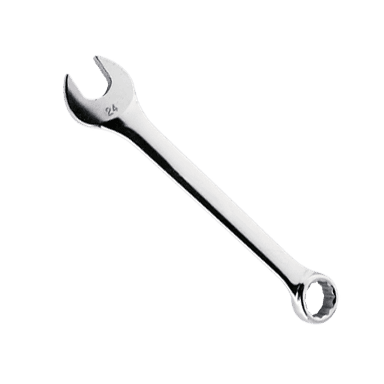
- 19mm combination wrench
- 22mm combination wrench
- 1/2-inch drive breaker bar
- 1/2-inch drive ratchet
- 1/2-inch drive extensions
- 1/2-inch drive torque wrench rated 30-200 ft-lbs
- Front ball-joint separator (specialty)
- 12-inch pry bar
- Diagonal cutting pliers
- Needle-nose pliers
- Brass drift punch
- 16-ounce ball-peen hammer
- Medium wire brush
- Penetrating oil aerosol
- Floor jack rated 3-ton minimum
- Jack stands rated 3-ton minimum
- Wheel chocks rated for passenger vehicles
- Mechanic's gloves
- Safety glasses
🔩 Required Parts
HowToo sells all the parts you need for this repair:
- Front lower ball joint assemblies - Qty: 2 - Replace in pairs
- Ball-joint stud retaining nuts - Qty: 2
- Ball-joint mounting bolts and nuts - Qty: 4 sets
- Ball-joint cotter pins - Qty: 2
📋 Before You Begin
- 🅿️ Park your Sienna on firm, level ground. Select Park and apply the parking brake.
- 🛞 Place wheel chocks firmly behind both rear wheels.
- 📏 Confirm that the replacement joints match the original mounting pattern before disassembly.
- 🔩 Spray penetrating oil on the ball-joint stud nut and mounting fasteners. Allow it to soak for several minutes.
- 🧭 Mark the front tire positions if you plan to rotate them during reassembly.
🔨 Step-by-Step Instructions
Follow these steps in order:
Step 1: Loosen the Front Wheel Nuts
- Use a 21mm impact socket and 1/2-inch drive breaker bar to loosen each front wheel nut approximately one turn.
- Do not remove the nuts while the tires are still carrying the vehicle's weight.
Step 2: Raise and Support the Front
- Use the 3-ton floor jack at the approved front-center lifting point to raise your Sienna.
- Place the 3-ton jack stands under the approved left and right front support points.
- Lower the vehicle onto the stands, then gently shake the body to verify that it is stable.
- Keep the floor jack lightly touching the lifting point as secondary support without carrying the vehicle's weight.
Step 3: Remove the Front Wheels
- Use the 21mm impact socket and 1/2-inch drive ratchet to remove the wheel nuts.
- Lift off both front wheels and place them flat away from the work area.
Step 4: Support the Steering Knuckle
- Position the 3-ton floor jack beneath the lower control arm near the ball joint.
- Raise the jack only enough to support the arm. Do not lift your Sienna off the jack stand.
- Inspect the brake hose and ABS sensor wire. Make sure both have enough slack for limited knuckle movement.
Step 5: Remove the Ball-Joint Stud Nut
- Use the diagonal cutting pliers and needle-nose pliers to straighten and remove the cotter pin from the stud nut.
- A cotter pin is the small split metal pin that prevents the nut from turning loose.
- Use a 22mm six-point socket, 1/2-inch drive extension, and 1/2-inch drive breaker bar to loosen the stud nut.
- Leave the nut threaded on by several turns while separating the joint. This prevents the knuckle from releasing suddenly.
Step 6: Separate the Joint from the Steering Knuckle
- Fit the front ball-joint separator around the joint. This tool presses the tapered stud out without striking the knuckle.
- Tighten the separator using the correctly fitting 19mm or 22mm six-point socket and 1/2-inch drive ratchet until the taper releases.
- Remove the loosened stud nut using the 22mm six-point socket.
- Lower the 3-ton floor jack slightly and guide the control arm away with the 12-inch pry bar.
- Do not pull the knuckle outward far enough to separate the CV axle or strain the brake hose.
- Keep fingers clear when the taper releases.
Step 7: Remove the Ball Joint from the Control Arm
- Use a medium wire brush to clean exposed rust and dirt from the mounting fasteners.
- Use a 19mm six-point socket, 19mm combination wrench, and 1/2-inch drive breaker bar to remove the two ball-joint mounting fasteners.
- Remove the ball-joint assembly from the lower control arm.
- If it is stuck, use the brass drift punch and 16-ounce ball-peen hammer to tap only the ball-joint housing.
- Do not bend or enlarge the mounting holes.
Step 8: Inspect and Clean the Mounting Area
- Use the medium wire brush to clean both mounting faces.
- Inspect the lower control arm and steering knuckle for cracks, elongated holes, severe corrosion, or collision damage.
- Check the nearby control-arm bushings, CV-axle boot, brake hose, and ABS sensor wire.
- Stop the repair if the knuckle or control arm is damaged.
Step 9: Install the New Ball Joint
- Position the new joint on the lower control arm in the same orientation as the original.
- Install new mounting bolts and nuts by hand to avoid cross-threading.
- Use a 19mm six-point socket, 19mm combination wrench, and 1/2-inch drive torque wrench to tighten the mounting fasteners evenly.
- Torque each ball-joint mounting fastener to 127 Nm (94 ft-lbs).
Step 10: Connect the Joint to the Steering Knuckle
- Use the 12-inch pry bar carefully to lower the control arm enough to guide the stud into the steering knuckle.
- Raise the 3-ton floor jack slightly under the control arm to seat the tapered stud.
- Install a new retaining nut by hand.
- Use a 22mm six-point socket and 1/2-inch drive torque wrench to tighten the stud nut.
- Torque the ball-joint stud nut to 140 Nm (103 ft-lbs).
- If the cotter-pin holes do not align, use the 22mm six-point socket and torque wrench to tighten the nut only until the next slot aligns. Never loosen it to align the hole.
- Install a new cotter pin using the needle-nose pliers, then bend its ends securely around the nut.
Step 11: Repeat on the Opposite Side
- Repeat Steps 4 through 10 using the same listed tools.
- Replace the opposite front lower ball joint even if only one side showed obvious looseness.
Step 12: Reinstall the Front Wheels
- Install both wheels and start every wheel nut by hand.
- Use the 21mm impact socket and 1/2-inch drive ratchet to snug the nuts in a crisscross pattern.
- Use the 3-ton floor jack to raise your Sienna, remove the jack stands, and lower the tires onto the ground.
- Use the 21mm impact socket and 1/2-inch drive torque wrench to tighten the wheel nuts in a crisscross pattern.
- Torque the wheel nuts to 103 Nm (76 ft-lbs).
✅ After Repair
- ✅ Check that both cotter pins are installed and that the brake hoses and ABS wires remain correctly routed.
- ✅ Turn the steering slowly from lock to lock while parked. Listen for contact, binding, or unusual noises.
- ✅ Drive slowly in a safe area and verify that steering response and braking feel normal.
- ✅ Arrange a four-wheel alignment check, especially if the tires show uneven wear or the steering wheel is off-center.
- ✅ Recheck wheel-nut torque after approximately 80-160 km.
- ✅ Stop driving immediately if there is looseness, clunking, pulling, or an ABS warning light.
💰 DIY vs Shop Cost
Shop Cost: ₹28,000-₹55,000 (parts + labor)
DIY Cost: ₹10,000-₹24,000 (parts only)
You Save: ₹18,000-₹31,000 by doing it yourself!
Labor rates around Sonīpat vary by workshop. This repair generally takes a professional approximately 2.5-4 hours, plus alignment if required.
🎯 Ready to get started?
HowToo makes it easy: same-day/2-day shipping on every part, plus all the tools and specialty tools you need! Check out the parts and tools sections below to add everything to your cart.