

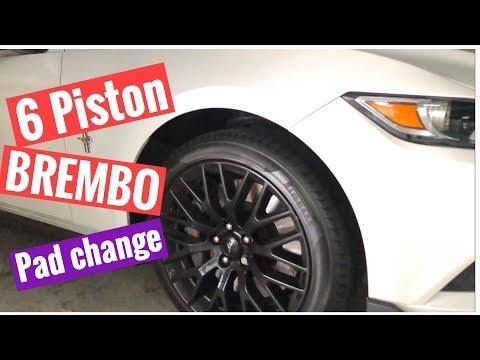







How to Replace Front Brake Pads on a 2015-2023 Ford Mustang GT (Engine: V8 5.0L | Body: Coupe)
Step-by-step Brembo six-piston brake service with tools, safety tips, and torque specs for 2015, 2016, 2017, 2018, 2019, 2020, 2021, 2022, 2023
How to Replace Front Brake Pads on a 2015-2023 Ford Mustang GT (Engine: V8 5.0L | Body: Coupe)
Step-by-step Brembo six-piston brake service with tools, safety tips, and torque specs for 2015, 2016, 2017, 2018, 2019, 2020, 2021, 2022, 2023


🔧 Mustang - Front Brake Pad Replacement
Your Mustang GT uses fixed six-piston Brembo front calipers. The pads can be replaced without removing the calipers, but all six pistons must be pressed back slowly and evenly.
Difficulty Level: Intermediate | Estimated Time: 1.5-2.5 hours
⚠️ Safety & Precautions
- ⚠️ Brake dust can be harmful. Never clean it with compressed air.
- 🛑 Support your Mustang with jack stands. Never work beneath a vehicle supported only by a floor jack.
- 🌡️ Allow the brakes to cool completely before starting.
- 🧱 Keep the rear wheels securely chocked because the parking brake operates the rear brakes.
- 💧 Do not allow brake fluid to contact paint. Wash any spill immediately with plenty of water.
- 🔋 Battery disconnection is not required, and the front brakes do not require electronic service mode.
- 🚫 Do not press the brake pedal while any pads are removed.
🔧 Required Tools
You'll need the following tools for this repair:
- Safety glasses
- Nitrile mechanic gloves
- Wheel chocks
- Low-profile floor jack rated 2-ton minimum
- Jack stands rated 2-ton minimum
- 21mm deep socket
- 1/2-inch-drive breaker bar
- 1/2-inch-drive torque wrench rated to 150 ft-lbs
- 5mm pin punch
- 16-ounce ball-peen hammer
- Six-piston brake pad spreader (specialty)
- Plastic trim tool
- Brake-fluid syringe
- Nylon brake cleaning brush
- Drain pan
- Shop towels
🔩 Required Parts
HowToo sells all the parts you need for this repair:
- Front brake pad set for six-piston Brembo calipers - Qty: 1 axle set
- Front brake pad retaining hardware kit - Qty: 1
- Aerosol brake cleaner - Qty: 1 can
- High-temperature ceramic brake lubricant - Qty: 1 tube
- Ford-approved DOT 4 LV brake fluid - Qty: 1 pint if needed
Replace both front sides together. Never replace pads on only one front wheel.
📋 Before You Begin
- 📍 Park your Mustang on a hard, level surface. Select Park or first gear, switch off the ignition, and engage the parking brake.
- 🧱 Place wheel chocks tightly against the front and back of one rear tire.
- 🧰 Open the hood and locate the brake-fluid reservoir near the driver-side firewall.
- 💧 Use a shop towel around the reservoir. If the fluid is at the MAX line, remove a small amount with the brake-fluid syringe before compressing the pistons.
- 📱 No infotainment menu, scan tool, coding, or electronic parking-brake service mode is required.
🔨 Step-by-Step Instructions
Follow these steps in order:
Step 1: Loosen the Front Wheel Nuts
- Use the 21mm deep socket and 1/2-inch-drive breaker bar to loosen each front wheel nut about one-quarter turn.
- Do not remove the nuts while your Mustang is still on the ground.
Step 2: Raise and Support the Front
- Use the low-profile floor jack at the reinforced front-center crossmember jacking point.
- Position the jack stands under the reinforced pinch-weld locations behind the front wheels.
- Lower your Mustang carefully onto the stands. Give the body a gentle push to verify that it is stable.
Step 3: Remove the Front Wheels
- Use the 21mm deep socket to remove the wheel nuts.
- Remove both front wheels and place them flat away from the work area.
Step 4: Inspect the Brakes
- Use the plastic trim tool to inspect the inner and outer pads without damaging their surfaces.
- Check both rotor faces for deep grooves, blue heat spots, cracks, or a pronounced outer ridge.
- If one pad is much thinner than the others, the caliper pistons may be sticking and the caliper should be inspected before proceeding.
Step 5: Clean the Caliper
- Place the drain pan beneath the caliper.
- Wear safety glasses and nitrile mechanic gloves.
- Use the aerosol brake cleaner, nylon brake cleaning brush, and shop towels to remove loose dust around the pads and retaining hardware.
- Do not use compressed air.
Step 6: Remove the Retaining Pins and Spring
- Use the 5mm pin punch and 16-ounce ball-peen hammer to drive the two pad-retaining pins out from their smaller, non-flared ends.
- Hold the anti-rattle spring with the plastic trim tool while removing the second pin. The anti-rattle spring is the metal plate that keeps the pads from vibrating.
- Remove the spring and set it aside. Replace it and the pins if they are bent, heavily corroded, or included with the new hardware kit.
- Photograph the spring orientation before removal.
Step 7: Retract the Six Caliper Pistons
- Leave the old pads in place and position the six-piston brake pad spreader between them.
- Open the spreader slowly to push all pistons back evenly. A piston is the round hydraulic part that presses the pad against the rotor.
- Use the brake-fluid syringe if the reservoir approaches the MAX line. Never allow it to overflow.
- Stop if any piston will not retract smoothly. Forcing a seized piston can damage the caliper.
Step 8: Remove the Old Pads
- Use the plastic trim tool to slide the inner and outer pads upward and out of the fixed caliper.
- Use the nylon brake cleaning brush and aerosol brake cleaner to clean the pad channels.
- Keep brake cleaner and lubricant off the rotor and pad friction surfaces.
Step 9: Prepare the New Pads
- Use a clean, gloved finger to apply a very thin film of high-temperature ceramic brake lubricant only where the pad backing plates contact the caliper and pistons.
- Do not place lubricant on the pad material, rotor, retaining-pin holes, or rubber piston boots.
- Compare the new pads with the old pads before installation. Their shape and retaining-pin holes must match.
Step 10: Install the New Pads and Hardware
- Slide the new inner and outer pads into the caliper by hand with their friction material facing the rotor.
- Position the anti-rattle spring in its original orientation.
- Start the first retaining pin by hand, passing it through the caliper, pad holes, and spring.
- Use the 5mm pin punch and 16-ounce ball-peen hammer to seat the pin gently.
- Press the spring into alignment with the plastic trim tool, then install and seat the second pin.
- Verify that both pins are fully seated and the spring is centered. These pins are interference-fit hardware and do not have a torque specification.
Step 11: Repeat on the Other Side
- Use the same 5mm pin punch, 16-ounce ball-peen hammer, six-piston brake pad spreader, and cleaning tools to replace the pads on the opposite front caliper.
- Perform a final visual inspection of both calipers before installing the wheels.
Step 12: Reinstall the Wheels
- Install each wheel and start all wheel nuts by hand.
- Use the 21mm deep socket to snug the nuts in a star pattern.
- Use the floor jack to raise your Mustang slightly, remove the jack stands, and lower it to the ground.
- Use the 21mm deep socket and 1/2-inch-drive torque wrench in a star pattern. Torque to 204 Nm (150 ft-lbs).
Step 13: Restore Brake-Pedal Pressure
- With the engine off, press the brake pedal slowly several times until it becomes firm.
- Do not move your Mustang until the pedal is firm and remains at a consistent height.
- Use the brake-fluid syringe to correct an overfilled reservoir, or add Ford-approved DOT 4 LV brake fluid if the level is below MIN.
- Secure the reservoir cap and clean any spilled fluid with shop towels and water.
✅ After Repair
- ✅ Start the engine and confirm that the brake pedal remains firm under steady pressure.
- 🔍 Check both calipers and the brake-fluid reservoir for leakage.
- 🚗 Test the brakes at walking speed in a safe, traffic-free area before normal driving.
- 🛑 Unless the pad manufacturer specifies another procedure, make 6-8 moderate stops from approximately 50 km/h to 15 km/h without activating ABS.
- 🌡️ Drive for several minutes between stops and avoid holding the brake pedal while the brakes are very hot.
- ⏳ Avoid hard braking for the first 200-300 km unless required for safety.
- 🔩 Recheck the wheel-nut torque after approximately 80-160 km.
💰 DIY vs Shop Cost
Shop Cost: $450-$750 (parts + labor)
DIY Cost: $120-$300 (parts only)
You Save: $330-$450 by doing it yourself!
Local Panipat pricing and imported performance-brake parts can vary. A professional shop typically needs approximately 1-1.5 labor hours.
🎯 Ready to get started?
HowToo makes it easy: same-day/2-day shipping on every part, plus all the tools and specialty tools you need! Check out the parts and tools sections below to add everything to your cart.