
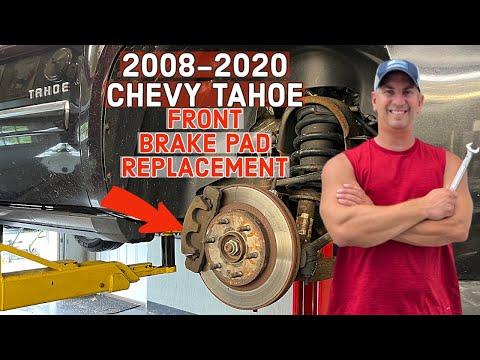






How to Replace Front Brake Pads on a 2008-2020 Chevrolet Tahoe (Trim: LT)
Step-by-step DIY guide with required tools, parts, torque specs, and safety tips for 2008, 2009, 2010, 2011, 2012, 2013
How to Replace Front Brake Pads on a 2008-2020 Chevrolet Tahoe (Trim: LT)
Step-by-step DIY guide with required tools, parts, torque specs, and safety tips for 2008, 2009, 2010, 2011, 2012, 2013


🔧 Tahoe - Front Brake Pad Replacement
Replacing the front brake pads requires servicing both front wheels, compressing the two caliper pistons, and installing new pad hardware. Inspect the rotors during the repair; deeply scored, cracked, or undersize rotors must also be replaced.
Difficulty Level: Beginner | Estimated Time: 1.5-2.5 hours
Assumption: The front rotors and calipers are reusable and undamaged.
⚠️ Safety & Precautions
- ⚠️ Support your Tahoe with jack stands under the frame. Never work under a vehicle supported only by a jack.
- ⚠️ Replace the pads on both front wheels to maintain even braking.
- ⚠️ Do not press the brake pedal while either caliper is removed.
- ⚠️ Never let a caliper hang from its rubber brake hose.
- ⚠️ Brake dust may be harmful. Do not blow it away with compressed air.
- ⚠️ The battery does not need to be disconnected, and the electronic parking brake does not require service mode because it operates only the rear brakes.
🔧 Required Tools
You'll need the following tools for this repair:
- 22mm deep socket
- 18mm socket
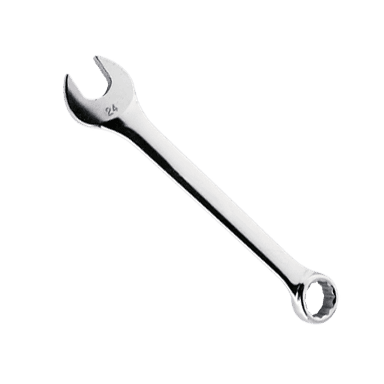
- 18mm combination wrench
- 1/2-inch drive breaker bar
- 3/8-inch drive ratchet
- Torque wrench rated 30-200 ft-lbs
- Dual-piston brake caliper compression tool (specialty)
- Flat-blade screwdriver
- Small nylon brush
- Brake fluid syringe (specialty)
- Floor jack rated 3-ton minimum
- Jack stands rated 6-ton minimum
- Wheel chocks
- Caliper hanger hook (specialty)
- Mechanic’s gloves
- Safety glasses
🔩 Required Parts
HowToo sells all the parts you need for this repair:
- Front brake pad set - Qty: 1 set for both front wheels
- Front brake pad hardware kit - Qty: 1
- High-temperature silicone brake lubricant - Qty: 1 tube
- Brake cleaner - Qty: 1 can
- Lint-free shop towels - Qty: 1 pack
- DOT 3 brake fluid - Qty: 1 small sealed bottle if adjustment is needed
📋 Before You Begin
- 📍 Park your Tahoe on firm, level ground. Shift into Park, apply the parking brake, and switch off the ignition.
- 📍 Place wheel chocks securely in front of and behind a rear tire.
- 📍 Open the hood and inspect the brake-fluid reservoir. If it is near the MAX line, use the brake fluid syringe to remove a small amount so it will not overflow when the pistons are compressed.
- 📍 Confirm that the new pad set matches the old pads before installing it.
🔨 Step-by-Step Instructions
Follow these steps in order:
Step 1: Loosen the Front Wheel Nuts
- Use the 22mm deep socket and 1/2-inch breaker bar to loosen each front wheel nut about one-quarter turn.
- Do not remove the nuts while your Tahoe is still on the ground.
Step 2: Raise and Support the Front
- Position the 3-ton floor jack beneath a solid front frame lifting point and raise your Tahoe.
- Place the 6-ton jack stands under the left and right frame rails, then lower the vehicle gently onto them.
- Give the body a careful push to verify that it is stable before removing a wheel.
Step 3: Remove the Front Wheels
- Use the 22mm deep socket and 1/2-inch breaker bar to remove the wheel nuts.
- Remove both front wheels and place them flat away from your work area.
Step 4: Inspect the Brake Assembly
- Use the safety glasses and visually inspect each rotor for cracks, heavy grooves, severe rust, or blue heat spots.
- Check the calipers and rubber hoses for wet brake-fluid leakage. Stop the repair if leakage is present.
- Compare pad wear on the inner and outer sides. A large difference can indicate sticking slide pins or pistons.
Step 5: Remove the Caliper
- Use the 18mm socket and 3/8-inch ratchet to remove the upper and lower caliper guide-pin bolts. If a guide pin turns, hold it with the 18mm combination wrench.
- A guide pin lets the floating caliper move sideways and apply both pads evenly.
- Lift the caliper from the bracket. Use the caliper hanger hook to suspend it from the frame.
- Do not disconnect, twist, stretch, or kink the brake hose.
Step 6: Remove the Old Pads and Hardware
- Use the flat-blade screwdriver to remove the inner and outer pads from the caliper bracket.
- Use the flat-blade screwdriver to remove the stainless-steel pad clips from the bracket.
- Note the position of any wear indicator tab so the new pads can be installed in the matching orientation.
Step 7: Clean and Lubricate the Bracket
- Use brake cleaner and lint-free shop towels to clean the pad contact areas. Keep brake cleaner away from painted surfaces.
- Use the small nylon brush to remove loose rust and debris beneath the pad clips.
- Install the new hardware clips by hand. Confirm that each clip is completely seated.
- Apply a very thin layer of high-temperature silicone brake lubricant to the pad ears where they touch the clips.
- Do not place lubricant on the rotor or pad friction surfaces.
- Too much lubricant attracts damaging grit.
Step 8: Check the Guide Pins
- Move both guide pins in and out by hand. They should move smoothly and their rubber boots must not be torn.
- If a pin is dry, use lint-free shop towels to wipe it clean and apply a thin coating of high-temperature silicone brake lubricant.
- Replace damaged boots or seized guide pins before continuing.
Step 9: Compress the Caliper Pistons
- Place an old brake pad across both pistons, then position the dual-piston brake caliper compression tool over the old pad.
- Turn the compression tool slowly so both pistons retract evenly into the caliper.
- Watch the brake-fluid reservoir while compressing the pistons. Use the brake fluid syringe if the fluid approaches the reservoir opening.
- Stop if either piston binds, tilts, or leaks fluid. The caliper may require replacement.
Step 10: Install the New Pads
- Press the new inner and outer pads into the new hardware clips by hand.
- Verify that the friction material faces the rotor and that each pad slides freely in the bracket without excessive looseness.
- Install any wear indicator in the same position as the original pad.
Step 11: Reinstall the Caliper
- Remove the caliper from the hanger hook and place it over the new pads without twisting the hose.
- Start both guide-pin bolts by hand to avoid cross-threading.
- Use the 18mm socket and torque wrench to tighten both guide-pin bolts to 100 Nm (74 ft-lbs). Hold a turning guide pin with the 18mm combination wrench.
Step 12: Repeat on the Other Side
- Use the same listed tools and repeat Steps 4 through 11 on the opposite front brake.
- Compare both sides and confirm that all pad clips, boots, and guide-pin bolts are correctly installed.
Step 13: Reinstall the Wheels
- Install both wheels and start every wheel nut by hand.
- Use the 22mm deep socket and 1/2-inch breaker bar to snug the nuts in a crisscross pattern.
- Use the 3-ton floor jack to raise your Tahoe slightly, remove the 6-ton jack stands, and lower it fully to the ground.
- Use the 22mm deep socket and torque wrench to tighten the wheel nuts in a crisscross pattern to 190 Nm (140 ft-lbs).
Step 14: Seat the Pads Against the Rotors
- Before starting or moving your Tahoe, press the brake pedal slowly several times until it becomes firm.
- Use the brake fluid syringe only if excess fluid must be removed. Check the reservoir level and adjust with fresh DOT 3 brake fluid without exceeding MAX.
- Do not drive if the pedal remains soft or sinks toward the floor.
✅ After Repair
- ✅ Start the engine while holding the brake pedal. Confirm that the pedal remains firm and the brake warning lamp goes out.
- ✅ Check around both calipers and the brake-fluid reservoir for leakage.
- ✅ Test the brakes at walking speed in a clear, private area before entering traffic.
- ✅ Follow the brake-pad manufacturer’s bedding procedure. Unless otherwise specified, avoid panic stops, towing, and prolonged brake holding for the first 200 miles.
- ✅ Recheck wheel-nut torque to 190 Nm (140 ft-lbs) after approximately 50 miles.
💰 DIY vs Shop Cost
Shop Cost: ₹18,000-₹35,000 (parts + labor, depending on imported-part availability)
DIY Cost: ₹8,000-₹18,000 (parts only)
You Save: ₹10,000-₹17,000 by doing it yourself!
Labor rates and imported Chevrolet parts availability vary around Sonīpat. This repair takes a shop approximately 1-1.5 hours.
🎯 Ready to get started?
HowToo makes it easy: same-day/2-day shipping on every part, plus all the tools and specialty tools you need! Check out the parts and tools sections below to add everything to your cart.