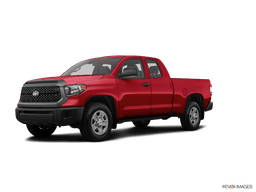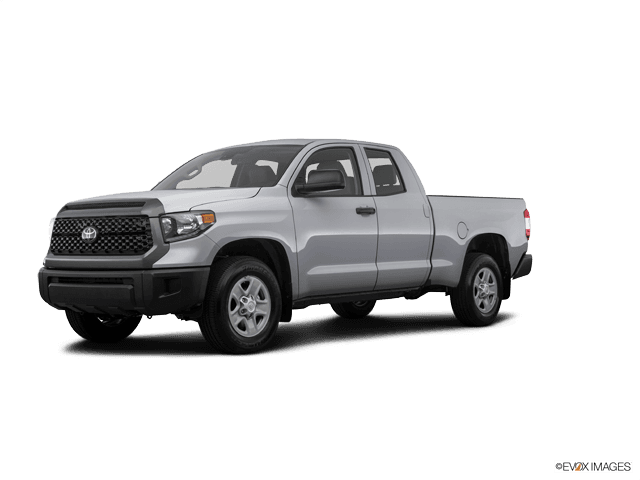

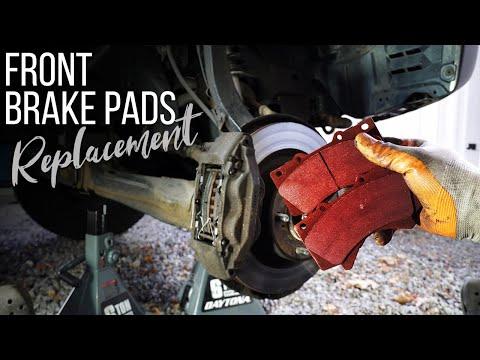







How to Replace Front Brake Pads on a 2007-2021 Toyota Tundra (Trim: Limited)
Step-by-step DIY instructions with tools, parts, safety tips, and torque specs for 2007, 2008, 2009, 2010, 2011, 2012, 2013
How to Replace Front Brake Pads on a 2007-2021 Toyota Tundra (Trim: Limited)
Step-by-step DIY instructions with tools, parts, safety tips, and torque specs for 2007, 2008, 2009, 2010, 2011, 2012, 2013


🔧 Tundra - Front Brake Pad Replacement
Your Tundra uses four-piston fixed front calipers. The pads slide out after removing two retaining pins, so the calipers and brake hoses normally stay installed.
Difficulty Level: Beginner | Estimated Time: 1-2 hours
⚠️ Safety & Precautions
- ⚠️ Support your Tundra with jack stands. Never work beneath a vehicle supported only by a jack.
- 🛑 Replace the front pads as a complete axle set—both front wheels.
- 🧤 Brake dust can be harmful. Do not blow it away with compressed air.
- 🔥 Allow the brakes to cool completely before beginning.
- 💧 Watch the brake-fluid reservoir while retracting the pistons. Remove excess fluid before it overflows.
- 🚫 Keep grease and brake fluid away from pad friction material and rotor surfaces.
- 🔋 Battery disconnection is not required.
🔧 Required Tools
You'll need the following tools for this repair:
- 22mm deep socket
- 1/2-inch drive breaker bar
- 1/2-inch drive torque wrench rated to at least 150 ft-lbs
- Floor jack rated 3-ton minimum
- Jack stands rated 3-ton minimum per pair
- Wheel chocks rated for light trucks
- Needle-nose pliers
- 5mm pin punch
- 16-ounce ball-peen hammer
- Four-piston brake caliper spreader (specialty)
- Small brake-fluid syringe
- Nylon brake-cleaning brush
- Plastic trim tool
- Mechanic gloves
- Safety glasses
🔩 Required Parts
HowToo sells all the parts you need for this repair:
- Front brake pad set - Qty: 1 - Replace both sides
- Front brake pad shim and fitting kit - Qty: 1
- High-temperature silicone brake lubricant - Qty: 1
- Non-chlorinated brake cleaner - Qty: 1 can
- DOT 3 brake fluid - Qty: 1 small sealed bottle, only if adjustment is needed
📋 Before You Begin
- 📍 Park your Tundra on firm, level ground. Shift into Park, apply the parking brake, and switch off the ignition.
- 🛞 Place wheel chocks securely behind both rear tires.
- 🔍 Check the front rotors for deep grooves, blue heat marks, cracks, or thickness variation. Damaged or undersized rotors require replacement or professional measurement.
- 💧 Open the hood and check the brake-fluid reservoir. Use a small brake-fluid syringe to lower the fluid near the MIN line if it is already close to MAX.
- 📱 No infotainment service mode, scan tool, electronic parking-brake retraction, coding, or battery registration is required.
🔨 Step-by-Step Instructions
Follow these steps in order:
Step 1: Loosen the Front Wheel Nuts
- Use a 22mm deep socket and 1/2-inch drive breaker bar to loosen each front lug nut approximately one-half turn.
- Do not remove the lug nuts while the tires are still supporting the vehicle.
Step 2: Raise and Support the Front
- Use the 3-ton floor jack beneath the front frame crossmember to raise your Tundra.
- Position the 3-ton jack stands under the reinforced frame rails behind the front suspension mounting area.
- Lower the vehicle onto the stands and gently test stability before approaching the brakes.
- Keep the floor jack lightly touching the crossmember.
Step 3: Remove Both Front Wheels
- Use the 22mm deep socket to remove the lug nuts.
- Remove each wheel and slide it beneath the frame as an additional safety measure.
Step 4: Inspect the Brake Assembly
- Use the non-chlorinated brake cleaner and nylon brake-cleaning brush to wet and remove loose brake dust.
- Inspect the caliper for wet brake fluid, torn piston boots, seized pistons, or uneven pad wear.
- Stop the repair if one pad is dramatically thinner than its partner or the caliper is leaking. The caliper requires diagnosis before new pads are installed.
Step 5: Remove the Pad Retaining Hardware
- Take a quick photo of the anti-rattle spring orientation before disassembly.
- Use needle-nose pliers to remove the small retaining clips from the two horizontal pad pins.
- Hold the anti-rattle spring with one hand. Use the 5mm pin punch and 16-ounce ball-peen hammer to tap out the upper and lower retaining pins.
- Remove the anti-rattle spring as the pins come out. Keep track of its installed direction.
- Support the spring so it cannot jump free.
Step 6: Remove the Old Pads
- Pull the inner and outer pads straight out through the rear opening in the fixed caliper.
- If a pad sticks, use the plastic trim tool to work it loose without gouging the rotor or piston boots.
- Compare wear across all four pads. Tapered or strongly uneven wear indicates sticking pistons or pad hardware.
Step 7: Retract the Four Caliper Pistons
- Place the old pads back against the pistons as protective plates.
- Use the four-piston brake caliper spreader to press the pistons inward slowly and evenly. A caliper spreader distributes force across opposing pistons.
- Do one side of the caliper gradually while keeping the opposite old pad in place so another piston cannot move outward.
- Watch the reservoir. Use the small brake-fluid syringe if the fluid approaches the top.
- Stop if a piston will not retract with steady moderate pressure. Do not force a seized piston.
Step 8: Prepare the New Pads and Hardware
- Use non-chlorinated brake cleaner and the nylon brake-cleaning brush to clean the retaining pins and caliper pad-contact areas.
- Install the new shims onto the pads in the same arrangement as the originals.
- Apply a very thin film of high-temperature silicone brake lubricant to the pad ears, retaining-pin contact points, and between stacked shims where applicable.
- Do not put lubricant on the rotor-facing friction material or rotor.
Step 9: Install the New Brake Pads
- Slide the new inner and outer pads into the caliper with their friction surfaces facing the rotor.
- Confirm that each pad sits squarely and moves without binding.
- Position the anti-rattle spring exactly as photographed.
- Insert the cleaned retaining pins through the caliper, pads, and spring. Use the 5mm pin punch and 16-ounce ball-peen hammer only for light alignment taps.
- Use needle-nose pliers to reinstall the retaining clips completely into their pin holes.
- No caliper-bolt torque is required because the fixed calipers were not removed.
Step 10: Repeat on the Opposite Side
- Use the same listed tools and procedure to replace the pads on the other front wheel.
- Verify that both calipers have both retaining pins, both retaining clips, and correctly seated anti-rattle springs.
Step 11: Reinstall the Wheels
- Mount each wheel and install the lug nuts by hand to prevent cross-threading.
- Use the 22mm deep socket to snug the lug nuts in a star pattern.
- Use the 3-ton floor jack to raise your Tundra, remove the 3-ton jack stands, and lower the tires to the ground.
- Use the 1/2-inch drive torque wrench and 22mm deep socket to tighten the lug nuts in a star pattern: Torque to 131 Nm (97 ft-lbs).
Step 12: Seat the Pads Before Moving
- With the engine off, press and release the brake pedal slowly until it becomes firm. This may take several strokes.
- Do not move your Tundra until the pedal remains firm and maintains normal height.
- Check the brake-fluid reservoir. Adjust between MIN and MAX using fresh DOT 3 brake fluid only if needed.
✅ After Repair
- 🔍 Check around both calipers and the reservoir for brake-fluid leaks.
- 🛑 Start the engine and hold firm pedal pressure for 30 seconds. The pedal should not continue sinking.
- 🚗 Test the brakes at walking speed in a safe, traffic-free area before normal driving.
- 🌡️ Bed in the pads with 8-10 moderate stops from approximately 50 km/h to 15 km/h. Do not come to a complete stop between applications.
- ❄️ Drive for 5-10 minutes with minimal braking afterward so the brakes can cool.
- 🚫 Avoid panic stops, towing, and holding the hot brakes at a stop for the first 300 km unless safety requires it.
- 🔧 Recheck lug-nut torque after approximately 80-160 km.
💰 DIY vs Shop Cost
Shop Cost: ₹18,000-₹35,000 (parts + labor)
DIY Cost: ₹10,000-₹24,000 (parts only)
You Save: ₹6,000-₹12,000 by doing it yourself!
Imported-part pricing and local labor rates vary. This repair takes a shop approximately 0.8-1.2 hours.
🎯 Ready to get started?
HowToo makes it easy: same-day/2-day shipping on every part, plus all the tools and specialty tools you need! Check out the parts and tools sections below to add everything to your cart.