








How to Replace Front Ball Joints on a 2015-2024 Nissan Murano
Step-by-step lower control arm replacement with tools, torque specs, and safety tips for 2015, 2016, 2017, 2018, 2019, 2020, 2021, 2022, 2023, 2024
How to Replace Front Ball Joints on a 2015-2024 Nissan Murano
Step-by-step lower control arm replacement with tools, torque specs, and safety tips for 2015, 2016, 2017, 2018, 2019, 2020, 2021, 2022, 2023, 2024


🔧 Murano - Front Lower Ball Joint Replacement
On your Murano, Nissan services the front lower ball joint as part of the complete lower control arm, also called the transverse link. Replacing the complete arm is safer and more reliable than pressing an aftermarket joint into the original arm.
Assumption: This procedure covers one front lower ball joint using a complete lower control arm assembly.
Difficulty Level: Advanced | Estimated Time: 2-4 hours per side
⚠️ Safety & Precautions
- ⚠️ Support your Murano with jack stands on solid, level ground; never work under a vehicle supported only by a jack.
- ⚠️ Do not strike the steering knuckle with a steel hammer because it can damage the aluminum knuckle.
- ⚠️ Keep the steering knuckle supported so the CV axle, brake hose, and ABS sensor wire are not stretched.
- ⚠️ The control-arm bushings must be tightened at normal ride height. Tightening them while the suspension hangs can tear the new bushings.
- ⚠️ Do not reuse a damaged cotter pin or a self-locking nut supplied as one-time-use hardware.
- ⚠️ Battery disconnection is not required.
- ⚠️ A professional wheel alignment is required after replacement.
🔧 Required Tools
You'll need the following tools for this repair:
- Hydraulic floor jack rated 2-ton minimum
- Jack stands rated 2-ton minimum
- Wheel chocks
- 1/2-inch-drive breaker bar
- 1/2-inch-drive ratchet
- 3/8-inch-drive ratchet
- 21mm deep socket
- 22mm deep socket
- 18mm combination wrench
- 21mm combination wrench
- 22mm combination wrench
- Torque wrench rated 20-200 Nm
- Ball-joint separator screw type (specialty)
- Needle-nose pliers
- Medium flat-blade screwdriver
- Soft-face mallet
- 12-inch pry bar
- Wire brush
- Paint marker
- Safety glasses
- Mechanic gloves
🔩 Required Parts
HowToo sells all the parts you need for this repair:
- Front lower control arm with ball joint - Qty: 1 per affected side
- Ball-joint retaining nut - Qty: 1 per affected side
- Ball-joint cotter pin - Qty: 1 per affected side
- Control-arm mounting hardware - Qty: 1 set per affected side
Replace both sides if both ball joints have measurable looseness, torn boots, or similar mileage-related wear.
📋 Before You Begin
- 📋 Park on solid, level ground. Set the parking brake and place the transmission in Park.
- 📋 Chock both rear wheels before raising the front of your Murano.
- 📋 Compare the new arm with the original. Confirm the mounting points, bushing orientation, and ball-joint stud match.
- 📋 No infotainment service mode, scan-tool command, or battery disconnection is required.
- 📋 Spray heavily rusted fasteners with penetrating oil and allow time for it to work.
🔨 Step-by-Step Instructions
Follow these steps in order:
Step 1: Loosen the Wheel Nuts
- Use a 21mm deep socket and breaker bar to loosen the five wheel nuts about one-quarter turn.
- Do not remove the nuts while the tire is supporting the vehicle.
Step 2: Raise and Support the Front
- Use the hydraulic floor jack at the front-center lifting point to raise your Murano.
- Place the jack stands under the reinforced front side support points.
- Lower the vehicle carefully onto the stands and gently push the body to confirm it is stable.
Step 3: Remove the Front Wheel
- Use the 21mm deep socket and ratchet to remove the wheel nuts.
- Remove the wheel and slide it beneath the rocker-panel area as an additional safety measure.
Step 4: Inspect the Work Area
- Use a wire brush to clean the visible threads on the ball-joint stud and control-arm bolts.
- Check the brake hose and ABS sensor wire routing before moving the steering knuckle.
- Use a paint marker to mark the original direction and position of the control-arm mounting bolts.
Step 5: Disconnect the Ball Joint
- Use needle-nose pliers to straighten and remove the cotter pin from the ball-joint stud.
- Use a 22mm deep socket and breaker bar to loosen the ball-joint retaining nut.
- Leave the nut threaded on by several turns to catch the knuckle when the taper releases.
- Install the screw-type ball-joint separator between the lower control arm and steering knuckle. A separator forces the tapered stud free without hammering the knuckle.
- Tighten the separator until the stud releases, then remove the tool and retaining nut.
- Support the steering knuckle so it cannot pull on the brake hose, ABS wire, or CV axle.
- Keep fingers clear when the taper releases.
Step 6: Remove the Control-Arm Mounting Bolts
- Use the appropriate 21mm or 22mm socket with the matching combination wrench to remove the rear bushing fastener.
- Use the appropriate 18mm or 21mm socket with the matching combination wrench to remove the front bushing fastener.
- Use the 12-inch pry bar only at the steel control arm to guide the bushings out of the subframe brackets.
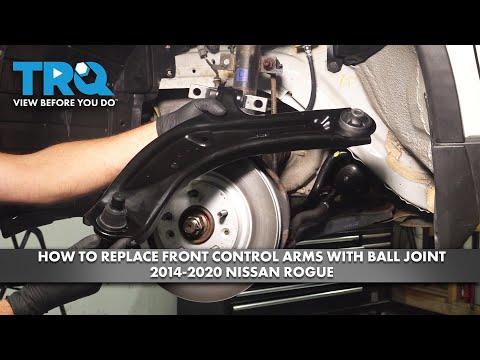
- Remove the complete lower control arm from your Murano.
- Do not pry against the aluminum steering knuckle or CV-axle boot.
Step 7: Position the New Control Arm
- Compare the new arm against the removed arm before installation.
- Guide the new arm into the subframe brackets by hand.
- Use the soft-face mallet only if light tapping is needed at the arm’s steel bushing sleeves.
- Install the front and rear mounting fasteners finger-tight. Do not apply final torque yet.
Step 8: Connect the New Ball Joint
- Guide the ball-joint stud into the steering-knuckle taper without damaging the rubber boot.
- Install the new retaining nut and tighten it with a 22mm deep socket and torque wrench to 62 Nm (46 ft-lbs).
- If the cotter-pin holes do not align, tighten the nut slightly until the next slot aligns. Never loosen the nut to align it.
- Use needle-nose pliers to install and bend the new cotter pin securely.
Step 9: Load the Suspension
- Install the wheel temporarily and tighten the nuts by hand.
- Use the hydraulic floor jack under the outer end of the lower control arm to raise the suspension until your Murano just begins to lift from the jack stand.
- This places the control-arm bushings near normal ride height for final tightening.
- Keep the jack stand in place as the primary support.
Step 10: Tighten the Control-Arm Fasteners
- Use the matching 21mm or 22mm socket, combination wrench, and torque wrench to tighten the rear bushing fastener to 165 Nm (122 ft-lbs).
- Use the matching 18mm or 21mm socket, combination wrench, and torque wrench to tighten the front bushing fastener to 103 Nm (76 ft-lbs).
- Confirm the ball-joint boot is not twisted or pinched.
Step 11: Reinstall the Wheel
- Lower the floor jack from beneath the control arm.
- Install the wheel and start all five wheel nuts by hand.
- Use the 21mm deep socket and ratchet to snug the nuts in a star pattern.
- Raise the vehicle slightly, remove the jack stands, and lower your Murano to the ground.
- Use the 21mm deep socket and torque wrench to tighten the wheel nuts in a star pattern to 113 Nm (83 ft-lbs).
✅ After Repair
- ✅ Turn the steering wheel fully left and right while parked. Listen for contact, popping, or binding.
- ✅ Press the brake pedal several times before moving the vehicle.
- ✅ Drive slowly in a safe area and check for clunks, pulling, or abnormal steering feel.
- ✅ Have a four-wheel alignment performed immediately because removing the lower control arm can change toe and camber.
- ✅ Recheck the wheel-nut torque after 80-160 km or 50-100 miles.
- ✅ Stop driving and recheck the installation if the steering wheel is severely off-center or any looseness remains.
💰 DIY vs Shop Cost
Shop Cost: $500-$900 per side (parts + labor)
DIY Cost: $140-$350 per side (parts only)
You Save: $350-$550 by doing it yourself!
Shop labor rates vary but typically run $100-$150/hour. This repair takes a shop approximately 1.5-2.5 hours per side, plus alignment.
🎯 Ready to get started?
HowToo makes it easy: same-day/2-day shipping on every part, plus all the tools and specialty tools you need! Check out the parts and tools sections below to add everything to your cart.