

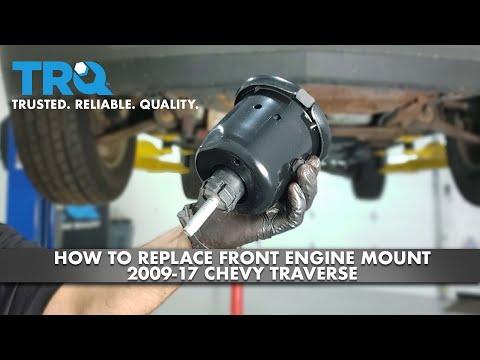






How to Replace Engine and Transmission Mounts on a 2018-2023 Chevrolet Traverse (Engine: V6 3.6L)
Advanced step-by-step guide covering tools, parts, powertrain support, safety, and torque specs for 2018, 2019, 2020, 2021, 2022, 2023
How to Replace Engine and Transmission Mounts on a 2018-2023 Chevrolet Traverse (Engine: V6 3.6L)
Advanced step-by-step guide covering tools, parts, powertrain support, safety, and torque specs for 2018, 2019, 2020, 2021, 2022, 2023


🔧 Traverse - Engine Mount Replacement
This is an advanced repair, especially when replacing every mount. Your Traverse uses multiple powertrain mounts, and access to the lower front and rear mounts can require exhaust and cradle work. The right hydraulic mount is usually the most approachable one, while the complete set is better handled with a lift and an engine support fixture.
Difficulty Level: Advanced | Estimated Time: 5-9 hours for the complete set
Assumption: These instructions cover complete mount replacement using a matched mount kit. Exact access and tightening specifications vary by mount position.
⚠️ Safety & Precautions
- ⚠️ Never remove a mount until the engine and transmission are independently supported.
- ⚠️ Never place any part of your body beneath a powertrain supported only by a jack.
- ⚠️ Support the vehicle by its approved lifting points with correctly rated jack stands.
- ⚠️ Use a broad wood block if supporting beneath a structural transmission housing. Never lift against the oil pan, transmission pan, or plastic covers.
- ⚠️ Disconnect the negative battery cable before moving the battery tray, fuse block, or nearby wiring.
- ⚠️ Replace one mount at a time. Removing several together can let the powertrain shift suddenly.
- ⚠️ Let the engine and exhaust cool completely before beginning.
- ⚠️ Do not start the engine while any mount fastener is loose.
🔧 Required Tools
You'll need the following tools for this repair:
- Metric socket set, 8mm-21mm
- Metric deep socket set, 10mm-21mm
- Metric combination wrench set, 10mm-21mm
- 3/8-inch drive ratchet
- 1/2-inch drive breaker bar
- 3/8-inch drive extension set, 3-12 inches
- 1/2-inch drive extension set, 3-10 inches
- Universal-joint socket adapter
- Torque wrench, 10-150 ft-lbs
- Engine support bar, 1,000-pound minimum (specialty)
- Transmission jack, 1,000-pound minimum (specialty)
- Floor jack, rated 3-ton minimum
- Jack stands, rated 3-ton minimum
- Wheel chocks
- Trim-clip removal tool
- Flat-blade screwdriver, 6-inch
- Paint marker
- Penetrating oil
- Work light
- Mechanic gloves
- Safety glasses
🔩 Required Parts
HowToo sells all the parts you need for this repair:
- Complete engine and transmission mount kit - Qty: 1
- Right hydraulic engine mount - Qty: 1 if replacing separately
- Mount fasteners specified as single-use - Qty: As required
- Exhaust flange gaskets - Qty: As required if the exhaust is separated
- Exhaust fasteners - Qty: As required if corroded
The matching engine-mount aisles are open in the parts list. A complete kit is the sensible choice when several mounts are collapsed or oil-soaked. Mixing one stiff new mount with three tired mounts can leave you chasing vibration. That’s shop whack-a-mole.
📋 Before You Begin
- Park on level, solid ground. Select Park, apply the parking brake, and chock both rear wheels.
- Open the hood and photograph the mount locations, brackets, wiring clips, and ground cables.
- Remove the key from the vehicle and wait at least two minutes before disconnecting the battery.
- Use a 10mm socket to disconnect the negative battery terminal. Isolate the cable so it cannot spring back.
- Use an engine support bar across the upper body structure. An engine support bar holds the powertrain from above while a mount is removed.
- Mark each mount and bracket position with a paint marker before loosening it.
- Inspect every mount first. Replace a mount showing separated rubber, deep cracking, collapsed height, or hydraulic-fluid leakage. Make sure apparent mount fluid is not engine oil leaking from above. charm.li
🔨 Step-by-Step Instructions
Follow these steps in order:
Step 1: Raise and secure the Traverse
- Use the floor jack at an approved central lifting point and raise the front of the vehicle.
- Place both 3-ton jack stands beneath the approved side support points.
- Lower the vehicle onto the stands, then gently shake it to verify stability.
- Use a trim-clip removal tool and the appropriate metric socket to remove the lower splash shield.
Step 2: Support the powertrain
- Install the 1,000-pound engine support bar across the upper body structure.
- Attach its chains to suitable factory engine lifting points.
- Tension the support only until it carries the engine’s weight. Do not lift the vehicle through the engine.
- Position the transmission jack beneath a solid transmission housing rib for secondary support.
- Support first, loosen second.
Step 3: Remove upper access components
- Use an 8mm or appropriate metric socket to loosen the air-intake clamps.
- Disconnect the intake duct carefully, then remove the air-cleaner housing.
- Use a 10mm socket to remove any battery-tray or fuse-block fasteners obstructing the left mount.
- Use the trim-clip removal tool to release wiring retainers. Do not pull directly on wires.
- Label and photograph each connector or ground cable before moving it.
Step 4: Replace the right hydraulic mount
- Confirm the engine support bar is carrying the right side of the engine.
- Use the matching metric socket, extensions, and breaker bar to loosen the mount-to-body and mount-to-bracket fasteners.
- Remove the fasteners while watching for engine movement.
- Adjust the engine support bar only enough to unload the mount. Never force the engine upward against hoses or wiring.
- Remove the old mount and compare its height, stud locations, heat shielding, and locating tabs with the replacement.
- Place the new mount in position and install every fastener finger-tight.
- Do not apply final torque yet.
Step 5: Replace the left transmission mount
- Support the transmission with the transmission jack before loosening this mount.
- Use the appropriate metric sockets to remove the obstructing battery tray or related brackets.
- Mark the mount bracket position with the paint marker.
- Use the breaker bar and appropriate metric socket to loosen the mount nuts and bracket bolts.
- Raise the transmission only enough to remove the load from the mount.
- Remove the mount and transfer any reusable bracket or heat shield in the same orientation.
- Install the replacement and start every fastener by hand. Leave them snug but not fully tightened.
Step 6: Replace the lower front mount
- Verify that both upper support and transmission jack remain secure.
- Use penetrating oil on exposed exhaust or cradle fasteners and allow it time to work.
- Use the appropriate sockets and extensions to remove shields or braces blocking the front mount.
- Support the mount area before removing its through-bolt or retaining fasteners.
- Adjust powertrain height a few millimeters at a time until the fastener slides out without hammering.
- Install the new mount in the same orientation, matching all locating tabs.
- Install the fasteners finger-tight.
Step 7: Replace the lower rear mount
- Inspect access around the rear mount before removing anything. Exhaust or cradle clearance may be required.
- If the exhaust must be separated, use safety glasses, penetrating oil, the breaker bar, and the appropriate metric socket.
- Support the exhaust so its weight does not hang from the remaining joints.
- If cradle movement is necessary, mark its position with the paint marker and support it with the transmission jack.
- Never remove all cradle fasteners. Lower only the service-manual-specified area enough to create access.
- Use the appropriate metric sockets and extensions to remove the rear-mount fasteners.
- Adjust the support bar slightly, remove the old mount, and install the replacement finger-tight.
- If you cannot access the rear mount without major cradle movement, stop and have a properly equipped shop finish this mount.
Step 8: Settle and tighten the mounts
- Check that every fastener is started correctly and no wiring, hose, heat shield, or exhaust component is trapped.
- Gradually lower the engine support bar and transmission jack until the powertrain rests naturally on all mounts.
- Gently rock the powertrain by hand to remove preload. Preload means the mounts are being twisted before the engine even runs.
- Use the torque wrench to tighten each fastener to its position-specific GM specification.
- Do not use one universal torque value. Through-bolts, bracket bolts, body bolts, and nuts can require different specifications.
- The older GM service information available for comparison lists mount-related values ranging from 50 Nm (37 ft-lbs) to 90 Nm (66 ft-lbs), depending on fastener position. These are not a substitute for the exact 2019 mount-specific specification. charm.li)
Step 9: Reassemble the removed components
- Use the appropriate metric sockets to reinstall braces, shields, the battery tray, and the air-cleaner housing.
- Reconnect every wiring connector, ground cable, intake hose, and retaining clip.
- If the exhaust was opened, install new gaskets and inspect the sealing faces before assembly.
- Use the torque wrench to tighten any cradle or structural fasteners to their exact GM specifications.
- Use a 10mm socket to reconnect the negative battery terminal.
Step 10: Lower the vehicle
- Remove all tools from beneath the vehicle.
- Use the floor jack to raise the vehicle slightly and remove both jack stands.
- Lower the Traverse fully, then remove the wheel chocks.
✅ After Repair
- Start the engine with the transmission in Park and keep your foot firmly on the brake.
- Watch the engine while a helper briefly selects Reverse and Drive. Excessive lifting or clunking indicates a loose, incorrect, or preloaded mount.
- Check for abnormal vibration at idle with the air conditioning both off and on.
- Inspect the exhaust for leakage or contact with the body and heat shields.
- Take a short, low-speed test drive. Listen during acceleration, braking, and shifting between Drive and Reverse.
- Reinspect every accessible mount fastener and confirm that no fluid, wiring, or intake connection was disturbed.
- If the steering wheel is no longer centered after cradle movement, have the alignment checked immediately.
💰 DIY vs Shop Cost
Shop Cost: $1,000-$2,200 USD for a complete mount set, depending on access and local labor
DIY Cost: $300-$650 USD for parts and normal consumables
You Save: Approximately $700-$1,550 USD by doing it yourself!
Labor prices vary considerably by region. A complete mount replacement commonly occupies a shop lift for approximately 5-9 hours.
🎯 Ready to get started?
HowToo makes it easy: same-day/2-day shipping on every part, plus all the tools and specialty tools you need! Check out the parts and tools sections below to add everything to your cart.