

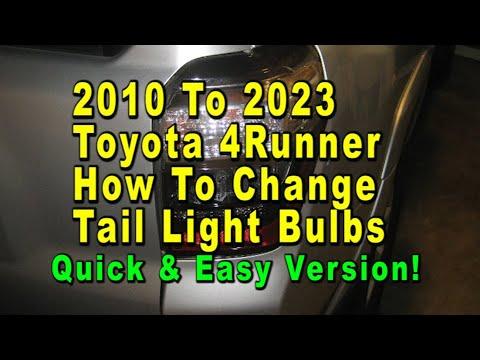







How to Replace Both Taillight Bulbs on a 2014-2023 Toyota 4Runner (Trim: TRD Off-Road)
Step-by-step 7443 bulb replacement with tools, safety tips, testing, and torque specs for 2014, 2015, 2016, 2017, 2018, 2019, 2020, 2021, 2022, 2023
How to Replace Both Taillight Bulbs on a 2014-2023 Toyota 4Runner (Trim: TRD Off-Road)
Step-by-step 7443 bulb replacement with tools, safety tips, testing, and torque specs for 2014, 2015, 2016, 2017, 2018, 2019, 2020, 2021, 2022, 2023


🔧 4Runner - Taillight Bulb Replacement
This procedure replaces the left and right rear stop/taillight bulbs. Each rear lamp assembly must be unbolted and pulled straight rearward to reach the bulb socket.
Assumption: “Both” means the stop/taillight bulb on each side.
Difficulty Level: Beginner | Estimated Time: 0.5-1 hour
⚠️ Safety & Precautions
- ⚠️ Switch all exterior lights off and allow hot bulbs to cool.
- 🧤 Wear gloves and safety glasses because a damaged bulb can break.
- 🔋 Battery disconnection is not required for this repair.
- 💡 Use the specified incandescent bulbs unless compatible LED operation has been verified.
- 🚫 Do not force the lamp sideways; this can break its locating pins.
🔧 Required Tools
You'll need the following tools for this repair:
- 10mm socket
- 1/4-inch drive ratchet
- 3-inch socket extension
- Plastic trim-removal tool
- 1/4-inch drive inch-pound torque wrench
- Nitrile mechanic gloves
- Safety glasses
- Clean microfiber cloth
🔩 Required Parts
HowToo sells all the parts you need for this repair:
- 7443 clear dual-filament stop/taillight bulbs - Replace in pairs - Qty: 2
📋 Before You Begin
- 🅿️ Park your 4Runner on level ground, select Park, apply the parking brake, and switch the ignition off.
- 💡 Confirm the headlight switch and hazard lights are off.
- 🚪 Open the rear liftgate completely to expose the lamp retaining bolts.
- 📦 Remove loose cargo that could interfere with your work.
🔨 Step-by-Step Instructions
Follow these steps in order:
Step 1: Remove the left lamp retaining bolts
- Use the 10mm socket, 3-inch socket extension, and 1/4-inch drive ratchet to remove the two bolts along the inside edge of the left rear lamp.
- Place the bolts somewhere safe so they cannot fall behind the bumper.
Step 2: Release the left lamp assembly
- Wear the nitrile mechanic gloves and hold the lamp securely.
- Pull the assembly straight toward the rear of your 4Runner to disengage its locating pins.
- If it is tight, use the plastic trim-removal tool gently between the lamp and body. Do not twist against the painted panel.
- Wiggle rearward gently; never pry sideways.
Step 3: Remove the left stop/taillight bulb
- Identify the stop/taillight socket behind the red lens area. It is the socket for the dual-function running light and brake light.
- Use your nitrile mechanic gloves to turn the socket counterclockwise approximately one-quarter turn, then pull it out.
- Pull the old 7443 bulb straight out of the socket using your gloved fingers.
- Do not pull on the wiring.
Step 4: Install and test the left bulb
- Push one new 7443 clear dual-filament bulb straight into the socket using your nitrile mechanic gloves.
- Temporarily switch on the parking lights and press the brake pedal with an assistant watching the lamp.
- If the bulb does not illuminate, switch the lights off, remove the bulb with your nitrile mechanic gloves, rotate it 180 degrees, and reinstall it.
- Switch the lights off before continuing.
Step 5: Reinstall the left socket and lamp
- Use your nitrile mechanic gloves to insert the socket and turn it clockwise until it locks.
- Align the lamp locating pins with their body grommets, then press the assembly straight forward by hand until fully seated.
- Start both bolts by hand to prevent cross-threading.
- Use the 10mm socket, 3-inch socket extension, and 1/4-inch drive inch-pound torque wrench to tighten both bolts to 5.4 Nm (48 in-lbs).
- Stop tightening as soon as torque is reached.
Step 6: Replace the right stop/taillight bulb
- Use the 10mm socket, 3-inch socket extension, and 1/4-inch drive ratchet to remove the two right lamp bolts.
- Pull the assembly straight rearward by hand. Use the plastic trim-removal tool gently only if needed.
- Using your nitrile mechanic gloves, turn the stop/taillight socket counterclockwise and remove it.
- Pull out the old bulb and push the second new 7443 clear dual-filament bulb straight into the socket.
- Reinstall the socket clockwise, align the locating pins, and press the lamp straight into place.
- Start both bolts by hand. Use the 10mm socket, extension, and torque wrench to tighten them to 5.4 Nm (48 in-lbs).
Step 7: Clean the work area
- Use the clean microfiber cloth to remove fingerprints from both lamp lenses.
- Make sure no tools or old bulbs remain near the liftgate opening before closing it.
✅ After Repair
- 💡 Turn on the parking lights and verify that both taillights illuminate evenly.
- 🛑 Press the brake pedal and confirm that both bulbs become noticeably brighter.
- 🔍 Check that both lamp assemblies sit flush and do not move when touched gently.
- 🚨 Test the turn signals and hazard lights to ensure no nearby socket was disturbed.
- ♻️ Place the old bulbs in protective packaging before taking them to an appropriate automotive waste collection facility.
💰 DIY vs Shop Cost
Shop Cost: $60-$130 (parts + labor)
DIY Cost: $8-$25 (parts only)
You Save: $52-$105 by doing it yourself!
Shop labor rates vary but typically run $100-$150/hour. This repair takes a shop approximately 0.3-0.5 hour.
🎯 Ready to get started?
HowToo makes it easy: same-day/2-day shipping on every part, plus all the tools and specialty tools you need! Check out the parts and tools sections below to add everything to your cart.