








How to Replace Both Side-View Mirrors on a 2013-2018 Toyota Avalon
Step-by-step guide with tools, parts, wiring, torque specs, and safety tips for 2013, 2014, 2015, 2016, 2017, 2018
How to Replace Both Side-View Mirrors on a 2013-2018 Toyota Avalon
Step-by-step guide with tools, parts, wiring, torque specs, and safety tips for 2013, 2014, 2015, 2016, 2017, 2018


🔧 Avalon - Both Side-View Mirror Replacement
Replacing both mirror assemblies requires removing the front door trim panels, disconnecting the mirror wiring, and transferring any reusable exterior covers if the new mirrors arrive unfinished. Your Avalon Limited uses feature-rich mirrors, so replacements must support the original blind-spot monitoring, heating, memory, turn-signal, puddle-light, and auto-dimming functions.
Difficulty Level: Intermediate | Estimated Time: 2-3 hours
Assumption: Complete, feature-matched mirror assemblies are being installed.
⚠️ Safety & Precautions
- ⚠️ Turn the ignition off and disconnect the battery before unplugging door electrical connectors.
- ⚠️ Wait at least 90 seconds after disconnecting the battery before beginning work.
- ⚠️ Support each mirror while removing its mounting nuts so it cannot fall against the door.
- ⚠️ Do not switch the ignition on while door connectors are unplugged; this can store fault codes.
- ⚠️ Protect the painted door and mirror cover with clean masking tape.
- ⚠️ Use only feature-matched mirrors. An incompatible mirror can disable blind-spot monitoring or memory functions.
🔧 Required Tools
You'll need the following tools for this repair:
- 10mm socket
- 1/4-inch drive ratchet
- 1/4-inch drive 6-inch extension
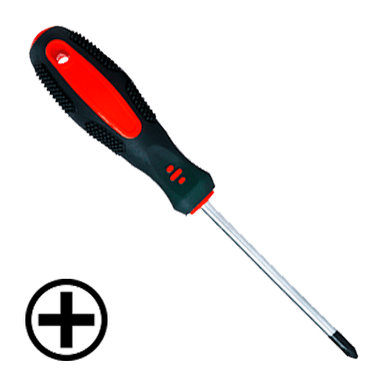
- Phillips No. 2 screwdriver
- Plastic trim-removal tool set
- Plastic push-clip removal tool
- Needle-nose pliers
- Torque wrench rated 2-20 Nm
- Digital multimeter rated 12 volts DC
- Low-tack automotive masking tape
- Clean microfiber towels
- Nitrile mechanic gloves
- Safety glasses
🔩 Required Parts
HowToo sells all the parts you need for this repair:
- Driver-side complete mirror assembly with Limited features - Qty: 1
- Passenger-side complete mirror assembly with Limited features - Qty: 1
- Mirror-to-door foam seals - Qty: 2
- Front door trim-panel clips - Qty: 1 set
- Mirror covers in matching finish - Qty: 2, if not included
Match every electrical feature and connector before installation. Do not install a basic mirror in place of the original Limited mirror.
📋 Before You Begin
- 📋 Park your Avalon on level ground, select Park, and apply the parking brake.
- 📋 Lower both front windows. This gives you a safe way to open the doors if the battery is disconnected.
- 📋 Save any radio presets or personal settings you may need.
- 📋 Turn off the ignition and keep the smart key at least 2 metres from the vehicle.
- 📋 Open the boot before disconnecting the battery because the battery is located there.
- 📋 Compare the new and old mirror connectors, mounting studs, camera openings, and equipment before removing either original mirror.
- 📋 A trim-removal tool is a non-metal pry tool designed to release interior panels without scratching them.
🔨 Step-by-Step Instructions
Follow these steps in order:
Step 1: Disconnect the Battery
- Use the 10mm socket, extension, and ratchet to loosen the negative battery-terminal clamp in the boot.
- Remove the negative clamp and position it where it cannot touch the battery post.
- Wait at least 90 seconds before working on the doors.
Step 2: Protect the Driver Door
- Use low-tack automotive masking tape around the interior sail-panel edge and the exterior mirror base.
- Place a clean microfiber towel over the door sill.
- Tape prevents expensive paint and trim scratches.
Step 3: Remove the Driver-Side Sail Panel
- The sail panel is the small triangular interior trim directly opposite the mirror.
- Use a plastic trim-removal tool to pull the panel inward from its upper edge.
- Release its clips carefully and set the panel aside.
- Do not use a metal screwdriver because it can damage the panel or window glass.
Step 4: Remove the Driver Door Switch Panel
- Use a plastic trim-removal tool to lift the rear edge of the armrest switch panel.
- Work forward gently until its retaining clips release.
- Press the locking tabs and unplug the switch-panel connectors by hand.
- Set the switch panel on a clean microfiber towel.
Step 5: Remove the Driver Door-Panel Fasteners
- Use a plastic trim-removal tool to remove the small cover behind the interior door-release handle.
- Use a Phillips No. 2 screwdriver to remove the exposed screw.
- Use the same screwdriver to remove the screw exposed beneath the switch panel.
- Keep the fasteners arranged in removal order.
Step 6: Release the Driver Door Panel
- Insert a plastic push-clip removal tool between the lower door panel and metal door shell.
- Release the clips along the bottom and both sides, working one clip at a time.
- Lift the panel straight upward to unhook it from the window ledge.
- Support the panel instead of letting it hang from its cables or wiring.
Step 7: Disconnect the Driver Door Panel
- Use needle-nose pliers only if needed to release the door-handle cable housings without crushing them.
- Unhook the lock and release cables from the handle levers by hand.
- Press the connector tabs and unplug the courtesy-light and remaining electrical connectors by hand.
- Place the panel on a clean microfiber towel with its finished side facing upward.
Step 8: Disconnect the Driver Mirror
- Peel back only enough moisture barrier to reach the mirror connector. Do not tear the barrier or its sealing adhesive.
- Release the mirror harness from its retainers by hand.
- Press the locking tab and unplug the mirror connector.
- Use a digital multimeter only if connector identification is uncertain; do not probe or apply power to blind-spot monitoring circuits.
Step 9: Remove the Driver Mirror
- Hold the mirror firmly from outside or have a helper support it.
- Use the 10mm socket, extension, and ratchet to remove the three mirror mounting nuts.
- Keep the socket centred so a nut does not fall inside the door.
- Pull the mirror straight away from the door while guiding its connector and harness through the opening.
Step 10: Prepare the New Driver Mirror
- Use a clean microfiber towel to clean the mounting surface without disturbing the paint.
- Confirm that the new foam seal lies flat around the mirror base.
- If the painted cover must be transferred, use a plastic trim-removal tool to release its clips gradually from the old mirror, then press it evenly onto the new assembly.
- Do not pry against the mirror glass.
Step 11: Install the New Driver Mirror
- Guide the wiring through the door opening and seat the mirror base evenly against the door.
- Start all three mounting nuts by hand to prevent cross-threading.
- Use the 10mm socket and torque wrench to tighten the nuts evenly to 8 Nm (71 in-lbs).
- Do not overtighten the nuts; excessive force can crack the mirror base.
- Connect the mirror plug by hand until its lock clicks, then secure the harness in every original retainer.
Step 12: Reinstall the Driver Door Panel
- Press the moisture barrier back onto its original adhesive using gloved fingers.
- Reconnect the courtesy-light and other electrical connectors by hand.
- Reconnect both handle cables and make sure each cable housing locks into its bracket.
- Hang the top of the panel over the window ledge, then press around its edges to engage every clip.
- Use the Phillips No. 2 screwdriver to reinstall both panel screws until snug. These are trim screws; do not overtighten them.
- Reconnect and press the switch panel into place by hand.
- Press the handle cover and sail panel into place by hand.
Step 13: Replace the Passenger Mirror
- Repeat Steps 2 through 12 on the passenger door using the same tools and precautions.
- Support the passenger mirror before removing its three mounting nuts.
- Use the 10mm socket and torque wrench to tighten the passenger mirror nuts to 8 Nm (71 in-lbs).
- Confirm that the passenger-side harness follows its original route and cannot contact the window mechanism.
Step 14: Reconnect the Battery
- Make sure both doors are fully assembled and all electrical connectors are attached.
- Place the negative clamp onto the battery post.
- Use the 10mm socket and torque wrench to tighten the terminal clamp to 5.4 Nm (48 in-lbs).
- Remove all masking tape and wipe both mirror bases with a clean microfiber towel.
✅ After Repair
- ✅ Switch the ignition on and check both mirrors through their full range using the mirror-control switch.
- ✅ Confirm the driver memory buttons recall the mirror positions correctly.
- ✅ Check both turn signals, puddle lights, and mirror heaters. The heaters operate with the rear-window defogger.
- ✅ Confirm both blind-spot monitor indicators illuminate during the ignition self-check.
- ✅ Check both front windows, door locks, speakers, courtesy lamps, and interior door handles.
- ✅ Initialize each automatic window if one-touch operation was lost: close the window completely, then hold the switch in the UP position for approximately one additional second.
- ✅ Set the clock and restore saved settings if needed.
- ✅ Road-test at low speed and listen for wind noise or loose door-panel clips.
- ✅ Mirror replacement alone normally does not require blind-spot monitor calibration if the correct complete assemblies were fitted and no rear radar sensor was disturbed. If a blind-spot warning remains displayed, have the system scanned before relying on it.
💰 DIY vs Shop Cost
Shop Cost: ₹90,000-₹180,000 (parts + labour)
DIY Cost: ₹65,000-₹145,000 (parts only)
You Save: ₹20,000-₹40,000 by doing it yourself!
Local labour rates and imported mirror prices vary considerably. This repair takes a shop approximately 2-3 hours.
🎯 Ready to get started?
HowToo makes it easy: same-day/2-day shipping on every part, plus all the tools and specialty tools you need! Check out the parts and tools sections below to add everything to your cart.