

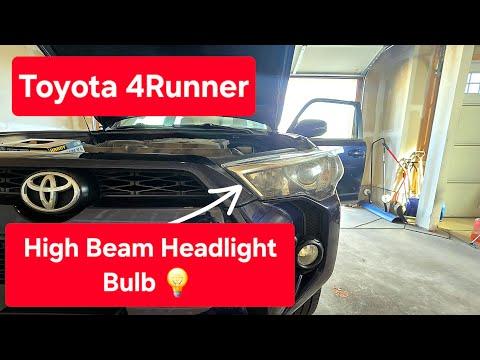





How to Replace Both Low-Beam Headlight Bulbs on a 2006-2020 Toyota 4Runner
Step-by-step H11 halogen bulb replacement with required parts, tools, and safety tips for 2006, 2007, 2008, 2009, 2010, 2011, 2012, 2013, 2014, 2015, 2016, 2017, 2018, 2019, 2020
How to Replace Both Low-Beam Headlight Bulbs on a 2006-2020 Toyota 4Runner
Step-by-step H11 halogen bulb replacement with required parts, tools, and safety tips for 2006, 2007, 2008, 2009, 2010, 2011, 2012, 2013, 2014, 2015, 2016, 2017, 2018, 2019, 2020


🔧 4Runner - Both Low-Beam Headlight Bulb Replacement
This procedure replaces the left and right low-beam bulbs through the engine compartment. Your 4Runner uses replaceable H11 halogen low-beam bulbs; replacing both together keeps their brightness and color consistent.
Assumption: “Both headlight bulbs” means both low-beam bulbs, not the high-beam bulbs.
Difficulty Level: Beginner | Estimated Time: 20-30 minutes
⚠️ Safety & Precautions
- Turn the headlights off and allow the bulbs to cool completely.
- Wear safety glasses and nitrile gloves. Halogen bulbs can become extremely hot.
- Do not touch the glass portion of a new bulb. Skin oil can create a hot spot and shorten bulb life.
- Do not force the bulb or electrical connector; the plastic locking tabs can break.
- Battery disconnection is not required for this repair.
🔧 Required Tools
You'll need the following tools for this repair:
- LED inspection light
- Clean microfiber cloth
- Nitrile mechanic gloves
- Safety glasses
🔩 Required Parts
HowToo sells all the parts you need for this repair:
- H11 halogen low-beam headlight bulbs - Qty: 2 - Replace in pairs
📋 Before You Begin
- Park your 4Runner on level ground, select Park, engage the parking brake, and switch off the ignition.
- Turn the headlight control to OFF and remove the key from the vehicle area.
- Open the hood and support it securely.
- Wait at least 10 minutes if the headlights were recently operating.
- Unpack each new bulb by its plastic base. Keep the glass clean and protected until installation.
🔨 Step-by-Step Instructions
Follow these steps in order:
Step 1: Identify the Low-Beam Bulbs
- Put on the safety glasses and nitrile mechanic gloves.
- Use the LED inspection light to look behind each headlight housing from inside the engine compartment.
- Locate the low-beam bulb at the rear of each outer projector lamp. It has a two-wire electrical connector attached directly to its plastic base.
- Do not remove the nearby high-beam bulb, which uses a different 9005 bulb type.
Step 2: Disconnect the Driver-Side Bulb
- Use the LED inspection light to see the connector locking tab.
- Press the locking tab with a gloved finger and pull the connector straight away from the bulb base.
- Pull on the connector body, not the wires.
- Wiggle gently if the connector feels tight.
Step 3: Remove the Driver-Side Bulb
- Grip the plastic bulb base with the nitrile mechanic gloves.
- Rotate the bulb approximately one-quarter turn counterclockwise when viewed from behind the headlight.
- Pull the bulb straight out without scraping its glass against the housing.
- No fastener torque specification applies because the bulb uses a quarter-turn locking base.
Step 4: Install the New Driver-Side Bulb
- Hold the new H11 bulb only by its plastic base while wearing the nitrile mechanic gloves.
- Align the bulb’s three locking tabs with the matching openings in the headlight housing.
- Insert the bulb fully, then rotate it clockwise approximately one-quarter turn until it stops securely.
- Reconnect the electrical plug until its locking tab clicks.
- Gently tug the connector body to verify that it is locked.
- If the glass is accidentally touched, clean it completely with the clean microfiber cloth before installation.
Step 5: Disconnect the Passenger-Side Bulb
- Move to the passenger side and use the LED inspection light to locate the matching low-beam bulb behind the headlight housing.
- Reach around the washer-fluid filler neck; it normally does not need to be removed.
- Press the electrical connector’s locking tab with a gloved finger and pull the connector straight off.
- Do not pull or twist the wiring harness.
Step 6: Replace the Passenger-Side Bulb
- Grip the bulb base with the nitrile mechanic gloves and rotate it counterclockwise approximately one-quarter turn.
- Pull the old bulb straight out.
- Align the three tabs on the new H11 bulb and insert it completely.
- Rotate the bulb clockwise approximately one-quarter turn until securely locked.
- Push the electrical connector onto the bulb until it clicks.
- No fastener torque specification applies because the bulb uses a quarter-turn locking base.
Step 7: Check the Installation
- Use the LED inspection light to confirm that both bulb bases sit flat against their housings.
- Check that both electrical connectors are fully seated and no wires are trapped or stretched.
- Use the clean microfiber cloth to remove any fingerprints from surrounding components.
- Remove all tools from the engine compartment and close the hood securely.
✅ After Repair
- Start your 4Runner and switch on the low-beam headlights.
- Confirm that both bulbs illuminate steadily with similar brightness and color.
- Check the high beams separately to confirm the correct bulbs were replaced.
- Park approximately 7.5 metres from a wall and verify that the original beam pattern remains even. A bulb that sits crooked must be removed and correctly reseated.
- No scan-tool reset, coding, or infotainment procedure is required.
- If one bulb remains off, switch the lights off and recheck its electrical connector and bulb seating.
💰 DIY vs Shop Cost
Shop Cost: ₹2,000-₹5,000 (parts + labor)
DIY Cost: ₹1,200-₹3,000 (parts only)
You Save: ₹800-₹2,000 by doing it yourself!
Labor rates around Sonīpat vary by workshop. This repair typically takes a shop approximately 0.3-0.5 hour.
🎯 Ready to get started?
HowToo makes it easy: same-day/2-day shipping on every part, plus all the tools and specialty tools you need! Check out the parts and tools sections below to add everything to your cart.