

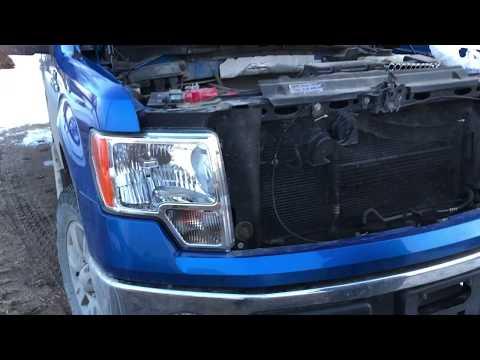







How to Replace Both Headlight Bulbs on a 2009-2014 Ford F-150
Step-by-step H13/9008 bulb replacement with required tools, torque specs, and safety tips for 2009, 2010, 2011, 2012, 2013, 2014
How to Replace Both Headlight Bulbs on a 2009-2014 Ford F-150
Step-by-step H13/9008 bulb replacement with required tools, torque specs, and safety tips for 2009, 2010, 2011, 2012, 2013, 2014


🔧 F-150 - Both Headlight Bulb Replacement
Your F-150 uses one dual-filament H13/9008 halogen bulb in each headlamp assembly for both low and high beams. Replacing both bulbs together keeps their brightness and color consistent.
Difficulty Level: Beginner | Estimated Time: 30-45 minutes
⚠️ Safety & Precautions
- ⚠️ Turn the exterior lights off, remove the key, and let the bulbs cool completely.
- 🧤 Wear clean nitrile gloves and never touch the new bulb glass. Skin oil can create a hot spot and shorten bulb life.
- 🔌 Battery disconnection is not required when the ignition and lights remain off.
- 💡 Use standard-wattage H13/9008 bulbs. Higher-wattage bulbs can overheat the factory wiring and headlamp housing.
- 🚫 Do not switch on a halogen bulb while it is outside the headlamp housing.
🔧 Required Tools
You'll need the following tools for this repair:
- 10mm socket
- 1/4-inch-drive ratchet
- 1/4-inch-drive 6-inch extension
- 5-25 Nm inch-pound torque wrench
- Plastic push-pin removal tool
- Clean nitrile gloves
- Safety glasses
🔩 Required Parts
HowToo sells all the parts you need for this repair:
- H13/9008 dual-filament halogen headlight bulbs - Replace in pairs - Qty: 2
- Headlamp rubber-shield push pins - Qty: 2 if damaged
📋 Before You Begin
- 🅿️ Park your F-150 on level ground, select Park, apply the parking brake, and open the hood.
- 🔑 Turn the ignition and headlight switch off, then remove the key.
- ⏳ Wait at least 10 minutes if the headlights were recently operating.
- 📦 Compare the new bulbs with the originals before installation. The connector and locking tabs must match.
- 🧤 Put on clean nitrile gloves before opening the bulb packages.
🔨 Step-by-Step Instructions
Follow these steps in order:
Step 1: Release the Driver-Side Rubber Shield
- Wear safety glasses and clean nitrile gloves.
- Use a plastic push-pin removal tool to lift the center of the push pin securing the rubber shield above the headlamp.
- Remove the push pin, then fold the rubber shield away from the lamp.
- A push pin is a two-piece plastic fastener; lifting its center releases its expanding base.
Step 2: Remove the Driver-Side Headlamp Fasteners
- Use a 10mm socket, 1/4-inch-drive ratchet, and 6-inch extension to remove the three headlamp mounting bolts.
- Place the bolts somewhere clean so they cannot fall into the engine compartment.
- Take a phone photo before disconnecting anything.
Step 3: Pull Out the Driver-Side Headlamp
- Hold the headlamp with both gloved hands and pull it straight forward to release its locating pins.
- Do not pry against the painted fender or twist the lamp sharply.
- Support the assembly so its wiring is not stretched.
Step 4: Remove the Driver-Side Bulb
- Press the electrical connector’s locking tab by hand and pull the connector straight off the bulb base.
- Grip the plastic bulb base with a gloved hand and rotate it counterclockwise approximately one-quarter turn.
- Pull the old H13/9008 bulb straight out of the housing.
- Inspect the connector for melted plastic, dark terminals, or corrosion. Repair connector damage before installing a new bulb.
Step 5: Install the New Driver-Side Bulb
- Hold the new bulb only by its plastic base while wearing clean nitrile gloves.
- Align the bulb’s locking tabs with the openings in the headlamp housing.
- Insert the bulb fully, then rotate its base clockwise by hand until it locks firmly.
- Push the electrical connector onto the bulb until its locking tab clicks.
- If the bulb glass is accidentally touched, clean it with residue-free isopropyl alcohol and a lint-free cloth before installation.
Step 6: Reinstall the Driver-Side Headlamp
- Align the headlamp locating pins and press the assembly straight into position by hand.
- Start all three mounting bolts by hand to prevent cross-threading.
- Use a 10mm socket and 5-25 Nm inch-pound torque wrench to tighten the headlamp bolts evenly to 5 Nm (44 in-lbs).
- Do not overtighten the bolts because the mounting tabs can crack.
- Return the rubber shield to its original position. Insert the push pin by hand and press its center flush.
Step 7: Replace the Passenger-Side Bulb
- Use the plastic push-pin removal tool to release the passenger-side rubber shield.
- Use the 10mm socket, ratchet, and 6-inch extension to remove the three passenger-side headlamp mounting bolts.
- Pull the headlamp straight forward by hand and support it without stretching the wiring.
- Disconnect the bulb connector, rotate the old H13/9008 bulb counterclockwise, and remove it by hand.
- Install the second new bulb without touching its glass. Rotate it clockwise until locked, then reconnect the electrical connector until it clicks.
Step 8: Reinstall the Passenger-Side Headlamp
- Align the locating pins and press the headlamp straight into position by hand.
- Start all three mounting bolts by hand.
- Use the 10mm socket and 5-25 Nm inch-pound torque wrench to tighten the bolts to 5 Nm (44 in-lbs).
- Reposition the rubber shield and secure its push pin by hand.
- Check that both headlamps sit evenly and that no wiring is trapped behind either assembly.
✅ After Repair
- 💡 Turn on the low beams and verify that both headlights illuminate with equal brightness.
- 🔦 Select high beams and confirm that both lamps change to high-beam operation.
- ↔️ Test the left and right front turn signals in case their connectors were disturbed.
- 🌙 Park approximately 25 feet from a level wall and check that the beam pattern has not changed significantly.
- 🛠️ Bulb replacement normally does not alter headlamp aim. If one beam is noticeably misplaced, confirm that the bulb and headlamp assembly are fully seated before adjusting anything.
- 💧 After the next rain or wash, inspect both housings for condensation that could indicate an improperly seated bulb.
💰 DIY vs Shop Cost
Shop Cost: ₹4,000-₹10,000 (parts + labor)
DIY Cost: ₹2,000-₹6,500 (parts only)
You Save: ₹2,000-₹3,500 by doing it yourself!
Labor rates around Sonīpat vary by workshop and imported US-spec bulb availability. This repair takes a shop approximately 0.3-0.6 hours.
🎯 Ready to get started?
HowToo makes it easy: same-day/2-day shipping on every part, plus all the tools and specialty tools you need! Check out the parts and tools sections below to add everything to your cart.