

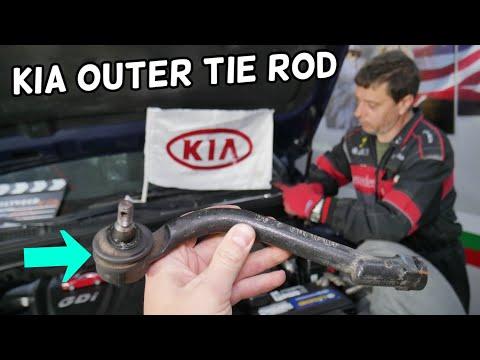





How to Replace a Front Outer Tie Rod End on a 2014-2018 Kia Forte
Step-by-step DIY instructions with required tools, torque specs, safety tips, and alignment guidance for 2014, 2015, 2016, 2017, 2018
How to Replace a Front Outer Tie Rod End on a 2014-2018 Kia Forte
Step-by-step DIY instructions with required tools, torque specs, safety tips, and alignment guidance for 2014, 2015, 2016, 2017, 2018


🔧 Forte - Outer Tie Rod End Replacement
This procedure replaces one worn front outer tie rod end, the steering joint connecting the steering knuckle to the tie rod. Replace the opposite side too if it has similar looseness, rust, or a damaged dust boot.
Difficulty Level: Intermediate | Estimated Time: 1-2 hours per side, plus alignment
Assumption: This procedure is for a front outer tie rod end.
⚠️ Safety & Precautions
- ⚠️ Never work under your Forte while it is supported only by a floor jack.
- 🧤 Wear safety glasses and gloves because rust and the separator can release suddenly.
- 🔒 Keep the steering wheel centered and secured while the tie rod is disconnected.
- 📏 Count the removal turns and mark the old position, but do not use these measurements as a substitute for alignment.
- 🚗 Arrange a professional four-wheel alignment immediately after replacement.
- 🔋 Battery disconnection is not required.
🔧 Required Tools
You'll need the following tools for this repair:
- 21mm deep socket
- 17mm socket
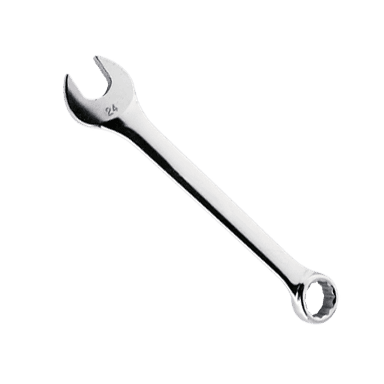
- 22mm crowfoot wrench
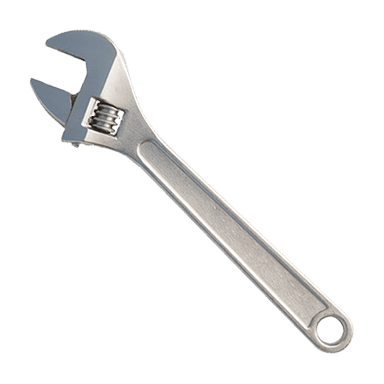
- 250mm adjustable wrench
- 1/2-inch drive breaker bar
- 3/8-inch drive ratchet
- 3/8-inch drive torque wrench rated 10-80 Nm
- 1/2-inch drive torque wrench rated 40-150 Nm
- Front-end ball joint separator (specialty)
- Needle-nose pliers
- Wire brush
- Paint marker
- Tape measure marked in millimeters
- Floor jack rated 2-ton minimum
- Jack stands rated 2-ton minimum
- Wheel chocks
- Seat belt or steering-wheel retaining strap
- Mechanic's gloves
- Safety glasses
🔩 Required Parts
HowToo sells all the parts you need for this repair:
- Front outer tie rod end - Qty: 1 per side
- Tie rod end retaining nut - Qty: 1 per side
- Tie rod end cotter pin - Qty: 1 per side
- Penetrating oil - Qty: 1 can
Use the new nut and cotter pin supplied with the replacement tie rod end. Never reuse the old cotter pin.
📋 Before You Begin
- 🅿️ Park your Forte on solid, level ground with the front wheels pointing straight ahead.
- ⚙️ Select Park, or first gear for a manual transmission, and apply the parking brake.
- 🛞 Place wheel chocks firmly behind both rear wheels.
- 📐 Measure between matching tread grooves at the front of the front tires and record the measurement as a rough reference.
- 🔒 Secure the centered steering wheel with the seat belt or steering-wheel retaining strap.
- 📱 No infotainment service mode or scan-tool command is required.
🔨 Step-by-Step Instructions
Follow these steps in order:
Step 1: Loosen the Wheel Nuts
- Use the 21mm deep socket and 1/2-inch drive breaker bar to loosen each wheel nut about one-quarter turn.
- Do not remove the wheel nuts while the tire is still supporting the vehicle.
Step 2: Raise and Support the Front Corner
- Use the 2-ton floor jack at the reinforced front-side jacking point behind the front wheel.
- Place a 2-ton jack stand beneath the adjacent reinforced support point, then lower the vehicle onto it.
- Gently shake the body to verify that the support is stable before working near the suspension.
Step 3: Remove the Front Wheel
- Use the 21mm deep socket and 1/2-inch drive breaker bar to remove the wheel nuts.
- Remove the wheel and place it flat beneath the side of the vehicle as an additional precaution.
Step 4: Mark the Original Tie Rod Position
- Use the wire brush to clean the exposed threads, jam nut, and tie rod end stud.
- Apply penetrating oil to the jam nut and stud threads. Allow several minutes for it to soak.
- Use the paint marker to mark the jam nut position on the threaded inner tie rod.
- Use the tape measure marked in millimeters to record the exposed thread length between the jam nut and tie rod end.
- The jam nut is the large nut that locks the tie rod end in its adjusted position.
Step 5: Loosen the Jam Nut
- Hold the tie rod end with the 250mm adjustable wrench.
- Use the 22mm crowfoot wrench and 1/2-inch drive breaker bar to loosen the jam nut approximately one-quarter turn.
- Do not rotate the inner tie rod or move the jam nut farther than necessary.
- Mark everything before loosening the nut.
Step 6: Remove the Retaining Nut
- Use the needle-nose pliers to straighten and remove the cotter pin from the tie rod end stud.
- Use the 17mm socket and 3/8-inch drive ratchet to loosen the stud nut.
- Leave the nut threaded on by two or three turns while separating the joint.
- Discard the old cotter pin.
Step 7: Separate the Tie Rod End
- Install the front-end ball joint separator between the steering knuckle and tie rod end.
- Tighten the separator slowly until the tapered stud releases from the knuckle.
- Use the 17mm socket and 3/8-inch drive ratchet to remove the loosened nut completely.
- Lift the stud out of the steering knuckle.
- Do not strike the threaded stud or hammer directly on the aluminum or steel knuckle.
Step 8: Remove the Old Tie Rod End
- Use the paint marker to place a starting reference mark on the old tie rod end.
- Turn the old tie rod end counterclockwise by hand while counting every complete and partial turn.
- Write down the exact number of turns.
- Leave the jam nut at the marked position.
Step 9: Install the New Tie Rod End
- Compare the new and old parts. Use the tape measure marked in millimeters to confirm that their threaded lengths and stud positions match.
- Thread the new tie rod end onto the inner tie rod by hand using exactly the same number of turns counted during removal.
- Align it with the paint mark and exposed-thread measurement.
- Do not force crossed threads. The part should turn smoothly by hand.
Step 10: Attach the Tie Rod End to the Knuckle
- Insert the new tie rod end stud fully into the steering knuckle.
- Install the new retaining nut by hand.
- Use the 17mm socket and 3/8-inch drive torque wrench to torque the retaining nut to 24.5-34.3 Nm (18-25 ft-lbs).
- If the cotter-pin hole does not align, tighten the nut slightly farther until the next slot aligns. Never loosen the nut to align it.
- Use the needle-nose pliers to install and bend the new cotter pin securely around the nut.
Step 11: Tighten the Jam Nut
- Confirm that the tie rod end remains at the original mark and that its stud is not twisted against the dust boot.
- Hold the tie rod end with the 250mm adjustable wrench.
- Position the 22mm crowfoot wrench at 90 degrees to the torque-wrench handle so the effective wrench length does not change.
- Use the 22mm crowfoot wrench and 1/2-inch drive torque wrench to torque the jam nut to 49-59 Nm (36-44 ft-lbs).
- Inspect the rubber dust boot and confirm it is not pinched, torn, or twisted.
Step 12: Reinstall the Wheel
- Install the wheel and start every wheel nut by hand.
- Use the 21mm deep socket and 3/8-inch drive ratchet to snug the nuts in a star pattern.
- Use the 2-ton floor jack to raise the vehicle slightly, remove the 2-ton jack stand, and lower the tire to the ground.
- Use the 21mm deep socket and 1/2-inch drive torque wrench to tighten the wheel nuts in a star pattern to 107.9-127.5 Nm (79.6-94.0 ft-lbs).
✅ After Repair
- 🔍 Verify that the cotter pin is secure, the dust boot is undamaged, and the jam nut is tight.
- ↔️ Turn the steering slowly from side to side while parked. Listen for binding, popping, or contact.
- 📐 Recheck the recorded front-tire measurement. A major difference means the toe angle is unsafe.
- 🚗 Drive slowly in a safe area. Stop immediately if the steering wheel is badly off-center, the vehicle pulls strongly, or the steering feels loose.
- 🛠️ Have a professional four-wheel alignment performed immediately. Toe is the inward or outward direction the tires point when viewed from above.
- 🔩 Recheck wheel-nut torque after approximately 80-160 km (50-100 miles).
💰 DIY vs Shop Cost
Shop Cost: ₹8,000-₹18,000 per side, including the part, labor, and alignment
DIY Cost: ₹2,500-₹7,000 for the part and alignment
You Save: ₹5,500-₹11,000 by doing it yourself!
Local labor rates vary. This repair takes a shop approximately 1-2 hours, followed by wheel alignment.
🎯 Ready to get started?
HowToo makes it easy: same-day/2-day shipping on every part, plus all the tools and specialty tools you need! Check out the parts and tools sections below to add everything to your cart.