

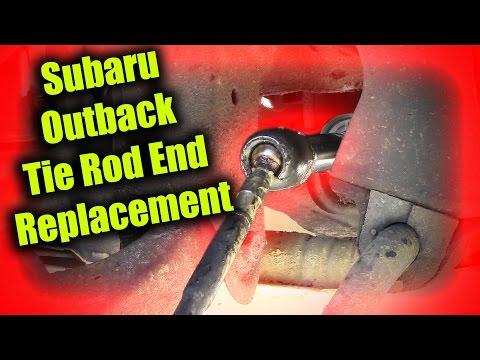





How to Replace a Front Outer Tie Rod End on a 2000-2023 Subaru Outback
Step-by-step DIY instructions with required tools, parts, torque specs, and safety tips for 2000, 2001, 2002, 2003, 2004, 2005, 2006, 2007, 2008, 2009, 2010, 2011, 2012, 2013, 2014, 2020, 2021, 2022, 2023
How to Replace a Front Outer Tie Rod End on a 2000-2023 Subaru Outback
Step-by-step DIY instructions with required tools, parts, torque specs, and safety tips for 2000, 2001, 2002, 2003, 2004, 2005, 2006, 2007, 2008, 2009, 2010, 2011, 2012, 2013, 2014, 2020, 2021, 2022, 2023


🔧 Outback - Front Outer Tie Rod End Replacement
This procedure replaces one front outer tie rod end, the steering joint attached to the wheel knuckle. A worn tie rod end can cause steering looseness, uneven tire wear, clunking, or wandering.
Assumption: This guide covers the front outer tie rod end, not the inner tie rod.
Difficulty Level: Intermediate | Estimated Time: 1-2 hours
⚠️ Safety & Precautions
- ⚠️ Support your Outback with jack stands. Never work under a vehicle supported only by a floor jack.
- 🛞 Do not drive aggressively before completing a professional four-wheel alignment.
- 🔩 Never hammer directly on the threaded stud. This can damage the threads and steering knuckle.
- 📏 Preserve the original adjustment by counting turns, but understand this does not replace an alignment.
- 🔋 Battery disconnection is not required.
🔧 Required Tools
You'll need the following tools for this repair:
- 19mm deep socket
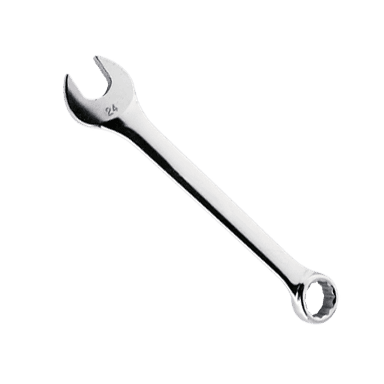
- 22mm open-end wrench
- 19mm open-end wrench
- 1/2-inch drive breaker bar
- 3/8-inch drive ratchet
- 3/8-inch drive extension, 6-inch
- Torque wrench, 20-150 ft-lbs
- Front-end service puller (specialty)
- Needle-nose pliers, 6-inch
- Wire brush, handheld
- Paint marker, fine-tip
- Tape measure, metric
- Floor jack, rated 2-ton minimum
- Jack stands, rated 2-ton minimum
- Wheel chocks, rubber
- Nitrile mechanic gloves
- Safety glasses, impact-rated
🔩 Required Parts
HowToo sells all the parts you need for this repair:
- Front outer tie rod end - Qty: 1 per side
- Tie rod end cotter pin - Qty: 1 per side
- Penetrating oil - Qty: 1 can
Recommendation: Replace both front outer tie rod ends if they have similar mileage or wear.
📋 Before You Begin
- 🅿️ Park your Outback on level, solid ground. Shift into Park and apply the parking brake.
- 🧱 Place rubber wheel chocks securely behind both rear tires.
- 📐 Use a metric tape measure to record the front tire toe measurement as a rough reference.
- 🛢️ Spray penetrating oil on the tie rod lock nut and tapered stud nut. Let it soak for at least 10 minutes.
- 🔍 Compare the new tie rod end with the old one. Confirm the stud, thread, bend, and overall length match.
🔨 Step-by-Step Instructions
Follow these steps in order:
Step 1: Loosen the Front Wheel Nuts
- Use a 19mm deep socket and 1/2-inch drive breaker bar to loosen the five wheel nuts about one-quarter turn.
- Do not remove the wheel nuts while the tire is still carrying the vehicle’s weight.
Step 2: Raise and Support the Vehicle
- Position the 2-ton floor jack under the reinforced front center crossmember lifting point.
- Raise the front of your Outback and place the 2-ton jack stands under the reinforced front side support points.
- Lower the vehicle gently onto the stands. Push the body lightly to verify it is stable.
- Keep the floor jack nearby as backup support.
Step 3: Remove the Front Wheel
- Use the 19mm deep socket and 3/8-inch drive ratchet to remove the five wheel nuts.
- Remove the wheel and place it flat away from the work area.
Step 4: Mark the Existing Tie Rod Position
- Use the wire brush to clean the exposed tie rod threads.
- Use the paint marker to mark the relationship between the tie rod, lock nut, and outer tie rod end.
- Use the metric tape measure to record the distance from the lock nut to a fixed point on the tie rod end.
- The lock nut is also called a jam nut. It locks the alignment adjustment in place.
Step 5: Loosen the Tie Rod Lock Nut
- Use a 22mm open-end wrench on the lock nut while holding the tie rod end with a 19mm open-end wrench.
- Turn the lock nut only enough to break it loose. Leave it close to its original marked position.
- If it is seized, apply more penetrating oil and work it back and forth gently.
Step 6: Remove the Cotter Pin and Castle Nut
- Use the 6-inch needle-nose pliers to straighten and remove the cotter pin from the tie rod stud.
- Discard the old cotter pin. Never reuse it.
- Use the 19mm deep socket, 6-inch extension, and 3/8-inch drive ratchet to loosen the castle nut.
- Leave the castle nut threaded on by two or three turns while separating the joint.
Step 7: Separate the Tie Rod End
- Install the front-end service puller around the steering knuckle and tie rod stud.
- A front-end service puller presses the tapered stud out without damaging the rubber boot or knuckle.
- Tighten the puller until the tapered stud releases with a pop.
- Remove the puller, then use the 19mm deep socket and 3/8-inch drive ratchet to remove the castle nut completely.
- Lift the tie rod end stud out of the steering knuckle.
Step 8: Remove the Old Tie Rod End
- Use the paint marker to place a starting mark on the tie rod end.
- Rotate the old tie rod end counterclockwise by hand and count every complete and partial turn.
- Write down the exact turn count. This helps place the new end near the previous alignment setting.
- Do not move the lock nut from its marked position.
Step 9: Install the New Tie Rod End
- Thread the new tie rod end clockwise onto the inner tie rod using exactly the same number of turns counted during removal.
- Align it with the steering knuckle and compare its position with the paint mark and recorded measurement.
- Do not tighten the lock nut yet.
Step 10: Connect the Tie Rod End to the Knuckle
- Insert the new tie rod end stud into the steering knuckle.
- Install the supplied castle nut by hand to prevent cross-threading.
- Use the 19mm deep socket and 20-150 ft-lb torque wrench to tighten the castle nut to 37 Nm (27 ft-lbs).
- If the cotter-pin holes do not align, tighten the nut only until the next slot aligns. Do not loosen the nut, and do not turn it more than an additional 60 degrees.
- Use the 6-inch needle-nose pliers to install and bend the new cotter pin securely around the castle nut.
Step 11: Tighten the Tie Rod Lock Nut
- Hold the new tie rod end with the 19mm open-end wrench so it cannot rotate.
- Use the 22mm open-end wrench to tighten the lock nut firmly against the tie rod end.
- The specified lock-nut torque is 83 Nm (61 ft-lbs). Because a standard torque wrench cannot usually fit this location correctly, have the lock nut verified during the alignment if you do not have an appropriate crowfoot torque setup.
- Confirm the tie rod end remains upright and the rubber boot is not twisted.
Step 12: Reinstall the Wheel
- Place the wheel onto the hub and install all five wheel nuts by hand.
- Use the 19mm deep socket and 3/8-inch drive ratchet to snug the nuts in a star pattern.
- Use the 2-ton floor jack to raise your Outback slightly, remove the jack stands, and lower the tire to the ground.
- Use the 19mm deep socket and 20-150 ft-lb torque wrench to tighten the wheel nuts in a star pattern to 120 Nm (89 ft-lbs).
✅ After Repair
- 🔍 Turn the steering wheel fully left and right while stationary. Check that the tie rod boot does not twist or contact another component.
- 🛞 Verify that the steering wheel remains reasonably centered during a very short, low-speed test drive.
- ⚠️ Stop immediately if the steering binds, clunks, pulls severely, or feels loose.
- 📐 Schedule a professional four-wheel alignment before normal driving. Matching the old turn count is only a temporary setting.
- 🔩 Recheck the wheel-nut torque at 120 Nm (89 ft-lbs) after approximately 80-160 km.
- 🧰 Ask the alignment technician to verify the tie rod lock nut is tightened to 83 Nm (61 ft-lbs).
💰 DIY vs Shop Cost
Shop Cost: ₹6,000-₹14,000 including one tie rod end, labor, and alignment
DIY Cost: ₹2,000-₹6,000 for parts and alignment
You Save: ₹4,000-₹8,000 by doing it yourself!
Labor rates around Sonīpat vary by workshop. This repair takes a shop approximately 1-1.5 hours, plus alignment time.
🎯 Ready to get started?
HowToo makes it easy: same-day/2-day shipping on every part, plus all the tools and specialty tools you need! Check out the parts and tools sections below to add everything to your cart.