

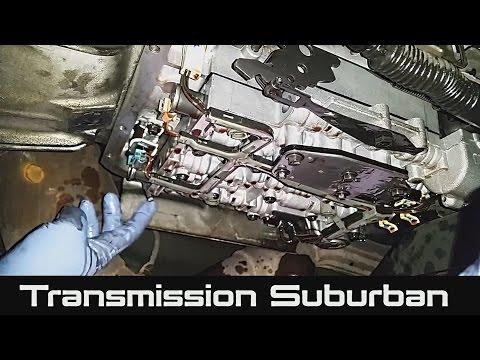






How to Change Transmission Fluid on a 2015-2020 Chevrolet Suburban 5.3L (Trim: Premier)
Step-by-step 6L80 fluid and filter service with tools, parts, torque specs, and safety tips for 2015, 2016, 2017, 2018, 2019, 2020
How to Change Transmission Fluid on a 2015-2020 Chevrolet Suburban 5.3L (Trim: Premier)
Step-by-step 6L80 fluid and filter service with tools, parts, torque specs, and safety tips for 2015, 2016, 2017, 2018, 2019, 2020


🔧 Suburban - Transmission Fluid and Filter Change
This service drains the fluid in the transmission pan, replaces the filter, and refills the 6L80 automatic transmission with GM-approved DEXRON-VI fluid. A pan service replaces only part of the total fluid; it is safer for routine maintenance than using a powered flush machine.
Assumption: This procedure covers the factory 6-speed 6L80 transmission fitted with the 5.3L V8.
Difficulty Level: Intermediate | Estimated Time: 2-3 hours
⚠️ Safety & Precautions
- ⚠️ Keep your Suburban perfectly level on four jack stands. Fluid level will be incorrect if the vehicle is tilted.
- ⚠️ Never work underneath a vehicle supported only by a jack.
- ⚠️ The final fluid check is performed with the engine running. Keep hands, clothing, and tools away from the exhaust and rotating components.
- ⚠️ Transmission fluid can exceed 93°C (200°F). Wear gloves and safety glasses.
- ⚠️ Do not remove the level plug with the engine stopped during the final check. Fluid may pour out and leave the transmission underfilled.
- ⚠️ Do not use DEXRON-III, DEXRON-HP, CVT fluid, or universal fluid unless its label specifically shows current GM DEXRON-VI approval.
- 🔋 Battery disconnection is not required.
🔧 Required Tools
You'll need the following tools for this repair:
- Floor jack rated 3-ton minimum
- Four jack stands rated 3-ton minimum per pair
- Wheel chocks
- 10mm socket
- 13mm socket
- 15mm socket
- 18mm socket
- 3/8-inch drive ratchet
- 3/8-inch drive extension set
- 3/8-inch drive torque wrench rated 5-80 Nm
- Plastic trim scraper
- Seal puller (specialty)
- Seal driver set (specialty)
- OBD-II scan tool with transmission-temperature data (specialty)
- Fluid transfer pump with 1-metre hose
- Drain pan rated 15-litre minimum
- Graduated measuring container rated 10-litre minimum
- Digital infrared thermometer rated 150°C minimum
- Shop light
- Lint-free shop towels
- Nitrile mechanic gloves
- Safety glasses
🔩 Required Parts
HowToo sells all the parts you need for this repair:
- GM-approved DEXRON-VI automatic transmission fluid - Qty: 7 litres
- 6L80 automatic transmission filter - Qty: 1
- Transmission filter neck seal - Qty: 1
- Transmission oil pan gasket - Qty: 1
- Transmission drain-plug sealing washer - Qty: 1
- Transmission level-plug sealing washer - Qty: 1
- Brake-parts cleaner - Qty: 1 can
📋 Before You Begin
- 🅿️ Park your Suburban on a solid, level surface. Apply the parking brake and chock the wheels.
- 🌡️ Begin with the transmission cool enough to touch safely.
- 📏 Raise the entire vehicle evenly with the 3-ton floor jack and support it on four 3-ton jack stands. Confirm level at the transmission-pan rail.
- 🔍 Connect the OBD-II scan tool and locate transmission fluid temperature, commonly abbreviated as TFT.
- 🧴 Measure the drained fluid. This provides a safe starting quantity, but the level-plug procedure determines the final amount.
- 🚫 Do not add aftermarket transmission additives or gasket sealant.
🔨 Step-by-Step Instructions
Follow these steps in order:
Step 1: Verify the Fill Plug Can Be Removed
- Use the shop light to locate the transmission fill plug on the passenger side of the transmission case.
- Place the drain pan underneath, then use the correct 15mm or 18mm socket and 3/8-inch ratchet to loosen the fill plug without fully removing it.
- Do not drain the transmission until you know the fill plug opens.
- Always open the fill point before draining.
Step 2: Drain the Transmission Pan
- Position the 15-litre drain pan beneath the transmission oil pan.
- Use the 15mm socket and 3/8-inch ratchet to remove the pan drain plug, if equipped.
- Allow the fluid to drain until it slows to an occasional drip.
- Transfer the old fluid into the graduated measuring container and record the quantity.
Step 3: Remove the Oil Pan
- Use the 13mm socket, extension, and 3/8-inch ratchet to loosen the pan bolts gradually.
- Leave two bolts loosely installed at one end while removing the remaining bolts. Carefully lower the opposite edge to drain trapped fluid.
- Support the pan by hand, remove the final two bolts with the 13mm socket, and lower the pan without spilling the remaining fluid.
- If a shield blocks a pan bolt, remove its fasteners with the 10mm or 13mm socket. Do not force the pan against the exhaust or wiring.
Step 4: Remove the Old Filter and Seal
- Grasp the transmission filter and pull it straight downward by hand. More fluid will drain.
- Check whether the filter’s metal-and-rubber neck seal remained inside the transmission pump bore.
- If the old seal remains installed, use the seal puller carefully to remove it. Do not scratch the aluminium bore.
- A seal driver is a round tool that presses the new seal in evenly without damaging it.
Step 5: Inspect and Clean the Pan
- Use the plastic trim scraper to remove gasket residue without gouging the sealing surface.
- Clean the pan and magnet with brake-parts cleaner and lint-free shop towels.
- A thin grey paste on the magnet is normal. Metal chips, needle-like pieces, or heavy clutch debris indicate internal transmission damage.
- Use lint-free shop towels to wipe the transmission’s pan rail. Do not spray cleaner upward into the valve body.
Step 6: Install the New Filter
- Lightly wet the new filter neck seal with fresh DEXRON-VI fluid.
- Use the correctly sized seal driver to press the seal squarely into its bore until fully seated.
- Push the new filter neck firmly into the seal by hand. Confirm the filter sits securely and does not hang loose.
- Never install two filter seals together.
Step 7: Reinstall the Transmission Pan
- Position the new pan gasket and pan against the transmission. Start every bolt by hand to prevent crossed threads.
- Use the 13mm socket and torque wrench to tighten the pan bolts in a crisscross pattern.
- Torque the transmission pan bolts to 12 Nm (106 in-lbs).
- Install the drain plug with its new sealing washer using the 15mm socket and torque wrench.
- Torque the drain plug to 18 Nm (13 ft-lbs).
- If a shield was removed, reinstall it with the appropriate 10mm or 13mm socket and tighten its original fasteners securely.
Step 8: Add the Initial Fluid Quantity
- Remove the loosened fill plug using the correct 15mm or 18mm socket and 3/8-inch ratchet.
- Use the fluid transfer pump to add approximately the amount of DEXRON-VI fluid that was drained. A typical pan-and-filter service takes roughly 5.5-6.5 litres, but do not rely on quantity alone.
- Stop adding when fluid begins reaching the fill opening, then install the fill plug finger-tight with the correct socket.
Step 9: Circulate the New Fluid
- Confirm your Suburban remains level and securely supported. Apply the parking brake and keep the service brake firmly pressed.
- Start the engine and allow it to idle. Do not raise engine speed.
- With your foot on the brake, move the selector slowly through Reverse, Neutral, Drive, and manual ranges. Pause about three seconds in each position, then return to Park.
- Use the OBD-II scan tool to monitor transmission fluid temperature.
- Inspect the pan, drain plug, and filter area for leaks using the shop light.
Step 10: Set the Final Fluid Level
- Keep the engine idling, your Suburban level, the selector in Park, and the air conditioning switched off.
- When the scan tool shows a TFT of approximately 35-45°C (95-113°F), position the drain pan beneath the level-check plug.
- Use the 15mm socket and 3/8-inch ratchet to remove the level-check plug from the transmission pan.
- If no fluid comes out, use the fluid transfer pump at the side fill opening to add DEXRON-VI in small amounts until fluid begins to escape from the level opening.
- If fluid pours out in a stream, allow it to drain until it becomes a thin stream or slow drip.
- Install the level plug with a new sealing washer before the TFT exceeds 50°C (122°F).
- Use the torque wrench and 15mm socket to torque the level plug to 9 Nm (80 in-lbs).
- Install the side fill plug using the correct socket and torque wrench. Torque the fill plug to 30 Nm (22 ft-lbs).
Step 11: Lower the Vehicle
- Switch off the engine and remove the OBD-II scan tool.
- Use the floor jack to lift one end at a time, remove all four jack stands, and lower your Suburban carefully.
- Remove the wheel chocks only after the vehicle is fully on the ground.
✅ After Repair
- ✅ Drive gently for 10-15 minutes and confirm that all shifts are smooth.
- 🔍 Park on level ground and inspect the pan, drain plug, fill plug, and level plug for leaks.
- 🌡️ If shifting is delayed, noisy, or abnormal, stop driving and recheck the fluid level at the specified TFT range.
- ♻️ Take the used fluid to an authorized oil recycler. Do not pour it onto the ground or into a drain.
- 🧾 Record the date and odometer reading. Under severe service, GM commonly recommends transmission service around 72,000 km (45,000 miles).
💰 DIY vs Shop Cost
Shop Cost: ₹22,000-₹40,000 (parts + labor)
DIY Cost: ₹10,000-₹18,000 (parts only)
You Save: ₹12,000-₹22,000 by doing it yourself!
Local labor rates vary. This repair takes a shop approximately 1.5-2.5 hours, excluding cooling and fluid-temperature setup time.
🎯 Ready to get started?
HowToo makes it easy: same-day/2-day shipping on every part, plus all the tools and specialty tools you need! Check out the parts and tools sections below to add everything to your cart.