

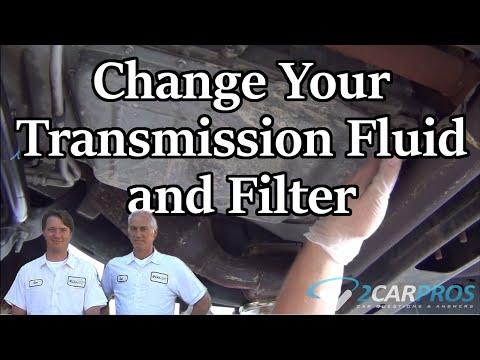






How to Change Transmission Fluid on a 2009-2014 Ford F-150 6R80 (Trim: STX | Engine: V8 5.0L)
Step-by-step fluid and filter replacement with tools, MERCON LV specs, and torque values for 2009, 2010
How to Change Transmission Fluid on a 2009-2014 Ford F-150 6R80 (Trim: STX | Engine: V8 5.0L)
Step-by-step fluid and filter replacement with tools, MERCON LV specs, and torque values for 2009, 2010


🔧 F-150 - Automatic Transmission Fluid and Filter Change
This procedure drains the transmission pan, replaces the filter, and refills the 6R80 automatic transmission with Ford-specified MERCON LV fluid. A pan service replaces only part of the total fluid because several quarts remain inside the torque converter and cooler lines.
Assumption: This procedure applies to the stock 6R80 six-speed automatic transmission.
Difficulty Level: Intermediate | Estimated Time: 2-3 hours
⚠️ Safety & Precautions
- ⚠️ Keep your F-150 level and securely supported on four jack stands. A tilted truck will produce an incorrect fluid level.
- ⚠️ Never work beneath a vehicle supported only by a floor jack.
- ⚠️ Transmission fluid and exhaust components become hot during the final level check. Wear gloves and safety glasses.
- ⚠️ The final level check requires the engine to run while your F-150 is raised. Keep hands, clothing, and tools away from moving or hot parts.
- ⚠️ Use only fluid labeled MERCON LV. MERCON V and universal fluids that do not specifically meet the MERCON LV specification are incorrect.
- 🔋 Battery disconnection is not required.
- 🚫 Do not use a pressurized “power flush” machine for this routine service.
🔧 Required Tools
You'll need the following tools for this repair:
- Floor jack rated 3-ton minimum
- Four jack stands rated 3-ton minimum
- Wheel chocks
- 8mm socket
- 10mm socket
- 19mm socket
- 3/8-inch drive ratchet
- 3/8-inch drive extension set
- Inch-pound torque wrench rated 50-150 in-lbs
- Foot-pound torque wrench rated 10-50 ft-lbs
- Plastic gasket scraper
- 10-quart drain pan
- 6-quart graduated measuring container
- Fluid transfer pump with flexible hose
- Long-neck transmission funnel
- OBD-II scan tool with transmission-fluid-temperature data
- Infrared thermometer rated 250°F minimum
- Brake-cleaner spray nozzle
- Lint-free shop towels
- Nitrile mechanic gloves
- Safety glasses
🔩 Required Parts
HowToo sells all the parts you need for this repair:
- 6R80 automatic transmission filter - Qty: 1
- Transmission filter inlet seal - Qty: 1
- Transmission pan gasket - Qty: 1
- MERCON LV automatic transmission fluid - Qty: 8 quarts
- Non-chlorinated brake cleaner - Qty: 2 cans
📋 Before You Begin
- 📍 Park your F-150 on firm, level ground. Apply the parking brake and chock the wheels.
- 🌡️ Perform the initial drain with the transmission warm, not extremely hot.
- 🧰 Connect the OBD-II scan tool and locate the transmission-fluid-temperature parameter. This displays the actual temperature inside the transmission.
- 📝 Confirm that the replacement fluid container specifically states MERCON LV.
- 🧪 Keep the drained fluid so you can measure it. The amount removed is your starting refill quantity.
- 🚚 If additional clearance is needed, raise all four corners evenly with the floor jack and place your F-150 securely on four jack stands.
🔨 Step-by-Step Instructions
Follow these steps in order:
Step 1: Verify access and fluid condition
- Use the safety glasses and gloves before working beneath your F-150.
- Use the 19mm socket and ratchet to carefully loosen the transmission fill-cap assembly on the passenger side before draining anything. Do not remove it near a hot exhaust component.
- Use a lint-free shop towel to inspect a fluid sample. Dark fluid can be normal, but a strong burnt smell, metal flakes, or clutch material indicates possible internal damage.
- Always confirm the fill point opens first.
Step 2: Position the drain pan
- Use the 10-quart drain pan beneath the entire transmission pan because fluid can spill from several edges.
- If the transmission pan has a factory drain plug, use the correctly fitting socket from the listed socket set to remove it slowly. Measure the drained fluid with the graduated container.
- If no drain plug is present, proceed directly to loosening the pan bolts.
Step 3: Lower the transmission pan
- Use the 8mm socket, extension, and ratchet to loosen the pan bolts gradually.
- Remove the bolts from the rear and sides first. Leave several front bolts loosely installed so the pan tips in a controlled direction.
- Use the drain pan to catch the fluid while slowly loosening the remaining bolts with the 8mm socket.
- Support the transmission pan by hand, remove the final bolts, and lower it carefully.
- Expect fluid to spill after the pan separates.
Step 4: Remove the old filter
- Use both gloved hands to pull the transmission filter straight downward. It is held in place by its inlet seal rather than external fasteners.
- Use the plastic gasket scraper carefully if the old filter seal remains inside the transmission pump inlet. Do not scratch the aluminum bore.
- Use the drain pan to catch additional fluid released when the filter comes out.
Step 5: Inspect and clean the pan
- Use the plastic gasket scraper to remove gasket residue without gouging the sealing surfaces.
- Use non-chlorinated brake cleaner and lint-free shop towels to clean the pan and its magnets.
- A thin gray paste on the magnets is normal wear. Large metal pieces, shiny flakes, or heavy black clutch debris require professional transmission diagnosis.
- Use the brake-cleaner spray nozzle and lint-free shop towels to clean the pan flange and transmission mating surface.
Step 6: Install the new filter
- Use a clean gloved finger to coat the new filter inlet seal with fresh MERCON LV fluid.
- Fit the seal to the replacement filter if it is not preinstalled.
- Use both hands to push the filter neck squarely into the pump inlet until the filter seats fully.
- Verify that the filter lies flat and does not pull free with light hand pressure.
Step 7: Install the transmission pan
- Position the new pan gasket on the clean transmission pan. Do not apply silicone sealer unless the replacement gasket manufacturer specifically requires it.
- Use the 8mm socket and extension to install every pan bolt finger-tight.
- Use the inch-pound torque wrench and 8mm socket to tighten the bolts gradually in a crisscross pattern.
- Torque the transmission pan bolts to 10 Nm (89 in-lbs).
- If equipped, use the appropriate socket and torque wrench to reinstall the drain plug with its sealing surface clean. Torque to 35 Nm (26 ft-lbs).
- Overtightening can distort the pan and cause leaks.
Step 8: Add the initial fluid charge
- Use the 19mm socket and ratchet to remove the passenger-side fill-cap assembly carefully.
- Use the long-neck transmission funnel or fluid transfer pump to add the same amount of MERCON LV fluid that was measured during draining.
- If the amount could not be measured, begin with approximately 5 quarts. Add fluid slowly to avoid overfilling.
- Use the 19mm socket to reinstall the fill cap lightly before starting the engine.
Step 9: Circulate the new fluid
- Use the scan tool to monitor transmission-fluid temperature.
- Start the engine with the parking brake applied and your foot firmly on the brake pedal.
- Move the shifter slowly through P-R-N-D-M, pausing about five seconds in each position. Return it to Park.
- Use the safety glasses and gloves during all checks beneath the running vehicle.
Step 10: Set the final fluid level
- Keep the engine idling in Park and keep your F-150 level.
- Use the scan tool to confirm the transmission-fluid temperature is approximately 85-93°C (185-200°F).
- Use the 19mm socket and ratchet to carefully remove the fill cap. The internal dipstick is attached to this cap.
- Use a lint-free shop towel to wipe the dipstick, reinstall it fully, then remove it again with the 19mm socket.
- Add MERCON LV through the fill opening with the fluid transfer pump in small amounts until the level reaches the marked hot operating range.
- If overfilled, use the fluid transfer pump to remove small amounts. Overfilling can aerate the fluid and cause poor shifting.
- Install the fill-cap assembly with the 19mm socket and torque wrench. Torque to 35 Nm (26 ft-lbs).
- The nearby exhaust will be extremely hot.
Step 11: Inspect and lower the truck
- Use the infrared thermometer only as a secondary temperature check; the scan-tool reading controls the final level procedure.
- Use the safety glasses and a lint-free shop towel to inspect around the pan, drain plug, and fill cap for leaks.
- Shut off the engine.
- Use the floor jack to lift each end, remove the jack stands, and lower your F-150 carefully.
- Remove the wheel chocks after your F-150 is fully on the ground.
✅ After Repair
- 🚗 Drive gently for 10-15 minutes and confirm that every gear engages normally.
- 🔍 Park on level ground and inspect the transmission pan, drain plug, and fill-cap area for leakage.
- 🌡️ If fluid was added before reaching the specified temperature range, repeat the hot level check with the scan tool. Fluid expands considerably as it warms.
- ♻️ Transfer the used fluid into sealed containers and take it to an authorized recycling or hazardous-waste facility. Do not pour it onto the ground or into a drain.
- 🛑 Stop driving if the transmission slips, delays engagement, produces abnormal noise, or displays a transmission warning.
💰 DIY vs Shop Cost
Shop Cost: $350-$600 equivalent (parts + labor)
DIY Cost: $120-$220 equivalent (parts only)
You Save: $230-$380 equivalent by doing it yourself!
Local Sonīpat labor and imported-fluid prices vary. This repair takes a shop approximately 1.5-2.5 hours.
🎯 Ready to get started?
HowToo makes it easy: same-day/2-day shipping on every part, plus all the tools and specialty tools you need! Check out the parts and tools sections below to add everything to your cart.