







How to Change Transmission Fluid on a 2007-2025 Toyota Sienna (Engine: V6 3.5L)
Step-by-step sealed transmission drain-and-refill guide with tools, fluid level checks, and torque specs for 2007, 2008, 2009, 2010, 2011, 2012, 2013, 2014, 2015, 2016, 2017, 2018, 2019, 2020
How to Change Transmission Fluid on a 2007-2025 Toyota Sienna (Engine: V6 3.5L)
Step-by-step sealed transmission drain-and-refill guide with tools, fluid level checks, and torque specs for 2007, 2008, 2009, 2010, 2011, 2012, 2013, 2014, 2015, 2016, 2017, 2018, 2019, 2020


🔧 Sienna - Automatic Transmission Fluid Drain and Refill
Your Sienna uses a sealed Toyota automatic transmission with no dipstick. This procedure replaces the fluid drained from the transmission pan, then sets the final level at a specific fluid temperature.
Difficulty Level: Advanced | Estimated Time: 2-3 hours
Assumption: These instructions cover both front-wheel-drive and all-wheel-drive versions; the transmission fluid procedure is the same, but plug access may differ slightly.
⚠️ Safety & Precautions
- ⚠️ Keep your Sienna completely level while draining and checking the fluid level. An incorrect angle will produce an incorrect level.
- ⚠️ Support all four corners with properly rated jack stands. Never work beneath a vehicle supported only by a jack.
- ⚠️ Transmission fluid can cause burns. Wear gloves and safety glasses.
- ⚠️ Use only Toyota ATF WS-compatible fluid. Other fluids can cause poor shifting or transmission damage.
- ⚠️ Do not perform a power flush. This procedure is a controlled drain and refill.
- ⚠️ Do not confuse the transmission plugs with the engine-oil, transfer-case, or differential plugs.
- ⚠️ The engine must run during the final level check. Keep hands, clothing, and tools away from moving or hot components.
- Battery disconnection is not required.
🔧 Required Tools
You'll need the following tools for this repair:
- Floor jack rated 2-ton minimum
- Four jack stands rated 2-ton minimum
- Wheel chocks
- 24mm socket
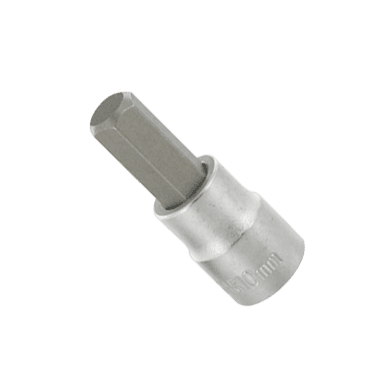
- 6mm hex-bit socket
- Torque wrench rated 10-80 Nm
- Torque wrench rated 1-10 Nm
- 3/8-inch-drive ratchet
- 3/8-inch-drive extension set
- Plastic trim-clip removal tool
- 10mm socket
- Fluid-transfer pump with ATF-safe hose
- Drain pan with 6-litre minimum capacity
- Graduated measuring container with 5-litre capacity
- Bidirectional scan tool with Toyota transmission-data capability (specialty)
- Digital thermometer rated 0-100°C
- Four-foot spirit level
- Nitrile mechanic gloves
- Safety glasses
- Shop towels
🔩 Required Parts
HowToo sells all the parts you need for this repair:
- Toyota ATF WS-compatible automatic transmission fluid - Qty: 5 litres
- Transmission drain-plug sealing gasket - Qty: 1
- Transmission overflow-plug O-ring or sealing gasket - Qty: 1
- Transmission refill-plug sealing gasket - Qty: 1
- Underbody shield clips - Qty: As needed
📋 Before You Begin
- Park your Sienna on firm, level ground. Apply the parking brake and chock the wheels.
- Drive for approximately 10 minutes, then allow the transmission to cool until it is safe to touch.
- Raise all four corners using the floor jack and support them securely with four jack stands.
- Use the spirit level along the front subframe and door sill to confirm your Sienna is level front-to-rear and side-to-side.
- Connect the scan tool to the diagnostic connector below the driver-side dashboard. A scan tool displays the transmission-fluid temperature needed for the final level check.
- Confirm the refill plug can be loosened before draining any fluid. If it cannot be removed, stop the repair.
- No infotainment menu or battery reset is required.
🔨 Step-by-Step Instructions
Follow these steps in order:
Step 1: Remove the lower splash shield
- Use a 10mm socket and plastic trim-clip removal tool to remove the fasteners obstructing access to the transmission pan.
- Arrange the clips in removal order so they return to their original locations.
- Photograph clip locations before removal.
Step 2: Identify the transmission plugs
- Locate the transmission refill plug on the side of the transmission case and the drain/overflow assembly at the bottom of the transmission pan.
- On an all-wheel-drive Sienna, do not open the nearby transfer-case plugs.
- Clean around each plug with shop towels so dirt cannot enter the transmission.
Step 3: Loosen the refill plug first
- Place the drain pan below the transmission as a precaution.
- Use a 24mm socket, extension, and 3/8-inch-drive ratchet to loosen the side refill plug.
- Remove the plug and sealing gasket only after confirming the correct plug has been identified.
- If the plug cannot be loosened safely, reinstall anything removed and stop. Never drain a sealed transmission before confirming it can be refilled.
Step 4: Drain the old transmission fluid
- Place the graduated measuring container beneath the bottom drain/overflow plug.
- Use a 6mm hex-bit socket and 3/8-inch-drive ratchet to remove the bottom plug slowly.
- Allow the fluid to drain until it slows to a drip.
- Measure and record the amount removed. A normal drain-and-refill generally removes roughly 3-4 litres, but the measured amount is only the starting refill quantity.
- Inspect the fluid for metal flakes, a strong burnt smell, or a milky appearance. Heavy debris requires professional diagnosis.
Step 5: Inspect the overflow tube
- The overflow tube is the internal standpipe that establishes the correct fluid level.
- If the tube was loosened or removed, inspect it for damage and reinstall it using the 6mm hex-bit socket and low-range torque wrench.
- Torque the overflow tube to 1.8 Nm (16 in-lbs). Do not overtighten the plastic tube.
Step 6: Install the bottom plug temporarily
- Install a new seal on the bottom plug.
- Use the 6mm hex-bit socket and torque wrench to install the plug temporarily snug. It must be removed again during the level-setting procedure.
Step 7: Add the initial refill quantity
- Insert the ATF-safe hose from the fluid-transfer pump into the side refill opening.
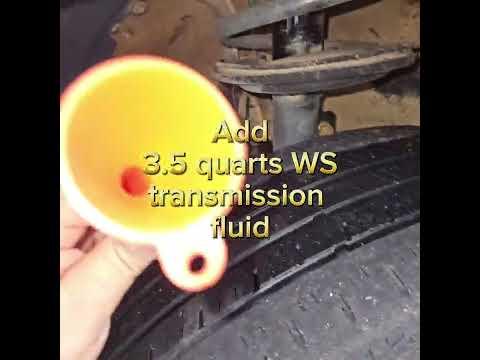
- Use the fluid-transfer pump to add the same amount of Toyota ATF WS-compatible fluid that was measured during draining.
- Add approximately 0.4 litre beyond the measured amount so excess fluid will be available during the overflow check.
- Install the refill plug finger-tight to prevent fluid from escaping during the temperature procedure.
Step 8: Circulate the new fluid
- Confirm your Sienna is stable on all four jack stands, with the parking brake applied and brake pedal held firmly.
- Start the engine and leave it idling. Do not raise engine speed.
- Move the selector slowly through P > R > N > D, pausing approximately three seconds in each position.
- Return to Park and keep the engine running.
- Check beneath the transmission for leaks.
Step 9: Monitor transmission-fluid temperature
- Use the bidirectional scan tool and select the Toyota powertrain or transmission data list.
- Monitor Automatic Transmission Fluid Temperature.
- Allow the temperature to reach 35-45°C (95-113°F). The final level must be checked within this range.
- If the temperature exceeds 45°C, reinstall the plug, switch off the engine, and allow the transmission to cool before repeating the check.
Step 10: Set the final fluid level
- Keep the engine idling and your Sienna level.
- Wear gloves and safety glasses. Use the 6mm hex-bit socket to remove the bottom overflow plug.
- If fluid flows in a steady stream, wait until it becomes a thin trickle or rapid drip.
- If no fluid emerges, reinstall the plug temporarily. Use the fluid-transfer pump to add fluid through the refill opening in 0.2-litre increments until fluid exits the overflow opening.
- The correct level is reached when fluid forms a thin trickle at 35-45°C (95-113°F).
- A heavy stream means the transmission is overfilled.
Step 11: Tighten the overflow plug
- Install a new overflow-plug seal or O-ring as equipped.
- Use the 6mm hex-bit socket and torque wrench to tighten the overflow plug while the fluid remains within the specified temperature range.
- Torque the overflow plug to 40 Nm (30 ft-lbs).
- Switch off the engine.
Step 12: Install the refill plug
- Remove the finger-tight refill plug and install a new sealing gasket.
- Use the 24mm socket and torque wrench to tighten the refill plug.
- Torque the refill plug to 49 Nm (36 ft-lbs).
- Clean all spilled fluid with shop towels.
Step 13: Reinstall the splash shield
- Use the 10mm socket and plastic trim-clip removal tool to reinstall the shield, bolts, and clips.
- Tighten small splash-shield bolts only until seated. Do not overtighten them into plastic retainers.
- Use the floor jack to remove the four jack stands and lower your Sienna safely.
✅ After Repair
- Start the engine and hold the brake pedal. Move slowly through every selector position, then return to Park.
- Take a gentle 10-15 minute test drive. Confirm normal engagement and smooth shifting.
- Inspect the refill and overflow plugs for leakage after the test drive.
- If the transmission slips, shifts harshly, or delays engaging Drive or Reverse, stop driving and recheck the fluid level at the specified temperature.
- Dispose of the used fluid through an authorised automotive-fluid recycling facility. Do not pour it onto the ground or into a drain.
- A drain and refill replaces only part of the total fluid. If the old fluid was badly degraded, additional drain-and-refill services should be spaced over normal driving rather than using a power flush.
💰 DIY vs Shop Cost
Shop Cost: ₹12,000-₹22,000 (parts + labour)
DIY Cost: ₹5,000-₹9,000 (parts only, excluding tools)
You Save: ₹7,000-₹13,000 by doing it yourself!
Local labour rates vary. This repair takes a shop approximately 1.5-2.0 hours.
🎯 Ready to get started?
HowToo makes it easy: same-day/2-day shipping on every part, plus all the tools and specialty tools you need! Check out the parts and tools sections below to add everything to your cart.