

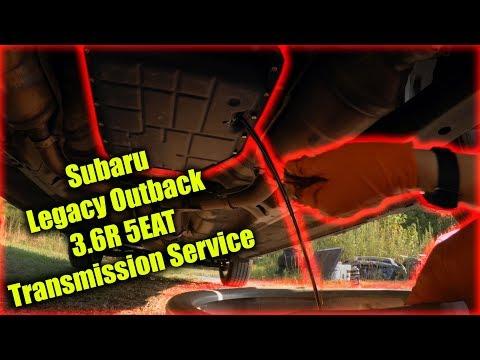




How to Change Transmission Fluid on a 2000-2014 Subaru Outback 5-Speed Automatic (Trim: 3.6R Limited | Engine: Flat 6 3.6L)
Step-by-step ATF drain-and-refill guide with tools, fluid specs, torque settings, and safety tips for 2000, 2008
How to Change Transmission Fluid on a 2000-2014 Subaru Outback 5-Speed Automatic (Trim: 3.6R Limited | Engine: Flat 6 3.6L)
Step-by-step ATF drain-and-refill guide with tools, fluid specs, torque settings, and safety tips for 2000, 2008


🔧 Outback - Automatic Transmission Fluid Drain and Refill
This procedure drains the serviceable portion of fluid from your Outback’s 5-speed automatic transmission, then refills it through the transmission dipstick tube. A drain-and-refill is safer than a power flush on a high-mileage transmission and replaces roughly 4–5 liters, not the transmission’s entire capacity.
Difficulty Level: Beginner | Estimated Time: 1–1.5 hours
Assumption: This procedure is for the factory Subaru 5-speed automatic transmission.
⚠️ Safety & Precautions
- ⚠️ Keep your Outback level while draining and checking the fluid.
- ⚠️ Support the vehicle with jack stands. Never work beneath a vehicle supported only by a jack.
- ⚠️ Transmission fluid can cause burns. Let the exhaust cool before working underneath.
- ⚠️ Do not remove the nearby front differential drain plug by mistake. Confirm the plug is in the automatic-transmission pan.
- ⚠️ Use only Subaru ATF-HP specification fluid. Do not use CVT fluid in this transmission.
- ⚠️ Do not overfill. Incorrect fluid level can cause foaming, harsh shifting, or transmission damage.
- 🔋 Battery disconnection is not required.
🔧 Required Tools
You'll need the following tools for this repair:
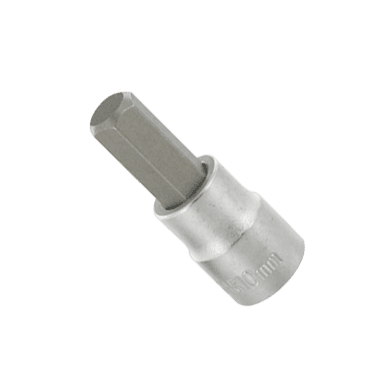
- 8mm hex-bit socket
- 3/8-inch-drive ratchet
- 3/8-inch-drive torque wrench rated 10–80 Nm
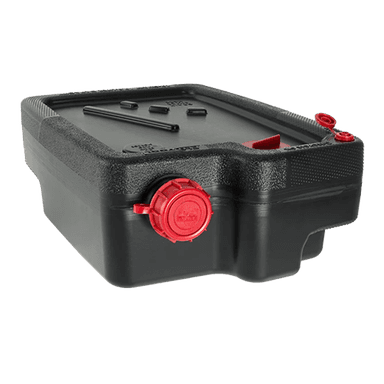
- Drain pan with 8-liter minimum capacity
- 5-liter graduated measuring container
- Long-neck transmission funnel
- Plastic trim tool
- OBD-II scan tool with transmission-fluid temperature display (specialty)
- Floor jack rated 2-ton minimum
- Four jack stands rated 2-ton minimum per pair
- Wheel chocks
- Nitrile gloves
- Safety glasses
- Shop towels
🔩 Required Parts
HowToo sells all the parts you need for this repair:
- Subaru ATF-HP automatic transmission fluid - Qty: 5 liters
- Automatic transmission drain-plug sealing washer - Qty: 1
📋 Before You Begin
- 🚗 Drive your Outback for approximately 10–15 minutes to warm the fluid, then park on firm, level ground.
- 🅿️ Apply the parking brake, place the transmission in Park, and chock the wheels.
- 📏 Raise the vehicle with the 2-ton floor jack only if additional access is necessary. Support all four corners evenly with four jack stands so the vehicle remains level.
- 🌡️ Connect the OBD-II scan tool if it can display automatic-transmission fluid temperature. This gives a more accurate final level check.
- 🧼 Clean the measuring container before use. The amount drained provides the safest starting refill quantity.
- 📱 No infotainment service mode, battery registration, coding, or transmission relearn command is required for a basic drain-and-refill.
🔨 Step-by-Step Instructions
Follow these steps in order:
Step 1: Locate the Transmission Dipstick
- Open the hood and locate the automatic-transmission dipstick at the rear area of the engine compartment.
- Use a plastic trim tool only if a retaining clip or nearby cover limits access.
- Pull the dipstick out slightly to confirm the fill tube can be accessed before draining anything.
- Never drain fluid before locating the fill point.
Step 2: Identify the Correct Drain Plug
- Put on safety glasses and nitrile gloves before going beneath your Outback.
- Locate the drain plug in the bottom of the automatic-transmission pan. The pan is behind the engine oil pan.
- Confirm the 8mm hex-bit socket fits the transmission drain plug before loosening it.
- Do not loosen the engine-oil drain plug or front-differential drain plug.
Step 3: Drain the Old Fluid
- Position the 8-liter drain pan directly beneath the transmission drain plug.
- Use the 8mm hex-bit socket and 3/8-inch-drive ratchet to loosen the plug carefully.
- Finish removing the plug by hand while pressing it toward the pan, then pull it away quickly.
- Allow the fluid to drain until it slows to an occasional drip. This normally takes 10–15 minutes.
Step 4: Measure and Inspect the Drained Fluid
- Pour the drained fluid into the 5-liter graduated measuring container and record the exact quantity.
- Normal used fluid may be dark red or brown. A strong burned odor, shiny metal particles, or heavy debris suggests the transmission should be professionally inspected.
- Do not perform repeated exchanges immediately if the fluid is severely burned or the transmission already slips.
Step 5: Reinstall the Drain Plug
- Wipe the drain plug and transmission-pan sealing surface with shop towels.
- Install one new transmission drain-plug sealing washer.
- Thread the plug in by hand first to prevent cross-threading.
- Use the 8mm hex-bit socket and torque wrench to tighten the plug to 25 Nm (18 ft-lbs).
- Stop immediately if the plug does not thread smoothly.
Step 6: Add the Initial Refill
- Remove the transmission dipstick and insert the long-neck transmission funnel into its tube.
- Add Subaru ATF-HP fluid slowly. Begin with approximately 0.25 liter less than the measured drained quantity.
- Remove the funnel, wipe it with shop towels, and reinstall the dipstick fully.
- Do not pour in the transmission’s total dry capacity. Only replace the quantity that drained out.
Step 7: Circulate the New Fluid
- Confirm the parking brake is applied and keep your foot firmly on the brake pedal.
- Start the engine and let it idle. Do not rev the engine.
- Move the selector slowly through Park, Reverse, Neutral, Drive, and the manual ranges, pausing approximately three seconds in each position.
- Return the selector to Park and leave the engine idling.
- Inspect the drain plug with a shop towel. There must be no leakage.
Step 8: Check the Fluid Level
- Keep your Outback level, the engine idling, the parking brake applied, and the selector in Park.
- Use the OBD-II scan tool to monitor transmission-fluid temperature. Perform the final hot check at approximately 70–80°C (158–176°F).
- Pull out the dipstick, wipe it clean with a shop towel, fully reinstall it, and remove it again.
- The fluid should register within the dipstick’s HOT range. Read both sides and use the lower reading if they differ.
- If low, use the long-neck transmission funnel to add Subaru ATF-HP in 100–200 ml increments. Recheck after each addition.
- If overfilled, allow the vehicle to cool and carefully drain a small amount through the plug using the 8mm hex-bit socket, then install a new sealing washer and tighten again to 25 Nm (18 ft-lbs).
Step 9: Complete the Repair
- Fully seat the transmission dipstick and remove the OBD-II scan tool.
- If raised, use the 2-ton floor jack to lift each support point, remove the jack stands, and lower your Outback carefully.
- Transfer the old fluid into sealed containers and take it to an authorized oil-recycling facility. Do not pour it onto the ground or into a drain.
✅ After Repair
- ✅ Drive gently for 10–15 minutes and verify that shifts remain smooth in all forward gears and Reverse.
- 🔍 Park on level ground and inspect the drain plug for leakage.
- 🌡️ Recheck the HOT fluid level with the engine idling after the transmission reaches operating temperature.
- 🛑 Stop driving if the transmission slips, bangs into gear, displays a warning light, or leaks fluid.
- 📋 No battery registration, infotainment reset, or scan-tool relearn is normally required.
- 🔄 A second drain-and-refill may be performed after several hundred kilometers when gradual fluid renewal is desired. Avoid chemical or high-pressure flushing.
💰 DIY vs Shop Cost
Shop Cost: ₹10,000–₹18,000 (parts + labor)
DIY Cost: ₹5,000–₹9,000 (fluid and sealing washer)
You Save: ₹5,000–₹9,000 by doing it yourself!
Local labor and imported Subaru ATF-HP prices vary. This repair takes a shop approximately 1–1.5 hours.
🎯 Ready to get started?
HowToo makes it easy: same-day/2-day shipping on every part, plus all the tools and specialty tools you need! Check out the parts and tools sections below to add everything to your cart.