

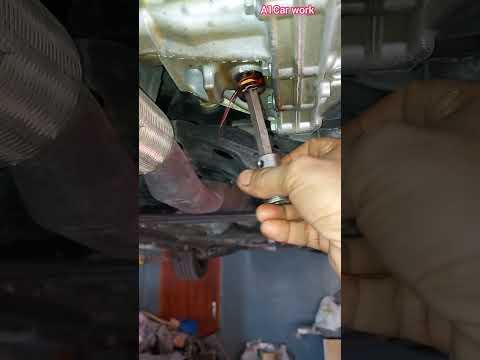







How to Change Transmission Fluid in a 2018 Toyota Avalon
Step-by-step drain-and-refill guide with Toyota ATF WS, tools, torque specs, and safety tips
How to Change Transmission Fluid in a 2018 Toyota Avalon
Step-by-step drain-and-refill guide with Toyota ATF WS, tools, torque specs, and safety tips


🔧 Avalon - Transmission Fluid Drain and Refill
Your Avalon uses a sealed Toyota U660-series automatic transmission without a dipstick. This procedure replaces the fluid in the transmission pan, then sets the final level at a specific fluid temperature; it is safer than a pressurized flush on a high-mileage transmission.
Difficulty Level: Intermediate | Estimated Time: 1.5-2.5 hours
Assumption: This procedure is for a routine drain-and-refill with Toyota Genuine ATF WS-equivalent fluid.
⚠️ Safety & Precautions
- ⚠️ Keep your Avalon perfectly level on four jack stands. An uneven vehicle produces an incorrect fluid level.
- ⚠️ Never work beneath a vehicle supported only by a floor jack.
- ⚠️ Transmission fluid and exhaust components become hot during the final level check. Wear gloves and safety glasses.
- ⚠️ Do not use Dexron, universal ATF, CVT fluid, or additives. Use only fluid explicitly approved for Toyota ATF WS.
- ⚠️ Remove the fill plug before draining. If the fill plug cannot be removed, stop so the transmission is not left empty.
- ⚠️ Do not start the engine after draining until replacement fluid has been added.
- ⚠️ Do not perform a pressurized transmission flush as part of this service.
- Battery disconnection is not required.
🔧 Required Tools
You'll need the following tools for this repair:
- Floor jack rated 2-ton minimum
- Four jack stands rated 2-ton minimum
- Wheel chocks
- Metric socket set, 10mm-14mm
- 3/8-inch drive ratchet
- 6mm hex-bit socket
- 10mm hex-bit socket
- Torque wrench, 2-20 Nm range
- Torque wrench, 20-80 Nm range
- OBD-II scan tool with Toyota transmission-data capability (specialty)
- ATF fluid-transfer pump with fill hose (specialty)
- Graduated drain pan, 8-quart minimum
- Digital measuring container, 5-quart minimum
- Infrared thermometer
- Mechanic’s creeper
- Nitrile mechanic’s gloves
- Safety glasses
- Shop towels
🔩 Required Parts
HowToo sells all the parts you need for this repair:
- Toyota ATF WS automatic transmission fluid - Qty: 5 quarts
- Transmission fill-plug sealing washer - Qty: 1
- Transmission drain-plug sealing washer - Qty: 1
- Transmission overflow-plug seal - Qty: 1
📋 Before You Begin
- Park your Avalon on a hard, level surface and apply the parking brake.
- Place wheel chocks securely against the tires before lifting.
- Drive only long enough to make the fluid mildly warm. Do not begin with an extremely hot transmission.
- Use the floor jack and four jack stands to raise and support the vehicle at equal height. Verify level front-to-rear and side-to-side.
- Connect the OBD-II scan tool. A scan tool is a diagnostic reader that displays the transmission’s internal fluid-temperature sensor.
- Select the Toyota powertrain data list and locate Automatic Transmission Fluid Temperature or A/T Oil Temperature.
- Confirm the fluid is below 35°C (95°F) before beginning the final level-setting procedure.
🔨 Step-by-Step Instructions
Follow these steps in order:
Step 1: Raise and level the vehicle
- Use the floor jack at the specified center lifting points, then support your Avalon on four jack stands.
- Use the infrared thermometer or a level reference to verify the vehicle is sitting evenly.
- Push firmly at one corner to confirm the vehicle is stable before going underneath.
- Level support is essential for accurate filling.
Step 2: Remove the lower engine cover
- Wear safety glasses before working underneath the vehicle.
- Use the appropriate 10mm socket or trim fasteners from the metric socket set to remove the lower cover obstructing transmission access.
- Place the fasteners in order so each one returns to its original location.
Step 3: Loosen the transmission fill plug first
- Locate the transmission fill plug on the side of the transmission case.
- Place the drain pan underneath in case a small amount of fluid escapes.
- Use the 10mm hex-bit socket and 3/8-inch ratchet to loosen and remove the fill plug.
- Inspect the plug threads. If the plug cannot be removed cleanly, stop and do not drain the transmission.
- Always prove you can refill before draining.
Step 4: Drain the old transmission fluid
- Position the graduated drain pan directly beneath the transmission drain assembly.
- Use the 10mm hex-bit socket and ratchet to remove the main drain plug.
- Allow the fluid to drain until the stream slows to drops.
- Use the 6mm hex-bit socket to remove the inner overflow plug if it did not come out with the drain assembly.
- The overflow tube is the internal standpipe that establishes the correct fluid height.
- Measure the exact amount removed with the digital measuring container and note the amount.
- Inspect the drained fluid for burnt odor, metallic particles, or coolant contamination. Fine gray paste is less concerning than visible metal fragments.
Step 5: Reinstall the overflow and drain plugs
- Use shop towels to clean the plugs and sealing surfaces without pushing dirt into the openings.
- Install a new overflow-plug seal and start the overflow plug by hand.
- Use the 6mm hex-bit socket and low-range torque wrench to torque the overflow plug to 1.8 Nm (16 in-lbs).
- Install a new sealing washer on the main drain plug and start the plug by hand.
- Use the 10mm hex-bit socket and high-range torque wrench to torque the drain plug to 49 Nm (36 ft-lbs).
- Do not overtighten the small overflow plug; its torque is measured in inch-pounds.
Step 6: Add the initial fluid quantity
- Keep the engine switched off.
- Use the ATF fluid-transfer pump and fill hose to add Toyota ATF WS through the side fill opening.
- Add approximately the amount measured during draining, then add about 0.3-0.5 quart extra for the final overflow check.
- A normal drain-and-refill is commonly around 3-4 quarts, but the measured amount and final overflow check determine the correct level.
- Do not install the fill plug yet.
Step 7: Circulate the new fluid
- Confirm the drain and overflow plugs are installed and no tools are near moving components.
- Start the engine and keep your foot firmly on the brake pedal.
- Move the selector slowly through P-R-N-D-S, pausing approximately three seconds in each position.
- Move the selector back to Park and leave the engine idling.
- Use the OBD-II scan tool to monitor A/T Oil Temperature.
- Inspect underneath your Avalon for active leaks using the safety glasses and infrared thermometer. Never touch hot exhaust parts.
Step 8: Set the transmission fluid level
- Keep your Avalon level, the engine idling, and the selector in Park.
- When the scan tool shows 35-45°C (95-113°F), position the drain pan beneath the overflow plug.
- Use the 6mm hex-bit socket and ratchet to carefully remove the overflow plug.
- If fluid produces a steady stream, let it drain until it becomes a thin trickle.
- If no fluid exits, use the ATF fluid-transfer pump to add Toyota ATF WS through the fill opening until fluid begins flowing from the overflow opening.
- Allow the flow to become a thin trickle or rapid drip.
- Complete the check before fluid temperature exceeds 45°C (113°F). If it becomes too hot, reinstall the plugs, switch off the engine, and let the transmission cool before repeating.
- A thin trickle indicates the correct level.
Step 9: Tighten the plugs
- With the engine still idling and the fluid at the specified temperature, start the overflow plug by hand.
- Use the 6mm hex-bit socket and low-range torque wrench to torque the overflow plug to 1.8 Nm (16 in-lbs).
- Switch off the engine.
- Install a new sealing washer on the fill plug and start it by hand.
- Use the 10mm hex-bit socket and high-range torque wrench to torque the fill plug to 49 Nm (36 ft-lbs).
- Use shop towels to clean spilled fluid from the transmission case.
Step 10: Reinstall the lower cover
- Use the appropriate 10mm socket or original trim fasteners to reinstall the lower engine cover.
- Tighten small cover fasteners only until secure. Do not crush the plastic cover.
- Use the floor jack to lift your Avalon slightly, remove the four jack stands, and lower it carefully.
- Remove the wheel chocks only after the vehicle is fully on the ground.
✅ After Repair
- Start the engine and confirm there are no warning lights or unusual transmission noises.
- With the brake applied, shift through every selector position and verify normal engagement.
- Take a gentle 10-15 minute road test. Avoid hard acceleration during the initial test.
- Check for smooth shifts, delayed engagement, slipping, or harsh operation.
- Park on a clean, level surface and inspect beneath the transmission for leaks.
- Recheck the drain and fill areas after the vehicle cools. Do not tighten plugs beyond their specified torque.
- If the old fluid contained metal fragments, smelled severely burnt, or the transmission already slips, obtain professional diagnosis rather than repeatedly changing fluid.
- Take used ATF to an automotive-fluid recycling facility. Never pour it onto the ground or into a drain.
💰 DIY vs Shop Cost
Shop Cost: $220-$400 (parts + labor)
DIY Cost: $55-$100 (parts only)
You Save: $165-$300 by doing it yourself!
Shop labor rates vary but typically run $100-$150/hour. This repair takes a shop approximately 1.0-1.5 hours.
🎯 Ready to get started?
HowToo makes it easy: same-day/2-day shipping on every part, plus all the tools and specialty tools you need! Check out the parts and tools sections below to add everything to your cart.