








How to Change the Oil and Oil Filter on a 2010-2019 Honda CR-V 2.4L (Trim: LX | Engine: Inline 4 2.4L | Body: Sport Utility)
Step-by-step DIY instructions with tools, 0W-20 capacity, torque specs, and Maintenance Minder reset for 2010, 2011, 2012, 2013, 2014, 2015, 2016
How to Change the Oil and Oil Filter on a 2010-2019 Honda CR-V 2.4L (Trim: LX | Engine: Inline 4 2.4L | Body: Sport Utility)
Step-by-step DIY instructions with tools, 0W-20 capacity, torque specs, and Maintenance Minder reset for 2010, 2011, 2012, 2013, 2014, 2015, 2016


🔧 CR-V - Engine Oil and Oil Filter Change
This service drains the old engine oil, replaces the oil filter, and refills your CR-V with fresh SAE 0W-20 oil. Regular oil changes protect the 2.4L engine from wear and sludge buildup.
Difficulty Level: Beginner | Estimated Time: 45-60 minutes
⚠️ Safety & Precautions
- ⚠️ Let the exhaust cool before working underneath your CR-V.
- 🛑 Never work beneath a vehicle supported only by a floor jack.
- 🧤 Used engine oil can irritate skin; wear nitrile gloves.
- 🚗 Keep your CR-V level while draining and checking the oil.
- 🔋 Battery disconnection is not required.
- ♻️ Collect all used oil and take it to an approved recycling facility.
🔧 Required Tools
You'll need the following tools for this repair:
- 17mm six-point socket
- 3/8-inch-drive ratchet
- 3/8-inch-drive torque wrench rated 10-80 ft-lbs
- 65mm 14-flute oil filter wrench (specialty)
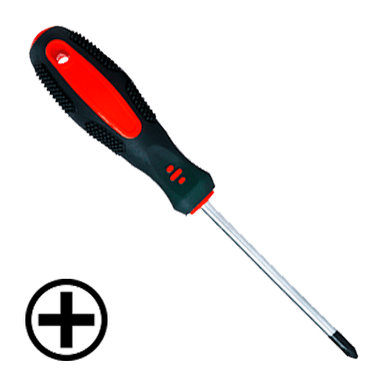
- No. 2 Phillips screwdriver
- Small flat-blade screwdriver
- Oil drain pan rated 8 quarts minimum
- Oil funnel with 1-inch outlet
- Engine oil dipstick cleaning cloth
- Drive-on ramps rated 3-ton minimum
- Wheel chocks rated 3-ton minimum
- Nitrile mechanic gloves
- ANSI Z87.1 safety glasses
🔩 Required Parts
HowToo sells all the parts you need for this repair:
- SAE 0W-20 full-synthetic engine oil - Qty: 5 quarts
- Engine oil filter - Qty: 1
- Engine oil drain-plug sealing washer - Qty: 1
📋 Before You Begin
- 🚗 Drive for approximately five minutes to warm the oil, then park on level ground.
- 🅿️ Apply the parking brake, shift the CVT into Park, and switch off the engine.
- 🧱 Place the wheel chocks behind both rear tires.
- ⏳ Wait several minutes so the exhaust can cool enough to work safely.
- 📏 The refill capacity with a new filter is approximately 4.6 US quarts. Do not pour in all five quarts.
🔨 Step-by-Step Instructions
Follow these steps in order:
Step 1: Raise the Front Safely
- Place the drive-on ramps directly ahead of both front tires.
- Slowly drive your CR-V onto the ramps, center the tires, shift into Park, and apply the parking brake.
- Confirm that both wheel chocks remain firmly behind the rear tires.
- Put on the ANSI Z87.1 safety glasses and nitrile mechanic gloves before going underneath.
Step 2: Open the Oil-Fill Point
- Open the hood and support it securely.
- Turn the engine oil filler cap counterclockwise by hand and remove it.
- Pull out the engine oil dipstick by hand, then set it back loosely. This lets the oil drain more freely.
Step 3: Open the Lower Service Access
- Position the 8-quart oil drain pan beneath the engine.
- Use the No. 2 Phillips screwdriver and small flat-blade screwdriver to remove the fasteners securing the lower oil-service access panel.
- Set the panel and fasteners aside in their removal order.
- Keep each fastener with its original hole.
Step 4: Drain the Old Engine Oil
- Move the drain pan under the engine oil pan drain plug.
- Use the 17mm six-point socket and 3/8-inch-drive ratchet to loosen the drain plug counterclockwise.
- Finish removing the plug carefully by hand. Warm oil will begin flowing immediately.
- Allow the oil to drain until it slows to an occasional drip.
- Remove the old sealing washer from the drain plug and wipe the plug with the dipstick cleaning cloth.
Step 5: Reinstall the Drain Plug
- Place one new drain-plug sealing washer on the cleaned drain plug.
- Thread the plug clockwise by hand until fully seated. If it does not turn easily, remove it and start again to prevent crossed threads.
- Use the 17mm six-point socket and 3/8-inch-drive torque wrench to tighten the drain plug to 40 Nm (30 ft-lbs).
- Never reuse a crushed sealing washer.
Step 6: Remove the Old Oil Filter
- Reposition the drain pan beneath the oil filter.
- Fit the 65mm 14-flute oil filter wrench over the filter.
- Use the 3/8-inch-drive ratchet and filter wrench to turn the filter counterclockwise.
- Finish unscrewing the filter by hand and lower it with the open end facing upward.
- Use the dipstick cleaning cloth to wipe the filter mounting surface.
- Confirm that the old rubber filter gasket came off with the filter. Two stacked gaskets can cause a major oil leak.
Step 7: Install the New Oil Filter
- Apply a thin film of fresh SAE 0W-20 oil to the new filter’s rubber gasket using a gloved fingertip.
- Thread the new filter clockwise onto the mounting stud by hand.
- When the gasket first contacts the mounting surface, tighten the filter an additional 3/4 turn by hand.
- Do not use the oil filter wrench to overtighten the new filter.
Step 8: Reinstall the Access Panel
- Wipe away spilled oil using the dipstick cleaning cloth.
- Position the lower oil-service access panel in its original location.
- Use the No. 2 Phillips screwdriver and small flat-blade screwdriver to reinstall its original fasteners securely.
Step 9: Add Fresh Engine Oil
- Place the oil funnel into the engine oil filler opening.
- Pour in approximately 4.3 US quarts of SAE 0W-20 full-synthetic engine oil.
- Remove the funnel and install the oil filler cap clockwise by hand until snug.
- Fully insert the dipstick.
Step 10: Circulate the Oil and Check for Leaks
- Confirm that no tools remain in the engine compartment or beneath your CR-V.
- Start the engine and let it idle for approximately one minute.
- Verify that the red oil-pressure warning light turns off within a few seconds. If it stays illuminated, switch off the engine immediately.
- Using the safety glasses, visually inspect the drain plug and oil filter areas for leakage. Do not touch moving or hot components.
- Switch off the engine and wait at least three minutes.
Step 11: Set the Final Oil Level
- Remove the dipstick by hand and wipe it clean with the dipstick cleaning cloth.
- Insert it fully, remove it again, and read the oil level.
- If needed, use the oil funnel to add SAE 0W-20 oil in small amounts until the level reaches the upper mark.
- Do not fill above the upper dipstick mark. Total capacity with filter replacement is approximately 4.6 US quarts.
- Reinstall the dipstick and oil filler cap securely by hand.
Step 12: Return the Vehicle to Level Ground
- Remove the wheel chocks by hand only after confirming the area behind your CR-V is clear.
- Release the parking brake and slowly back your CR-V off the drive-on ramps.
- Park on level ground, shift into Park, apply the parking brake, and reinstall the wheel chocks.
- Wait three minutes, then use the dipstick cleaning cloth to perform one final dipstick check.
Step 13: Reset the Maintenance Minder
- Switch the ignition on without starting the engine.
- Use the instrument-panel select/reset knob to display Engine Oil Life.
- Press and hold the select/reset knob for approximately 10 seconds until the oil-life display begins blinking.
- Release the knob, then press and hold it again for approximately five seconds until the display resets to 100%.
✅ After Repair
- ✅ Start the engine and confirm that the oil-pressure warning light switches off normally.
- 🔍 Check beneath your CR-V for leaks after the first drive.
- 📏 Recheck the dipstick on level ground after the engine has been off for at least three minutes.
- ♻️ Pour the used oil into a sealed container and take it, along with the old filter, to an approved recycling facility.
- 📝 Record the date and mileage of the oil change.
💰 DIY vs Shop Cost
Shop Cost: $80-$140 (parts + labor)
DIY Cost: $35-$60 (parts only)
You Save: $45-$80 by doing it yourself!
Shop labor rates vary but typically run $100-$150/hour. This repair takes a shop approximately 0.3-0.5 hours.
🎯 Ready to get started?
HowToo makes it easy: same-day/2-day shipping on every part, plus all the tools and specialty tools you need! Check out the parts and tools sections below to add everything to your cart.