







How to Change the Engine Oil and Filter on a 2015-2021 Chevrolet Trax (Engine: Inline 4 1.4L)
Step-by-step DIY guide with required tools, oil specs, torque values, and oil-life reset for 2015, 2016, 2017, 2018, 2019, 2020, 2021
How to Change the Engine Oil and Filter on a 2015-2021 Chevrolet Trax (Engine: Inline 4 1.4L)
Step-by-step DIY guide with required tools, oil specs, torque values, and oil-life reset for 2015, 2016, 2017, 2018, 2019, 2020, 2021


🔧 Trax - Engine Oil and Oil Filter Change
Your Trax uses a replaceable cartridge-style oil filter inside a reusable housing cap. Drain the old oil, replace the filter and sealing ring, refill with GM-approved oil, then reset the oil-life monitor.
Difficulty Level: Beginner | Estimated Time: 45-60 minutes
⚠️ Safety & Precautions
- ⚠️ Let the engine cool until the oil is warm, not hot. Hot oil can cause serious burns.
- 🛑 Work on firm, level ground and apply the parking brake.
- ⚠️ Never work beneath your Trax while it is supported only by a floor jack.
- 🧤 Wear gloves and safety glasses because used engine oil is a skin and eye irritant.
- 🔩 Do not overtighten the plastic oil-filter cap; it can crack and leak.
- 🔋 Battery disconnection is not required.
🔧 Required Tools
You'll need the following tools for this repair:
- 24mm socket
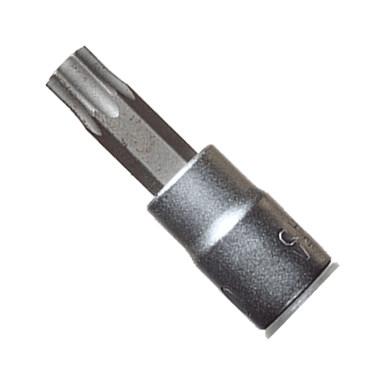
- Torx T45 bit socket
- 3/8-inch-drive ratchet
- 3/8-inch-drive 6-inch extension
- 3/8-inch-drive torque wrench rated 7-75 ft-lbs
- Oil drain pan rated 6-quart minimum
- Automotive funnel with 1-inch outlet
- Plastic O-ring pick
- Low-profile floor jack rated 2-ton minimum
- Jack stands rated 2-ton minimum
- Wheel chocks rated for passenger vehicles
- Shop towels
- Nitrile mechanic gloves
- ANSI-rated safety glasses
🔩 Required Parts
HowToo sells all the parts you need for this repair:
- SAE 5W-30 full-synthetic engine oil meeting GM dexos1 specification - Qty: 5 quarts
- Cartridge engine oil filter with cap O-ring - Qty: 1
- Engine oil drain-plug sealing ring - Qty: 1
📋 Before You Begin
- 🚗 Drive briefly or idle the engine for about three minutes. Warm oil drains more completely.
- 🅿️ Park on firm, level ground, shift into Park, apply the parking brake, and switch off the engine.
- 🧱 Place wheel chocks firmly behind both rear tires.
- 📏 Keep your Trax level while draining and checking the final oil level.
- ♻️ Prepare a sealed container so the used oil can be taken to an authorized recycling facility.
🔨 Step-by-Step Instructions
Follow these steps in order:
Step 1: Open the Hood and Loosen the Fill Cap
- Open the hood and locate the oil-fill cap on top of the engine.
- Turn the cap counterclockwise by hand and set it on a clean shop towel.
- Pull out the yellow-handled dipstick, wipe it with a shop towel, and leave it slightly raised. This allows air into the engine while the oil drains.
Step 2: Raise and Support the Front
- Place a 2-ton floor jack beneath the approved front-center lifting point.
- Raise the front only high enough to provide safe access.
- Position 2-ton jack stands beneath the reinforced front side lifting points, then slowly lower your Trax onto them.
- Gently push the vehicle to verify it is stable before going underneath.
- A jack stand is a rigid support that safely holds the vehicle after lifting.
Step 3: Drain the Used Oil
- Position the 6-quart drain pan beneath the oil-pan drain plug.
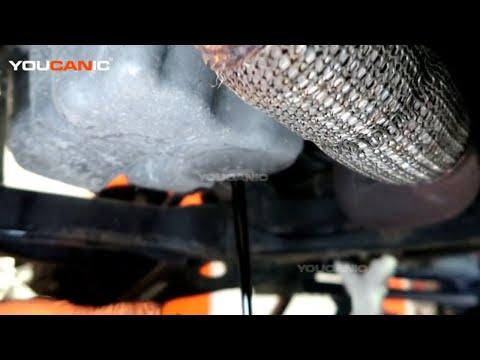
- Wear safety glasses and gloves, then use a Torx T45 bit socket and 3/8-inch-drive ratchet to loosen the drain plug counterclockwise.
- Finish removing the plug carefully by hand and allow the oil to drain for at least five minutes.
- Inspect the plug and install a new drain-plug sealing ring.
- Clean the plug and oil-pan sealing surface with a shop towel.
- Start the plug by hand to prevent crossed threads, then use the Torx T45 bit socket and torque wrench to torque to 14 Nm (10 ft-lbs).
- Stop tightening immediately when the wrench clicks.
Step 4: Remove the Oil Filter
- From above the engine, locate the black oil-filter housing cap near the front of the engine.
- Place shop towels around the housing to catch drips.
- Use a 24mm socket, 6-inch extension, and 3/8-inch-drive ratchet to turn the cap counterclockwise.
- Lift the cap and attached cartridge filter from the housing. A cartridge filter is a replaceable paper element fitted inside a reusable cap.
- Hold the assembly above the housing briefly so excess oil can drain back into the engine.
Step 5: Install the New Filter and O-Ring
- Pull the old cartridge filter straight off the housing cap by hand.
- Use a plastic O-ring pick to remove the old rubber O-ring from the cap groove without scratching the plastic.
- An O-ring is the round rubber seal that prevents oil from leaking around the cap.
- Apply a thin film of fresh 5W-30 oil to the new O-ring with a gloved finger.
- Fit the new O-ring into the same cap groove. Do not place it against the cap’s outer flange or threaded area.
- Push the new cartridge filter squarely onto the cap until fully seated.
- Insert the assembly into the housing and thread the cap clockwise by hand.
- Use the 24mm socket and torque wrench to torque to 25 Nm (18 ft-lbs).
- A dry or misplaced O-ring commonly causes leaks.
Step 6: Lower the Vehicle
- Confirm that the drain plug is installed and remove the drain pan from beneath your Trax.
- Use the 2-ton floor jack to raise the vehicle slightly off the jack stands.
- Remove both stands, then lower the vehicle slowly onto level ground.
- Leave the rear wheel chocks installed until the repair is complete.
Step 7: Add Fresh Engine Oil
- Insert the automotive funnel into the oil-fill opening.
- Add approximately 4 quarts of SAE 5W-30 full-synthetic oil meeting GM dexos1 specification.
- Wait one minute, fully insert the dipstick, then remove it and inspect the level.
- Add oil in small amounts until it reaches the upper crosshatched mark. The approximate capacity with a new filter is 4.0 L (4.2 US qt).
- Do not automatically pour in all five quarts; overfilling can damage the engine and catalytic converter.
- Remove the funnel and tighten the oil-fill cap securely by hand.
Step 8: Check for Leaks and Verify the Level
- Start the engine and confirm that the red oil-pressure warning light turns off within a few seconds.
- Switch off the engine immediately if the warning light remains on.
- With the engine running, use a flashlight and inspect the filter cap and drain-plug area for leaks without reaching near moving or hot parts.
- Switch off the engine and wait at least five minutes on level ground.
- Use the dipstick and shop towel to check the level again. Add 5W-30 oil through the funnel as needed, without exceeding the upper mark.
Step 9: Reset the Engine Oil-Life Monitor
- Turn the ignition on without starting the engine. For keyed ignition, turn the key to ON. For push-button ignition, press the start button without pressing the brake pedal.
- Use the MENU button on the turn-signal lever to display the Vehicle Information Menu.
- Rotate the lever’s thumbwheel until Remaining Oil Life appears.
- Press and hold the SET/CLR button at the end of the lever.
- If a confirmation message appears, use the thumbwheel to select Yes, then press SET/CLR.
- Verify the display reads 100%, then switch the ignition off.
✅ After Repair
- ✅ Take a short drive, park on level ground, switch off the engine, and wait at least five minutes.
- 🔍 Recheck the dipstick and inspect beneath your Trax for fresh oil drops.
- 🧽 Clean spilled oil from the engine and underbody with shop towels.
- ♻️ Pour the used oil into a sealed container and take it with the old filter to an authorized oil-recycling facility. Do not place liquid oil in household waste or pour it onto the ground.
- 📝 Record the date, mileage, oil viscosity, and filter replacement.
💰 DIY vs Shop Cost
Shop Cost: $80-$140 (parts + labor)
DIY Cost: $35-$60 (parts only)
You Save: $45-$80 by doing it yourself!
Shop labor rates vary but typically run $100-$150/hour. This repair takes a shop approximately 0.3-0.5 hours.
🎯 Ready to get started?
HowToo makes it easy: same-day/2-day shipping on every part, plus all the tools and specialty tools you need! Check out the parts and tools sections below to add everything to your cart.