

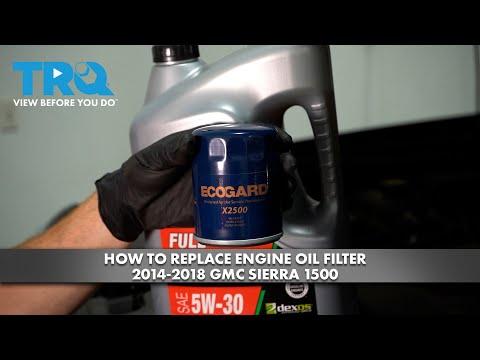







How to Change Oil and Filter on a 2018 GMC Sierra 1500 6.2L V8
Step-by-step DIY guide with tools, oil capacity, torque specs, safety tips, and oil-life reset
How to Change Oil and Filter on a 2018 GMC Sierra 1500 6.2L V8
Step-by-step DIY guide with tools, oil capacity, torque specs, safety tips, and oil-life reset


🔧 Sierra 1500 - Engine Oil and Oil Filter Change
Your Sierra 1500’s 6.2L V8 uses approximately 8 quarts (7.6 liters) of SAE 0W-20 full-synthetic oil when the filter is replaced. Changing both items removes contaminated oil and helps protect the engine’s bearings, cylinders, and Active Fuel Management components.
Difficulty Level: Beginner | Estimated Time: 45-60 minutes
⚠️ Safety & Precautions
- ⚠️ Work on level, solid pavement and keep the transmission in Park.
- ⚠️ Allow a hot engine and exhaust system to cool before reaching underneath.
- ⚠️ Never work beneath your Sierra 1500 while it is supported only by a floor jack.
- ⚠️ Wear safety glasses and nitrile gloves because used oil can irritate skin.
- ⚠️ Do not overfill the engine; excess oil can cause foaming and engine damage.
- ⚠️ Battery disconnection is not required for this repair.
🔧 Required Tools
You'll need the following tools for this repair:
- 15mm six-point socket
- 3/8-inch-drive ratchet
- 3/8-inch-drive torque wrench rated 10-80 Nm
- Oil-filter cap wrench sized for installed filter
- 3/8-inch-drive extension, 3-inch
- Oil drain pan rated 10-quart minimum
- Automotive funnel with 1-inch outlet
- Low-profile floor jack rated 3-ton minimum
- Jack stands rated 3-ton minimum
- Wheel chocks rated for light trucks
- Mechanic’s creeper rated 300-pound minimum
- Shop towels
- Nitrile mechanic gloves
- ANSI Z87.1 safety glasses
🔩 Required Parts
HowToo sells all the parts you need for this repair:
- SAE 0W-20 full-synthetic engine oil meeting GM dexos1 specification - Qty: 8 quarts (7.6 liters)
- Engine oil filter compatible with the 6.2L V8 - Qty: 1
- Engine oil drain-plug seal - Qty: 1
📋 Before You Begin
- 📍 Park your Sierra 1500 on level, solid pavement, shift into Park, apply the parking brake, and switch off the engine.
- 🛞 Place wheel chocks firmly in front of and behind one rear tire.
- 🌡️ Run the engine for three to five minutes if it is completely cold, then shut it off and wait five minutes. Warm oil drains more easily, but it should not be hot enough to burn you.
- 📏 If additional clearance is necessary, raise the front at the designated front-center lifting point and support it at both frame lifting points with jack stands. A lifting point is a reinforced location designed to carry vehicle weight.
- 📱 No service mode, scan tool, battery disconnect, or infotainment preparation is required.
🔨 Step-by-Step Instructions
Follow these steps in order:
Step 1: Open the hood and remove the oil cap
- Use your hands to open the hood and remove the oil-fill cap from the top of the engine.
- Use a shop towel to wipe around the opening so dirt cannot fall inside.
- Set the cap in a clean location. Removing it helps the oil drain smoothly.
Step 2: Raise and secure the truck if necessary
- Use the 3-ton floor jack at the designated front-center lifting point only if you need more working clearance.
- Place the 3-ton jack stands beneath the left and right frame lifting points, then lower the truck carefully onto them.
- Gently push the body with your hands to verify that it is stable before going underneath.
- Use the mechanic’s creeper to move beneath the engine.
Step 3: Position the drain pan
- Put on the ANSI Z87.1 safety glasses and nitrile mechanic gloves.
- Use the 10-quart drain pan beneath the oil-pan drain plug.
- Position the pan slightly toward the direction the plug faces because the oil initially exits in an arc.
Step 4: Drain the old engine oil
- Use the 15mm six-point socket and 3/8-inch-drive ratchet to loosen the drain plug counterclockwise.
- Finish removing the plug carefully with your gloved hand while keeping it pressed against the oil pan until the final thread releases.
- Allow the oil to drain into the 10-quart drain pan until it slows to occasional drops, usually about 10 minutes.
- Inspect the plug with a shop towel. Replace its seal and replace the complete plug if its threads or head are damaged.
Step 5: Reinstall the drain plug
- Use a shop towel to clean the drain-plug opening and the plug.
- Use your fingers to thread the drain plug clockwise until fully seated. It should turn easily; resistance indicates cross-threading.
- Use the 15mm socket and 3/8-inch-drive torque wrench to tighten the plug to 25 Nm (18 ft-lbs).
- Do not tighten beyond the specification because the aluminum oil pan can be damaged.
Step 6: Remove the old oil filter
- Move the 10-quart drain pan beneath the oil filter at the lower rear area of the engine.
- Use the correctly sized oil-filter cap wrench, 3-inch extension, and 3/8-inch-drive ratchet to turn the filter counterclockwise.
- An oil-filter cap wrench fits over the filter’s end so the ratchet can loosen it.
- Finish unscrewing the filter with your gloved hand and keep it upright as it comes off.
- Use a shop towel to verify that the old rubber filter gasket did not remain stuck to the engine’s sealing surface.
Step 7: Install the new oil filter
- Use a clean, gloved fingertip to apply a thin film of fresh 0W-20 oil to the new filter’s rubber gasket.
- Use your hand to thread the new filter clockwise until its gasket contacts the engine’s sealing surface.
- Use your hand to tighten the filter an additional 3/4 turn after gasket contact.
- Do not use the oil-filter cap wrench for final tightening unless the filter manufacturer specifically provides a torque value. Hand-tight prevents gasket and housing damage.
Step 8: Lower the truck
- Use the mechanic’s creeper to move completely out from beneath the truck.
- Use the 3-ton floor jack to raise the truck slightly, remove both 3-ton jack stands, and lower it slowly onto level ground.
- Leave the wheel chocks installed until the repair is complete.
Step 9: Add fresh engine oil
- Place the automotive funnel into the oil-fill opening.
- Pour approximately 7.5 quarts (7.1 liters) of dexos1-approved 0W-20 full-synthetic oil through the funnel.
- Use your hands to remove the funnel and install the oil-fill cap securely.
- Use a shop towel to remove the dipstick, wipe it clean, fully reinstall it, and remove it again to check the preliminary level.
Step 10: Circulate the oil and inspect for leaks
- Use the ignition switch to start the engine and let it idle for approximately 30 seconds.
- Confirm that the oil-pressure warning turns off within a few seconds. Shut the engine off immediately if it remains illuminated or unusual engine noise develops.
- Use the safety glasses, mechanic’s creeper, and a shop towel to inspect the drain plug and filter for fresh leakage without touching hot or moving parts.
- Switch off the engine and wait at least five minutes for the oil to return to the oil pan.
Step 11: Set the final oil level
- Use a shop towel to remove and wipe the dipstick, reinstall it fully, and remove it again.
- Add 0W-20 oil through the automotive funnel in small amounts until the level reaches the upper crosshatched mark.
- The expected total capacity with a new filter is approximately 8 quarts (7.6 liters).
- Use your hands to reinstall the dipstick, oil-fill cap, and funnel. Do not add oil above the upper mark.
Step 12: Reset the engine-oil life monitor
- Use the ignition switch to turn the ignition on without starting the engine.
- Use the steering-wheel controls to display the Driver Information Center > Info > Oil Life page.
- Use the steering-wheel checkmark button to select Reset, then confirm until the display reads 100%.
- If the Oil Life page is hidden, use the steering-wheel controls to open Options > Info Pages and enable it.
- As an alternate method, turn the ignition on with the engine off and use the accelerator pedal to press fully and release three times within five seconds.
✅ After Repair
- ✅ Start the engine and confirm normal oil pressure with no warning message or unusual noise.
- 🔍 Inspect the drain plug and oil filter again after a short drive, then check them once more the following day.
- 📏 Park on level ground, wait at least five minutes after shutting off the engine, and verify the dipstick level remains within the crosshatched area.
- ♻️ Pour the used oil into a sealed container and take it, along with the old filter, to an authorized used-oil collection or recycling facility. Never place oil in household waste or pour it onto the ground.
- 🧾 Record the date and odometer reading for maintenance history.
💰 DIY vs Shop Cost
Shop Cost: ₹8,000-₹14,000 (parts + labor)
DIY Cost: ₹6,000-₹10,000 (parts only)
You Save: ₹2,000-₹4,000 by doing it yourself!
Local labor and imported dexos1 oil prices vary. This repair takes a shop approximately 0.5-1.0 hour.
🎯 Ready to get started?
HowToo makes it easy: same-day/2-day shipping on every part, plus all the tools and specialty tools you need! Check out the parts and tools sections below to add everything to your cart.